| While managing the workspace consists of managing, configuring, and updating perhaps multiple workspaces and dashboards, the initial goal of workspace management is simply creating the workspace itself. The next few pages address creating and deleting workspaces, followed by holistic, or end-to-end, workspace administration considerations. Finally, we conclude this section with a discussion on managing multiple workspaces. The bulk of time initially spent managing workspaces really amounts to administrative and similar tasks . Later, as the SharePoint Portal Server evolves and workspaces morph into, or are replaced by, newer instances, or are split to support new organizational requirements and boundaries, it becomes necessary to one day delete little-used workspaces and reclaim /reorganize SharePoint Portal Server resources. Creating a Workspace After SharePoint Portal Server setup is complete, the New Workspace Wizard appears. This wizard assists us in creating the default workspace. Note that even if Cancel is selected, and the New Workspace Wizard does not appear, a new workspace may be created at any time by using SharePoint Portal Server Administration. To do so, perform the following: -
In the console tree, select your SPS server. -
On the Action menu, point to New, and click Workspace. You may also right-click the server name , point to New on the shortcut menu, and then click Workspace. At this point, the New Workspace Wizard appears. Click Next. -
On the Workspace Definition page, in the Workspace name field, type the name of the new workspace to be created. It is also recommended that a description be included in the Description field. See Figure 9.1 for an example. Figure 9.1. Creating a new workspace in SharePoint Portal Server for the Marketing group . 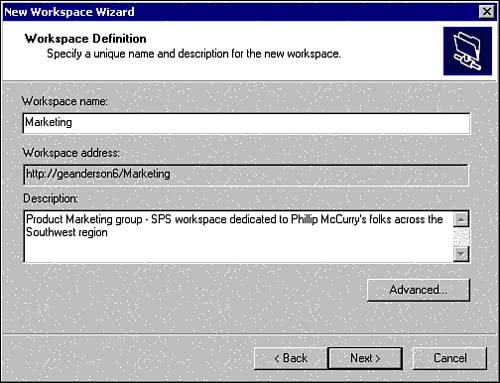 NOTE Note that workspace names can consist of characters from lower ASCII, and cannot exceed 25 characters in length. The following characters are not supported: # : \? * < > % / " { } ~ [ ] Space ! () = ; . , @ & + The wizard verifies that the workspace name is indeed unique, confirming that the name does not conflict with any other workspace names or propagated index names on the SharePoint Portal Server. If the workspace name does already exist, SharePoint Portal Server prompts you to enter a unique name. CAUTION A workspace name cannot be changed after it is created. And if you are creating an index workspace, the name of the workspace that you are creating must be different from that of the destination workspace. Fortunately, the New Workspace Wizard ensures that a workspace with the same name as the index workspace does not already exist on the destination. -
If a dedicated index workspace is being created, click Advanced. Select the Configure as an index workspace check box. In Specify the destination workspace address, type the destination workspace for the propagated index. The name of the destination workspace is in the form of http://server/workspace/. Click OK. -
If creating an index workspace, SharePoint Portal Server prompts you for a propagation access account, which is required before you can propagate an index. Note that this account must have local Administrator permissions on the destination server. CAUTION You may create index workspaces with the same name (and propagating to the same destination) on multiple servers dedicated to creating and updating indexes. If fully qualified domain names and index workspace propagation are desired together, though, both the server dedicated to indexing and the destination server must be in Windows 2000 domains. Once the workspace installation is completed, the following New Workspace Wizard "administrative" tasks must be addressed: -
On the Workspace Contact page, for the workspace contact name, enter a name of a user or group. -
In the Workspace contact email address field, type the email address for the workspace contact previously entered. Refer to Figure 9.2 for an example. Figure 9.2. A Workspace contact name and email address are important in terms of identifying the responsible Coordinator of a workspace, especially when multiple workspaces reside on a single SPS server. 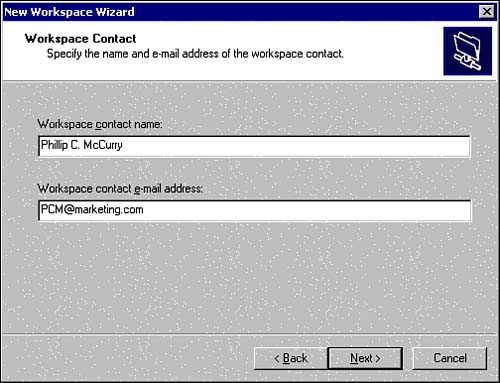 -
Click Next, and the Completing the New Workspace Wizard screen is displayed (see Figure 9.3). Review all information provided on this screen, and then click Finish to complete the wizard. Once all wizard options are addressed, another screen is displayed, for anywhere from a few minutes to 20 minutes or more, indicating that the creation of the workspace will take some time. Figure 9.3. Review all information provided on this screen for accuracy, and then click Finish to actually complete the New Workspace Wizard. 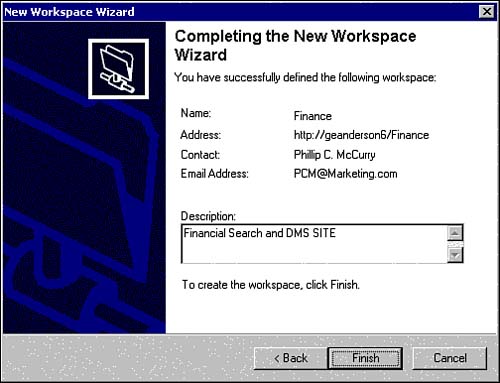 The workspace is now created, and a message is displayed stating that the wizard will open the workspace and create a shortcut for it in My Network Places. -
Click OK. The shortcut is now created. The Configure Your Workspace page opens, and the dashboard site opens, too. For index workspaces, an introduction page opens as well, and the shortcut points to the Content Sources folder within the workspace. Once the new workspace is created, a Security Warning screen related to installing the Microsoft Digital Dashboard Service Component may be displayed, as Figure 9.4 illustrates. Click Yes to continue with the installation. Note that this screen typically is displayed during the installation of the first workspace on a particular SPS server. Subsequent installations will not display this screen if the box entitled Always trust content from Microsoft Corporation is checked the first time this screen is displayed. Figure 9.4. The Digital Dashboard is automatically installed once you click Yes on the Security Warning screen. 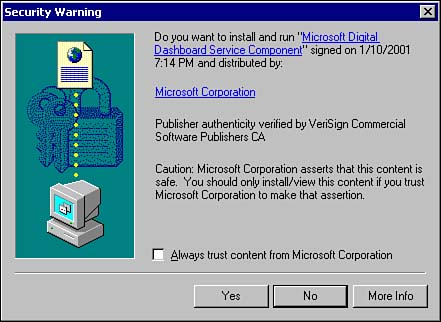 Finally, security on the workspace node may then be configured by using SharePoint Portal Server Administration or Web folders. Note that the Windows 2000 local Administrators group has permission to read documents and configure security on any folder or document in a workspace. Security considerations are addressed in greater detail later in this chapter. Exporting and Deleting a Workspace Eventually, when the need arises to delete a workspace, SharePoint Portal Server Administration must again be leveraged. When a workspace is deleted, the information stored in that workspace is no longer available to users. SharePoint Portal Server deletes the files associated with that workspace and the virtual root referencethe virtual root setting of that workspace (which maps the URL of the workspace to the physical storage location). In addition, the following occurs: -
All index processes, such as creating, updating, or propagating an index, are stopped . -
Scheduled tasks for crawling content sources and processing subscriptions are deleted. -
Index workspaces are unregistered with their destination workspaces. -
Propagated indexes are deleted from their destination workspaces. -
All of the documents stored in the workspace are deleted. CAUTION If a destination workspace is deleted before deleting an index workspace, the index workspace deletion succeeds as expected. However, if the destination workspace is unavailable at the time the index workspace is deleted, you are notified and prompted to continue. Selecting the continue option forces the index workspace deletion to succeed.
A workspace can only be deleted by using SharePoint Portal Server Administration. Given the unrecoverable nature of this operation, it is recommended that before a workspace is deleted, the Coordinator should consider exporting the contents of the workspace to another location on the server, or backing up the files and configuration settings. To export the contents of a workspace, you can use the Software Development Kit that ships with SPS to write your own export/import tool. You may also use the Application Deployment Wizard in the Microsoft Web Storage System Software Development Kit to package and deploy your entire dashboard. In the latter method, the wizard packages the Web Storage System data and application logic into a cabinet file , the .cab file format popular with Microsoft. The .cab file may then be exported to another server by using the Deploy Application component of the same wizard. To perform this method of export/import, do the following: -
Install the Web Storage System Developer Tools, by downloading them from http://msdn.microsoft.com/downloads/default.asp?URL=/code/sample.asp?URL=/MSDN-FILES/027/001/557/msdncompositedoc.xml. -
Begin the process of packaging the Digital Dashboard you would like to export into a single .cab file by clicking the Start menu, Programs, Web Storage System SDK, Web Storage System Tools, Application Deployment Wizard. -
At the Wizard's Welcome screen, click the option titled Package Application, and then click Next. -
At the Instruction page, click Next. -
Enter the URL of the digital dashboard, including the dashboard folder name; for example, http://server/public/folder_name. -
Select the check box labeled Include all sub-folders (which ensures that all sub-dashboards and related Web Parts are included in the packaging process), and then click Next. -
Enter the logon information for the server, in the format domain/user_name (to ensure communication between servers in different domains). -
Select the option titled Package to single CAB file. Type a location and name for the .cab file, like C:\temp\dashboard1.cab, and then click Next. -
Enter SampleFilter.xml for the default schema filter file, and then click Next. At this point, the package begins to be assembled and therefore the export is performed. Once this process is completed, continue with the steps below to deploy it to another server. -
Launch the Application Deployment Wizard again, as outlined previously in step 2. -
At the Welcome screen, select the Deploy Application option, and then click Next. -
Type the URL of the production server, including the dashboard folder name to be used, like http://server/public/folder_name, and then click Next. -
Enter the logon information for the server, again leveraging the format domain/user_name. -
Finally, click the Deploy from single CAB file option, type the location and name of the source .cab file (for example, C:\temp\dashboard1.cab), and then click Next. Deployment, or the actual import, of the dashboard application begins. -
Once the import is complete, a Finish button is displayed. Click it. As we can see, the Application Deployment Wizard is a straightforward method for exporting and importing dashboard applications from one server to another. It should be noted that this functionality is quite flexible, too. That is, we can copy a dashboard from a computer running Exchange 2000 Server onto a computer running SPS, or vice versa. Once we have safeguarded our data and application logic by exporting it from, and importing it to, another server, we are in a position to actually delete the workspace. Perform the following steps: -
In the console tree, select the server that contains the workspace that will be deleted. -
Click to expand the server, and then select the workspace to be deleted. -
From the Action menu, select All Tasks, and then click Delete Workspace. Alternatively, right-click the server name, select All Tasks on the shortcut menu, and then click Delete Workspace. -
Click Yes to confirm the deletion of the workspace (refer to Figure 9.5). A Delete Workspace Confirmation box is displayed. Clicking the Yes button irrevocably removes the selected workspace. Figure 9.5. Deleting a workspace is easily accomplished through SharePoint Portal Server Administration, by clicking the workspace to be deleted, then clicking All Tasks, and then selecting Delete Workspace.  Remember, deleting a workspace is final. However, with the protection that our export process provides us, we should be confident in deleting workspaces that become obsolete or otherwise of no immediate or foreseeable value.  |
