| InfoPath's template design mode is quite similar to Access's DAP Design view. The primary difference is InfoPath's substitution of task pane panels for the data source's Field List and the Tool Box. You create and deploy a data-bound template in later sections, so the following sections describe how to modify a sample template, save the template as an TemplateName.xsn file, and publish the solution file to a shared folder for others to use. Sections near the end of the chapter show you how to export form templates to a SharePoint Services site. Modifying a Sample InfoPath Template The sample Change Order template is a good choice for exploring InfoPath's design mode because it warrants modification to ensure that the resulting forms created by users are consistent. For example, you might want to make some optional sections mandatory and remove others from the form. The schema includes fields that don't appear on the form and might be useful to include, such as a supplier ID number. You also can provide default values for fields, such as the two members of the Currency group. The following sections describe how to make these typical design modifications. Changing the Properties of Sections To make initial modifications to the Change Order template's optional sections, do the following: If InfoPath isn't loaded and displaying the Change Order form, follow steps 1 and 2 of the earlier "Getting Acquainted with InfoPath Forms" to open the form.  Click the toolbar's Design This Form button to change to template design view. The template name changes to Template1 in the title bar and the Design Tasks task pane opens. Click the toolbar's Design This Form button to change to template design view. The template name changes to Template1 in the title bar and the Design Tasks task pane opens.
Pass the mouse pointer over the text boxes to display the data source, in this case the name of an element defined by the form's XML schema (see Figure 26.9). Figure 26.9. Passing the mouse pointer over a bound control in design mode displays the field (element) name defined by the underlying XML schema. 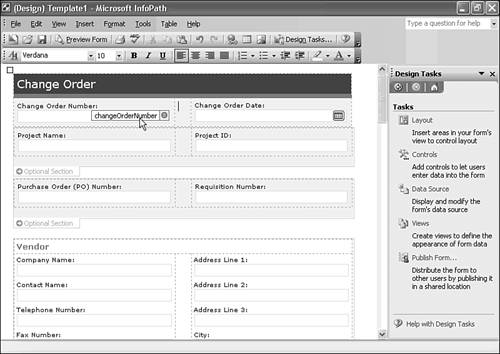 Right-click the Optional Section tab of the first optional section (Project Information), and choose Section Properties to open the Section Properties dialog. Tip Press Ctrl+Z to undo any inadvertent changes or deletions in the following steps. Clear the Allow Users to Delete This Section check box to make the section mandatory (see Figure 26.10). Click OK to change Optional Section to Section. Figure 26.10. You control the default visibility of sections and whether sections are optional on the Data page of the Section Properties dialog.  Repeat steps 4 and 5 for the Purchase Order Information, Vendor, Requester, and Itemized Changes. For Itemized Changes select the Include the Section in the Form by Default option. Click the Optional Section tab to select the Reason for Changes section, and press Delete to remove it from the form. Press Delete again to remove the extra vertical space. Repeat step 7 for the remaining Optional Sections Detailed List of Changes, Changes to Parts Order, and Notes. Click anywhere in the Signatures table to display a selection square at the upper-left corner. (Signatures isn't a section because it's not bound to the form's schema.) Click the square to select the entire table and press delete to remove it. Click the toolbar's Preview Form button to emulate form view. Scroll to the bottom of the form to verify removal of optional sections and the Signatures table. Click the Close Preview button to return to template design mode.
The preceding modifications ensure that all users prepare identical forms for analysis in an Excel worksheet. Using the Data Source List to Replace a Form Field The task pane's Data Source pane provides a tree view of the schema's elements. Many elements don't have bound controls on the form. The Vendor section has three address lines but is missing a supplier ID number. This section explains how to add a field to a section's table, change the font size of the data entry text box, and remove a field from a section table. To replace Address Line 3 with an identificationNumber value, do the following: Click the Data Source link in the Design Tasks pane to view the schema. Scroll to and expand the vendor node to display its child nodes. Select the identificationNumber element (field) and drag the insertion point to the immediate left of the "A" in the Address Line 1: caption. This step adds an Identification Number: caption and a text box above Address Line 1.  Select the new text box and change the font size from 8 to 10 points to equal the font size of the other text boxes on the form. Select the new text box and change the font size from 8 to 10 points to equal the font size of the other text boxes on the form.
Select the line3 text box and press delete to remove it. Unlike Access, deleting an InfoPath text box doesn't delete its label. Select the Address Line 3: caption and its trailing line feed and press delete. Your form design appears, as shown in Figure 26.11. Figure 26.11. The Identification Number caption and related text box replace the Address Line 3 element. 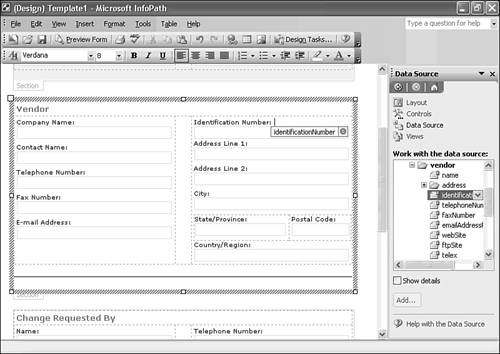 Press Ctrl+S to open a dialog, click Save, and save the form template file as ChangeOrder.xsn in My Documents or elsewhere. Don't close the template.
Saving sample Template1 as a form template file changes the name in the title bar to (Design) FileName. Setting Default Field Values The Currency list box opens with the value of the first element of the currencies.xml file Select. The currencies.xml file is the secondary data source for the Currency list. Setting a default value for your locale's currency name and symbol eliminates the need for users to set the currency value each time they complete a new form. To set a default currency name and value, do the following: In the data source list, scroll to and expand the currency node. Right-click the name field and choose Properties to open the Field or Group Properties dialog. Type the currency name USD for this example in the Default Value text box (see Figure 26.12). Click OK. Figure 26.12. Set default values for a selected field in the Field or Group Properties dialog. You also can establish validation rules for fields.  Repeat steps 2 and 3, but specify the symbol field and type ($). Click Preview Form and scroll to the Currency list and verify that "USD ($)" appears and that ($) follows the Cost header of the Itemized Charges list. Press Ctrl+S to save your design changes.
JScript code behind the form sets today as the value of the Change Order Date text box when you open the form. Unlike Access, default values of elements must be constants. Publishing Form Templates You can publish form templates to a file share, SharePoint form library, or Web site. This example publishes to a file share; you publish the data-bound example that you create later in the chapter to a SharePoint site. To publish the ChangeOrder.xsn template to a file share, do this: Create a share on your computer and assign appropriate share permissions to groups or users. For this example, the share is the InfoPath folder of the computer used to write this chapter. With the template open in design mode, choose File, Publish to start the Publishing Wizard. Click Next to bypass the Welcome dialog. In the second dialog, accept the default To a Shared Folder on This Computer or on a Network option (see Figure 26.13). Click Next. Figure 26.13. You select the location for the published form in the second Publishing Wizard dialog.  In the third dialog, type the UNC path to the share you created in step 1 (see Figure 26.14). Click Next to confirm the location, and click Finish to publish the template. Figure 26.14. Specify the UNC path and file name for published form template. 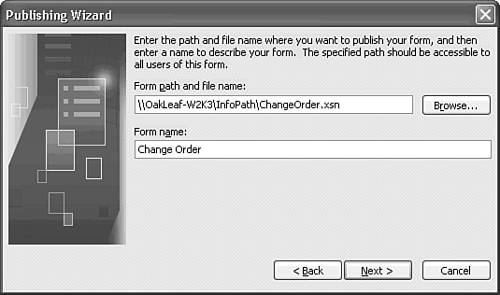
After publication, the Wizard offers the opportunity to send messages that notify users of the location of the form. |