 | Access 2003's Linked Table Wizard lets you use SQL Server 2000's new linked servers feature to gain access to remote instances of SQL Server, other client/server RDBMSs, and Jet databases. Linking a Jet database provides access to tables linked from Excel worksheets, text files, and other indexed-sequential access method (ISAM) databases, such as dBASE and Paradox. Alternatively, you can link via the Open Database Connectivity (ODBC) API to data sources for which you have current ODBC drivers. You also can link data sources that don't return traditional tabular data such as Windows 2000 Active Directory, documents indexed by the Microsoft Indexing Service, and Exchange 2000 Web folders. |
Linked servers require an OLE DB data provider for the data source. Depending on the data source type and location, as well as the capabilities of the OLE DB provider, the linked tables are read/write or read-only. Office Data Connector (.odc) files store linked table definitions. By default, Access 2003 stores .odc files in your My Documents\My Data Sources folder, the physical location of which depends on your operating system. The following sections describe two scenarios that use the Link Table Wizard to define the links. Your Access project must be connected to a local SQL Server instance to use the Link Table Wizard. Linking a Jet 4.0 Database The easiest way to test-drive a linked server is to link a Jet 4.0 database with the Microsoft Jet 4.0 OLE DB provider. To create read-only views of tables from a linked, unsecured Jet database in ADP quickly, do this: Open the NorthwindCS.adp project, if it isn't already open, with the connection to the database on your local instance of MSDE. Choose File, Get External Data, Link Tables to open the Link Table Wizard's first dialog, which offers the option of creating a linked server or using T-SQL's OpenRowset function to create a temporary connection to a database (see Figure 20.45). Accept the default Linked Server option, and click Next to open the Select Data Source dialog. Figure 20.45. The first dialog of the Link Table Wizard briefly describes SQL Server's linked server feature and the difference between a linked server and an ad hoc connection to a remote data source. 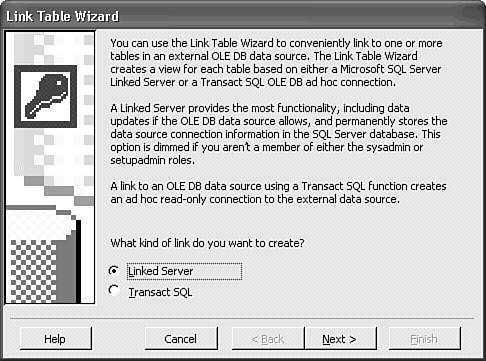 You can select existing .odc, .mdb, .mde, .adp, .ade, and a variety of other file types from the files of type list. For this example, navigate to your \Program Files\Microsoft Office\Office11\Samples folder, select Northwind.mdb (see Figure 20.46), and click Open. Figure 20.46. The Select Data Source dialog lets you select a data source from a variety of file types. Scroll the Files of Type list to expose more data source types you can specify. 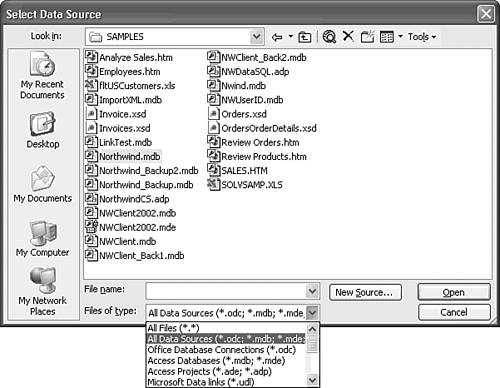 In the second Wizard dialog, double-click the tables you might want to link existing SQL Server tables to in the Available Tables list. (The Tables list also includes Jet QueryDefs disguised as views.) For this example, double-click each of the eight original tables of Northwind.mdb (see Figure 20.47). Click Next and then Finish to add the linked server definition to the current SQL Server database. Figure 20.47. Add the tables to display as views in the current project.   Click the Queries shortcut in the Database window to display views the Wizard added (see Figure 20.48). The default names for linked views use the DatabaseName__TableName format; two underscores separate the object names. Click the Queries shortcut in the Database window to display views the Wizard added (see Figure 20.48). The default names for linked views use the DatabaseName__TableName format; two underscores separate the object names.
Figure 20.48. Views over linked Jet tables appear in the Queries page of the Database window after the Wizard creates the linked table definition in the local database. 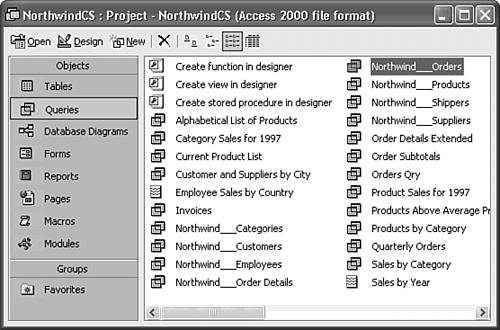 Double-click one of the links, such as Northwind__Orders to display the data. The view's columns appear in alphabetical order (see Figure 20.49). The disabled New Record button indicates that the view is read-only. Figure 20.49. Views over linked Jet tables are read-only in Datasheet view and columns appear in alphabetical order by name. 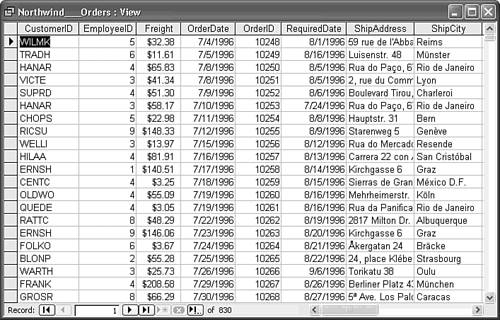
Datasheets of views created against remote Jet tables linked to SQL Server aren't updatable, despite the fact that the underlying tables' key fields are identified by a bold font in Design view. You can, however, use T-SQL UPDATE, INSERT, and DELETE statements or stored procedures to update the linked Jet tables. Linking a Remote SQL Server Database The advantage of using an .odc file is that all members of Office XP can use the .odc file to connect to an SQL Server data source. You can copy the .odc file you create to a server share for access by other users. The files are coded in HTML and contain an XML representation of the connection string, which specifies the remote database. To create an .odc file to link a remote SQL Server database to your local copy of MSDE, do the following: Open the Select Data Source dialog as described in steps 1 and 2 of the preceding section. Double-click the +New SQL Server Connection.odc item in the My Data Sources folder to open the Data Connection Wizard's Connect to Database Server dialog. Type the NetBIOS name of the server OAKLEAF-MS10 for this example in the Server Name text box, and accept the default Use Windows 2000 Security option (see Figure 20.50). Click Next. Figure 20.50. The Link Table Wizard calls the Connection Wizard to create a new Office Data Connector (.odc) file that defines the connection to the remote server.  In the Select Database and Table dialog, open the Select the Database... list and select the database on the remote server. OAKLEAF-MS10 has SQL Server Standard Edition installed, which includes a sample Northwind database (see Figure 20.51). Click Next. Figure 20.51. Select the database of the remote server in the second Connection Wizard dialog. The list of tables is read-only. 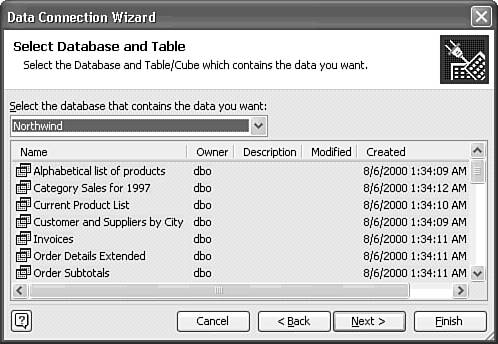 In the Save Data Connection File and Finish dialog, accept the default SERVERNAME DatabaseName.odc file name and My Data Sources location, or click Browse to open the File Save dialog, and specify a different name, location, or both. Type an optional description of the .odc file (see Figure 20.52), and click Finish to return to the Link Table Wizard. Figure 20.52. Specify the name of the .odc file and add a description in the third Connection Wizard dialog. 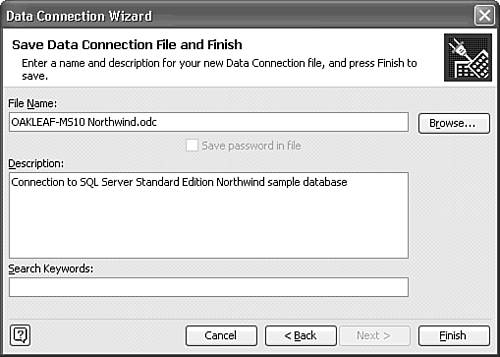 Double-click the tables that you might want to use in the Available Tables list (see Figure 20.53). Click Finish to add views to the Queries page of the Database window. Figure 20.53. The Wizard generates views for each table or view you add to the Link to Project list. All tables are accessible from T-SQL SELECT statements.  The Database window displays the views in SQL Server four-part name format, SERVER_Database_Schema_Table; underscores replace the periods used when referring to the tables in T-SQL statements (see Figure 20.54). Figure 20.54. Views over linked SQL Server tables use a modified SQL Server four-part naming convention for tables. (Underscores replace periods between object names.) 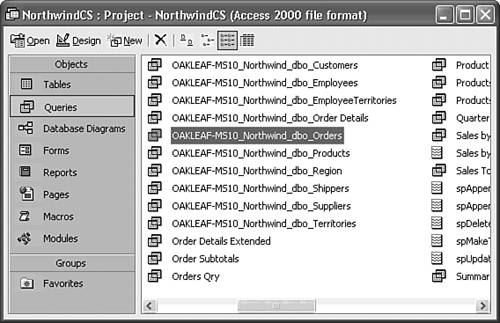 Double-click one of the tables to display the data. Unlike linked Jet tables, the columns of views against SQL Server tables appear in the original order (see Figure 20.55). The Datasheet view isn't updatable, because the current version of the SQL Server OLE DB provider doesn't support the Unique Rows property of linked SQL Server tables. Figure 20.55. Like linked Jet tables, Datasheet views of remote SQL Server tables are read-only. 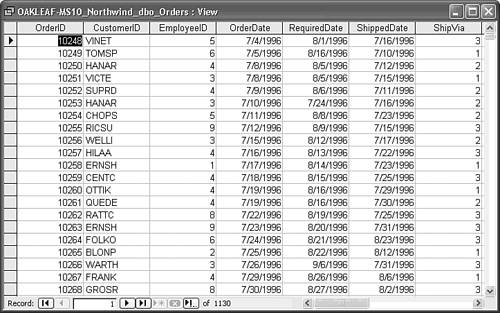
The .odc file you saved in step 5 is an XML file with an HTML wrapper. To view the .odc file in Internet Explorer 5+, navigate to your My Documents\My Data Sources folder, and double-click the .odc file. The browser displays the table name, schema, and type (TABLE or VIEW) in a PivotTable control (see Figure 20.56). Figure 20.57 shows the first part of the source code of the OAKMONT-DC1 Northwind.odc file. Figure 20.56. Office Database Connector (.odc) files display in a PivotTable all tables and views in the remote database. 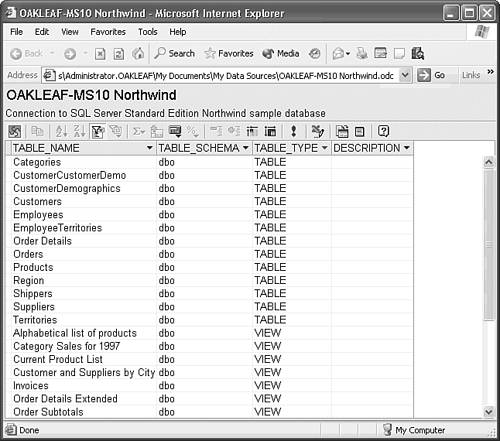 Figure 20.57. Notepad displays the first few lines of the XML source code for the OAKMONT-DC1 Northwind.odc file. The <odc: connectionstring>...;</odc :connectionstring> tags enclose the connection string definition (attributes) for the remote server. 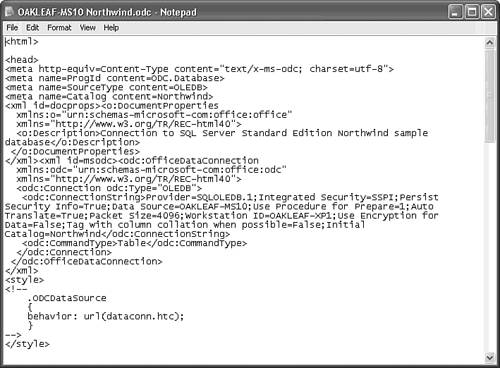 |