Understanding the Macro Recorder's Code You very likely know that you can record VBA code that, when run, repeats any actions that you took while the recorder was running. The rationale for this is not so much to record a utility that saves you having to take the same keyboard or mouse pointer sequence over and over, although this does happen. The real benefit of recording macros is to learn more about VBA. If you're not familiar with the macro recorder, try it out. Choose Tools, Macro, Record New Macro. Click OK in the Record Macro dialog box (see Figure 7.8). Figure 7.8. For something you use frequently, you can store the recorded macro in a personal macro workbook. 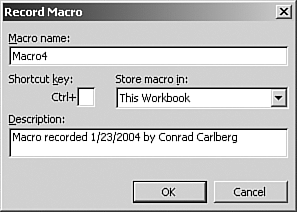
Now do something relevant to Excel enter a value in a cell, or sort a range of values, or copy and paste something. Click the Stop Recording button or choose Tools, Macro, Stop Recording (see Figure 7.9). Figure 7.9. Click the Stop Recording button when you're through taking actions that you want recorded in VBA. 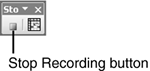
Press Alt+F11 to switch to the VBE. You'll see something similar to what is shown in Figure 7.10. Figure 7.10. The macro recorder usually records much more than actually took place. 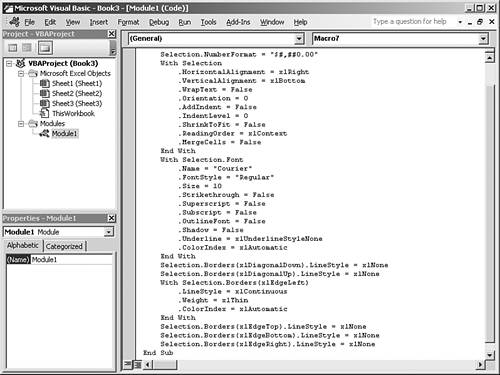
The code you see in Figure 7.10 was created by the macro recorder in response to these actions: - Set the active cell's number format to Currency.
- Set the active cell's horizontal alignment to Right (Indent).
- Set the active cell's font to Courier.
- Give the active cell a thin left border.
The macro recorder attempts to provide code that's comprehensive, and so doesn't limit itself strictly to the results of actions taken by the user. For example, it uses a With block to set nine formatting aspects of the selected cell: number format, horizontal alignment, vertical alignment, text wrapping, and so on. It does this even though the only properties belonging directly to the selection that were changed were its number format, horizontal alignment, its font and its left border. NOTE Although the macro recorder attempts to be comprehensive, there are actions you might take while recording that don't get recorded, or that don't record as you might expect them to. For example, if you switch to another application, or even to the VBE, while recording a macro, this action goes unrecorded. If you take an action repeatedly, the recorder does not put a For-Next or a Do While loop in the code; it just records each action separately. The recorder does not declare variables for you. If you can't do it on the worksheet, the recorder ignores it.
The recorder responds not to changes in worksheet elements, but to their properties following some action taken by the user. After setting the horizontal alignment to Right (Indent), the other properties (vertical alignment, text wrapping, and so on through cell merging) were as shown in the recorded code. They were left alone, but the recorder doesn't know that. Working directly with the code created by the recorder has several benefits. Two of the most important are discussed in the next two sections. Learning the Names in the Object Model The Excel object model is so large that it's not feasible, nor even sensible, to learn all its objects, methods, and properties. Even if you did, you'd still need the names of the values that the properties can take on. For example, using the Range object's End property can take you up or down from a selection you can use xlUp or xlDown. But to go left or right, you have to specify xlToLeft or xlToRight. It's pointless to remember that. Stuck for a name, use the macro recorder to provide it for you. On the other hand, there are some objects and constructions that you use so frequently while developing your code that you really have to know their names. Otherwise, you'll spend your time ineffectively. Suppose that you frequently format cells, as Currency, or Date, or Percentage. In that case, it's important to know what string you use to call for a particular number format. And the fastest way to find that out is seldom by means of the Help documentation, but by recording a macro that assigns a format to a cell and then examining the code that results. Adapting the Code to Another Purpose It often happens that you're coding some task when you're brought up short: You realize that you've taken the next step many times on the worksheet but never in code. You've inserted a new name for a range, for example, or sorted a range of cells into ascending order. Now you want to do something similar in your VBA code, but you have no idea how to go about it. The macro recorder is an ideal solution here. Suppose that you want to know how to call for VBA to sort the data in a range of cells. You happen to have data in cells A1:B17, and cells A1 and B1 contain row headers (in other words, you have an Excel list in A1:B17). So, click in some cell inside A1:B17 say, A7 and choose Tools, Macro, Record New Macro to find out how to sort it using VBA. Then sort the list. Assume that you sort first on the values found in Column B, and then on the values found in Column A, and that you want an ascending sort on both columns. In the Sort dialog box, if necessary, you identify Row 1 as a header row. You click OK, stop the macro recorder, switch to the VBE, and see the following: Range("A7").Select Range("A1:B17").Sort Key1:=Range("B2"), Order1:=xlAscending, Key2:=Range( _ "A2"), Order2:=xlAscending, Header:=xlGuess, OrderCustom:=1, MatchCase _ :=False, Orientation:=xlTopToBottom, DataOption1:=xlSortNormal, _ DataOption2:=xlSortNormal
The first statement just shows that you started out by selecting cell A7, a cell inside the range you want to sort. The next statement shows you that in general you get VBA to sort a range of cells by calling that range's Sort method. In the code for the more generalized task that you're coding, you might use something like this: Dim SortRange As Range Set SortRange = ActiveSheet.Range(Cells(1, 1), Cells(17, 2)) SortRange.Sort Key1:=SortRange.Offset(1, 1).Resize(1, 1), _ Order1:=xlAscending, Key2:=SortRange.Offset(1, 0).Resize(1, 1), _ Order2:=xlAscending, Header:=xlYes
There are several aspects to this code that are worth noting: The address of the sort range is not specified in the statement that performs the Sort method. Instead, an object variable (see this chapter's next section, "Using Object Variables") that represents a range is assigned to a range of cells (here, A1:B17). That object variable, standing in for the actual range, is sorted. The sort keys are still B2 and A2 (in that order), but they're referred to as offsets from the upper-left cell of the range. The cell B2 is offset from A1 by one row and one column; the cell A2 is offset from A1 by one row and zero columns. This way, the sort statement does not use the cell references "B2" and "A2" that are provided by the macro recorder. That makes it possible to use the sort statement elsewhere in your code when you want to sort a range that does not include B2 or A2. The Header specification in the code provided by the macro recorder uses xlGuess; that is, Excel is required to determine whether or not the range has a header row. The revised code specifies xlYes because the programmer knows that the range has a header row. The code has been shorn of extraneous specifications, such as DataOption1 and MatchCase. When you adapt something you get from the macro recorder, you spend some time getting rid of unnecessary code that the recorder, in its effort to be comprehensive, insists on providing.
You'll notice that the code generated by the macro recorder frequently uses Select, sets the properties of selections, and carries out methods that apply to the selections. For example Range("A2").Select Selection.Font.ColorIndex = 3
If you use this as a building block for a different subroutine, you could and should change that to something such as Range("A2").Font.ColorIndex = 3
There's no requirement that you select an object before you set one of its properties; to do so slows down your code needlessly and makes it that much more difficult to maintain. |