Managing Your Business Contact Manager Data Using Views and Reports
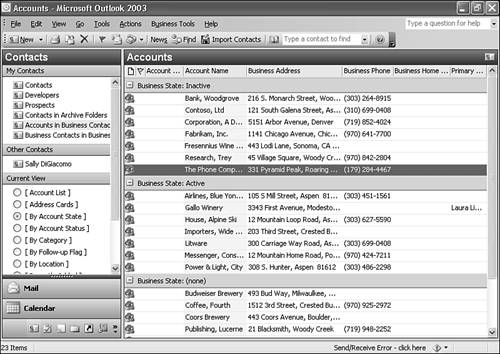
| Business Contact Manager installs with a number of built-in reports. These reports can help you manage your accounts, business contacts, and opportunities. In addition to the built-in reports, you can also manage your data with the built-in views available in the Accounts, Business Contacts, and Opportunities folders. Using Views to Manage Your Business Contact Manager InformationEach of the three Business Contact Manager folders comes with a number of built-in views. These views differ from the standard Contact and Task views that ship with Outlook 2003. The Business Contact Manager views are designed to show you a variety of Business Contact Manager data to help you manage your various contacts, accounts, and opportunities. In the Accounts folder, you can choose from a number of standard Contact views, as well as the following custom views:
Within the Business Contacts folder, you can choose from a separate set of views. The custom views available in the Business Contacts folder are the following:
The Opportunities folder contains its own set of custom views. They include
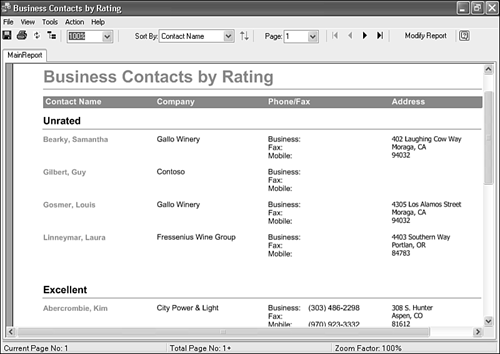
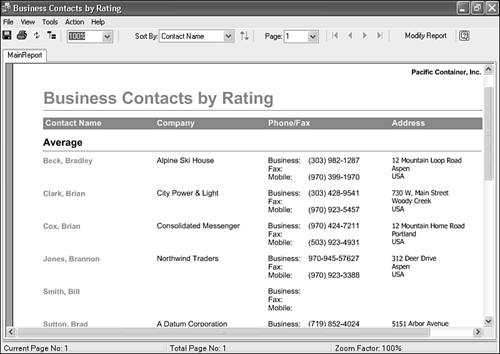
In addition to the various views available in the Business Contact Manager folders, you can also generate a number of different reports to help you manage your BCM data. Using Reports to Manage Your InformationBusiness Contact Manager comes with a number of built-in reports that you can access to generate different views of your data. Those reports can be exported to Word or Excel. From there you can use another program, such as Access, to manipulate the data contained in those reports. To access the built-in reports, select Reports from the Business Tools menu. You can then choose the segment of Business Contact Manager for which you want to display a report. Business ContactsYou can choose from six preconfigured reports on your Business Contacts. Each report displays the data in a slightly different way. For example, the Business Contacts by Rating report, shown in Figure 36.34, shows your business contacts grouped by financial rating. Figure 36.34. You can display a report grouping your business contacts by financial rating.
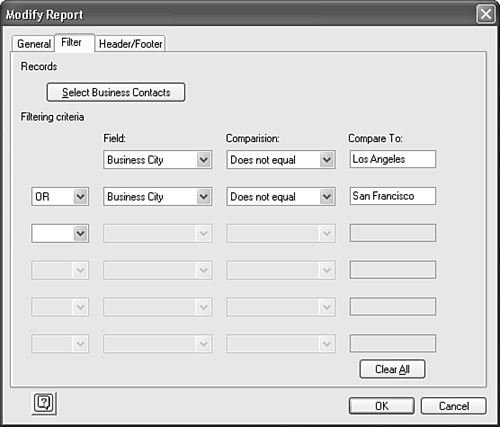
After you select the desired report, it opens in a separate window. Business Contact Manager uses a runtime version of Crystal Reports to create your reports. Using Crystal Reports' functionality, you can click the Modify Report button on the toolbar to change certain characteristics of your report. For example, on the By Rating report, you can change the sort order or click the Filter tab, shown in Figure 36.35, to select only certain contacts on your report. Figure 36.35. You can customize your reports by filtering the data displayed. This Filter tab prevents display of contacts in either Los Angeles or San Francisco.
The Filter tab enables you to filter by a variety of contact fields that appear on the report. The Filter tab in Figure 36.35 will display all contacts except those in Los Angeles or San Francisco. If you can't quite get the results you're looking for from the filter criteria, you can click the Select Business Contacts button to display Figure 36.36. Figure 36.36. You can select specific contacts to include on your report.
Click the contact's name in the left list and click the TIP If you want to prevent display of only a couple of contacts, use the >> button to move all business contacts from the left list to the right list. Then you can use the After you've selected the contacts you want to appear on your report, click OK twice to return to your report. You can also configure the header and footer of your report. Click the Modify Report button and click the Header/Footer tab to display Figure 36.37. Figure 36.37. You can create your own custom headers and footers for your reports.
By default, the report title is included in the header of the report. The page number and date created are added to the report footer. You can add your company name to the header and enter any additional text on the report footer. Click OK to save your changes. After customization, your report might look something like Figure 36.38. Figure 36.38. After you've customized your report, it might look like this figure.
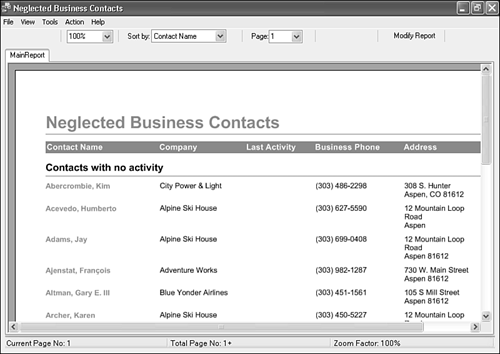
When you've finished customizing your report, you can save it as a Word document, an Excel file, an RTF (rich text format) document, or an HTML page. To save your report, choose File, Save As. Enter a name for your report and choose a location. Select the format to save your report from the Save as Type drop-down box. A variety of other reports are available to display your contacts. As its name implies, Business Contact Manager will help you manage your contacts. One of the management tools you can use to ensure that all of your contacts are receiving adequate attention is the Neglected Contacts report, shown in Figure 36.39. This report shows all business contacts with no activity. Figure 36.39. The Neglected Contacts report enables you to see which contacts have no activity.
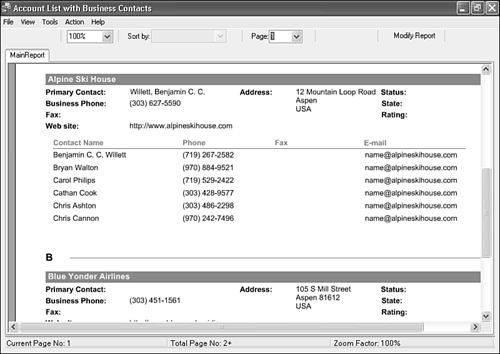
AccountsYou can choose from a different set of reports to display information about your accounts. The Account List with Business Contacts report, shown in Figure 36.40, lists each account with its associated business contacts. Figure 36.40. The Account List with Business Contacts report shows all contacts associated with each account.
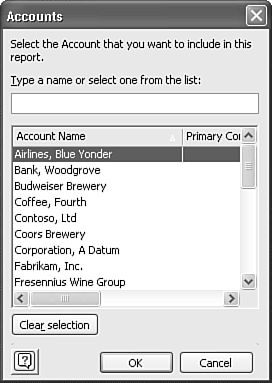
The Account History report can be run for any account in your Accounts folder. When you choose to run this report, you must first choose an account from the dialog box displayed in Figure 36.41. Figure 36.41. You can run the Account History report for any of your existing accounts.
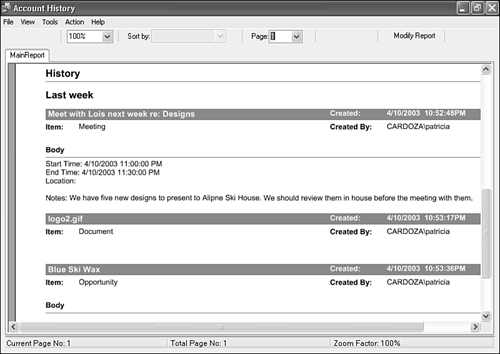
When you choose your account, the Account History report is displayed on the screen. The first page of the report contains the basic information about your account. To view the history items associated with your account, use the Page drop-down list to navigate to page 2 of the report, shown in Figure 36.42. Figure 36.42. The Account History report shows all the contact you've had with the account.
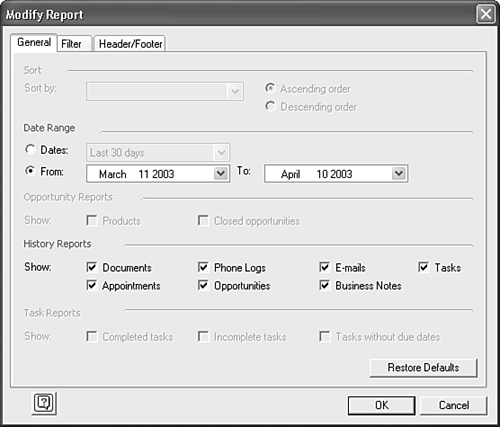
You have several options for modifying the Account History report. Click the Modify Report button to display Figure 36.43. Figure 36.43. You can filter your Account History report by history type and date range.
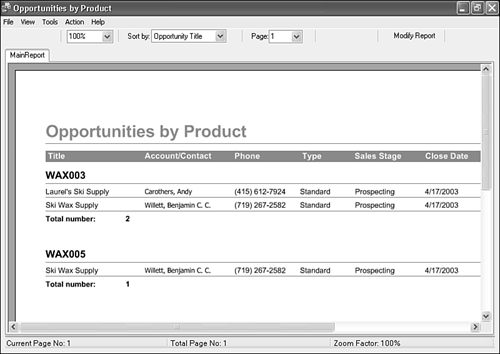
You can choose which types of history items you want to display on your report. By default, all items are selected; however, if you want to display only emails and appointments, you can clear all the other check boxes. After you choose your selections, click OK to return to your report. OpportunitiesYou can choose from five different reports to display information about your opportunities. The Opportunity Funnel report displays a brief overview of all of your existing opportunities. By default, closed opportunities are not displayed. You can modify the report to display closed opportunities. The Opportunity Forecast report lists opportunities that are projected to be closed within the next 14 days. Each opportunity is displayed with a list of products associated with the opportunity and the projected total revenue for each opportunity. To display a listing of all products in your product catalog and their associated opportunities, choose the Opportunities by Product report, shown in Figure 36.44. Figure 36.44. The Opportunities by Product report lists all opportunities associated with a product in your product catalog.
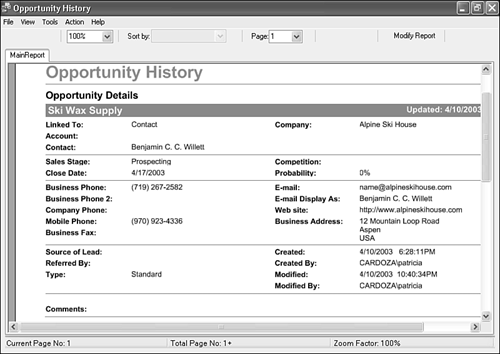
The Opportunity History report, shown in Figure 36.45, lists everything that's happened with the opportunity as well as all the information contained in the opportunity form. You can see all products associated with the opportunity and any activity that has taken place within the opportunity grouped by date. Much like the Account History report, you can run this report for only one opportunity at a time. Figure 36.45. The Opportunity History report shows all activity on a selected opportunity.
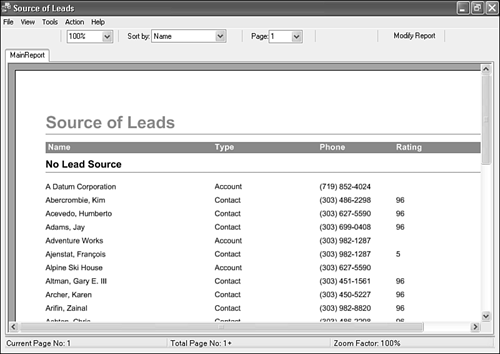
The last opportunity report, Past Due Opportunities, lists any opportunities that haven't been closed by the estimated close date. OtherBusiness Contact Manager comes with two other reports that are not directly tied to accounts, business contacts, or opportunities. The Business Task List report shows all tasks you've created from within an account, business contact, or opportunity. The Source of Leads report, shown in Figure 36.46, can help you understand the most productive sources of leads for your business. Both accounts and contacts are displayed for each lead source. Figure 36.46. The Source of Leads report displays accounts and contacts grouped by lead source.
Any of the reports available in Business Contact Manager can be saved to your hard drive or printed. After you save a report to your hard drive, you can email that report to another person. You can save the reports in XLS (Excel), DOC (Word), RTF (rich text format), or HTML. TIP If you want to customize your BCM reports by adding charts and graphs from Excel, you can actually automate the process a bit. Simply save your BCM reports to an Excel file and then create an Excel macro to take data from the BCM report and create a chart. Because the BCM report will always be in the same format, you can simply run your macro against new data each week or month to create powerful customized reports. |
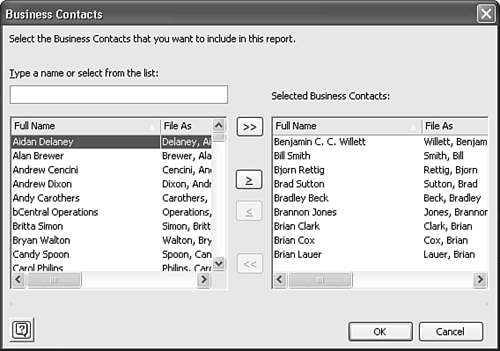
 button to move the contact to the right list. Click the >> button to move all contacts from the left list to the right list. All contacts in the right list will be displayed on your report. All contacts in the left list will be excluded.
 button to move one or two contacts from the right list back to the left list.
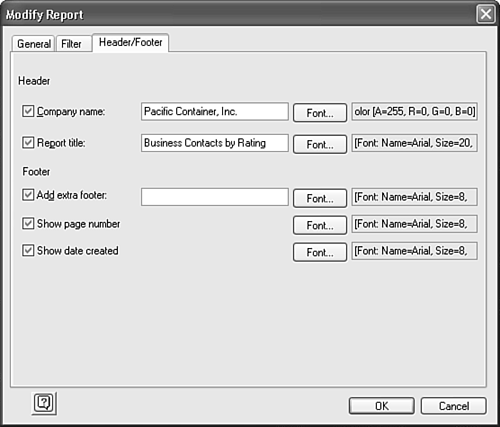
EAN: 2147483647
Pages: 426