Changing Existing Text into an Outline
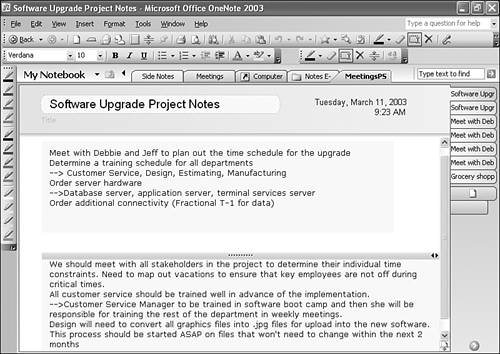
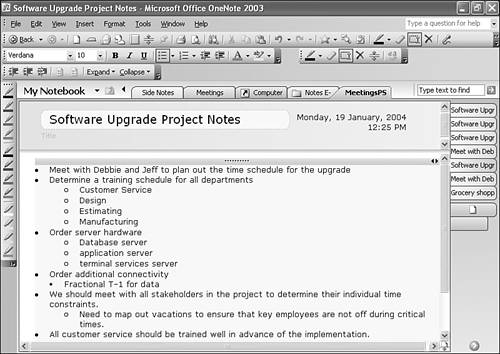
| As you're typing along in OneNote, you don't always know that what you're typing would make more sense in outline format. You can turn what's called body text (that text that's not part of an outline) into an outline using the Outlining toolbar. Consider the notes in Figure 15.1. Figure 15.1. The following notes would make more sense if turned into an outline.
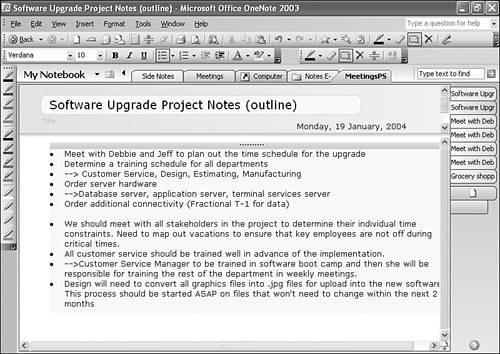
As you can see, there are two distinct note containers on this page. If you need both note containers to be part of the same outline, the first step you'll want to take is combining these two note containers. It's easy to combine note containers. Simply position your mouse over the top of the second note container. You'll see the darker gray container handle appear. Click on this handle and drag the note container upwards until it merges with the first note container. Release the mouse button to combine (or dock) the second note container with the first container. Now that you have a single note container on the screen, there are several different ways you can turn this large note into an outline. You can use one of the following methods or use a combination of these methods to create your outline. Converting an Entire Note Container to an OutlineThe easiest way to create an outline from existing text is to convert the entire note container to a list (either a bulleted or numeric list) with just a couple of clicks. You can then turn the list into an outline by indenting specific lines. To convert a note container into a bulleted list, click the note container's handle to select all text within the container. Click the Bullets button on the Formatting toolbar to change the text into a bulleted list, as shown in Figure 15.2. Figure 15.2. You can change text into a bulleted list with a single click.
Now that you have a bulleted list, you can turn that list into an outline by choosing sections of text to indent.
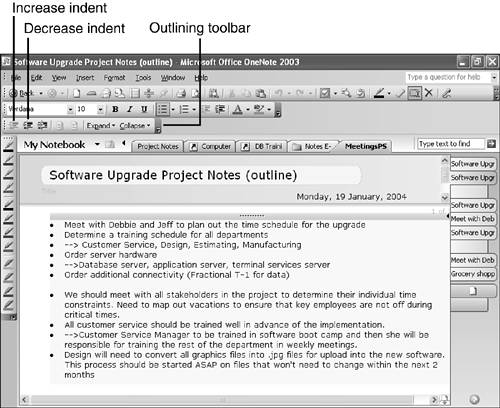
Selecting Sections of Text to IndentEven though the text is now in bulleted form, Figure 15.2 still isn't very readable. From looking at the text, it should be obvious that several of the lines should be indented (or nested) under other lines. To indent these lines, use the following steps.
You can use the same sort of process to reverse the indentation of a line. If you accidentally select two lines to indent, or merely want to decrease the indentation of a particular line, select the line and click the Decrease Indent button on the Outlining toolbar. The selected line will decrease one indentation level. Creating Your Outline Line by LineIf you don't want to convert an entire block of text into an outline at once, you can create your outline step by step. You'll use the same basic techniques as described in the previous section. To begin, highlight the first line of your outline and click the Bullets or Numbering button on the Formatting toolbar. You can then click the next line you want to add to your outline and click the appropriate button again. If you want to create a numbered outline, after you select the second line and click the Numbering button, you'll have two lines at the same level (numbered 1 and 2). Select the second line and press Tab (or click the Increase Indent button on the toolbar) to indent the line. tip
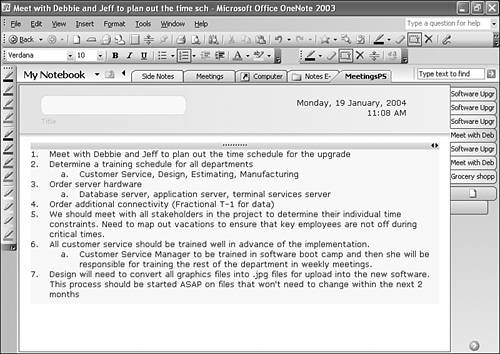
You can continue these steps to create the rest of your outline. Your numbered outline might look similar to Figure 15.4. Figure 15.4. You can create a numbered outline from any text in OneNote.
Changing Text from Outline Text to Body TextBody text is text within your outline that provides more detail to an outline topic. For example, in Figure 15.5, the text beneath the fourth top-level bullet is body text. You can turn any portion of an outline into body text. Simply select the line of text using the line handle and then click the Make Body Text button on the Outlining toolbar. By default, when turning outline text into body text, the text becomes body text under the outline level immediately above it, even if the text was originally at a higher level than the line above it. Figure 15.5. You can make body text out of any lines within the outline.
In Figure 15.5, if you turned the second bullet and its associated sub-bullets into body text, they would all appear as body text indented under the first bullet. |
EAN: 2147483647
Pages: 182