Understanding Field Objects
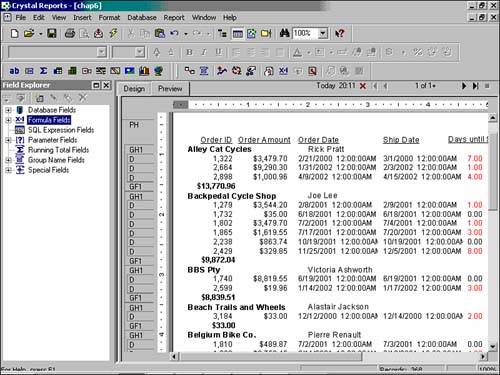
| As described in a previous hour, the Field Explorer displays a tree view of data fields in your report. It shows database fields, formula fields, SQL expression fields, parameter fields, running total fields, group name fields, and special system fields that you have defined for use in your report. In this hour, you will be introduced to all the standard field types available in Crystal Reports. To activate the Field Explorer, either select it from the View menu or click on the Field Explorer button in the Crystal Reports Standard toolbar. Figure 6.1 shows the sample Crystal Report created in the last hour with the Field Explorer activated and docked on the left side of the screen. As previously mentioned, this can be docked on either side of the designer or at the bottom the screen. Alternatively the Field Explorer can freely float over any part of the design window by simply dragging and dropping it. Figure 6.1. Crystal Reports Designer with the Field Explorer docked on the left side.
The next seven sections introduce the different types of fields accessible from the Field Explorer and provide some introductory ideas on where they might be used in a report. Subsequent hours in the book will cover some advanced uses of these types of fields. Before moving on to explore these different types of fields, here are some common traits shared by all field types:
Accessing Database FieldsThe database fields branch of the Field Explorer tree is used to add database fields to your report. The fields that can be added to your report are those from standard database tables, views, stored procedures, and so on that you previously selected as data sources for this report (discussed in Hours 3 5). To add additional tables or other data sources to your report, you would use the Database Expert under the Database menu. To insert the database fields that are available from the Field Explorer into your report, either click and drag them in to the desired location on the report or select them, click the Insert to Report button (or Insert to Report action from the right-click menu), and then select the desired location on the report for the highlighted fields.
Multiple fields can be highlighted simultaneously in the Field Explorer and placed in the report designer window at once. Crystal Reports will drop the first of the multiple chosen fields in the selected location on the report and will place the subsequent fields in order to the right of the initial field. If the report's layout runs out of real estate on the right side of the report, the subsequent fields will be placed one line down and the placement algorithm will continue. Accessing Formula FieldsFormula fields provide a means to add derived fields (that is, those not directly available in your database) into your Crystal Reports, such as a calculation. They also provide your business users (report consumers) with additional views of data. Crystal Reports treats derived formula fields in exactly the same manner as it does original database fields. Some examples of where formulas might be used on the sample report (Chap5.rpt) from Hour 5 would include
The formula fields branch of the Field Explorer tree is used to add existing or new formula fields to a report. A listing of previously created formulas (for example, DaysUntilShipped from the Hour 5 sample report) will appear in this part of the Field Explorer tree. Once created, existing formulas are added to the report by either clicking and dragging and dropping or by selecting the formula and using the Insert functionality available through the right-click menu or Field Explorer action button and then selecting the location.
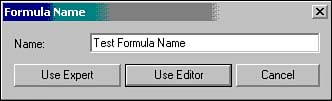
If a new formula is required, it can be created directly from the Field Explorer by using the New toolbar button. You will be prompted to name the new formula and then select the method of creation. This dialog is displayed in Figure 6.2. Figure 6.2. The Formula Name dialog.
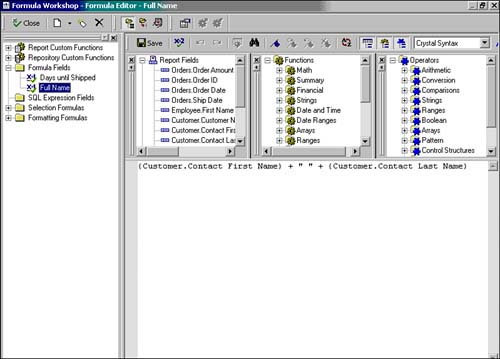
Using the Xtreme Sample Database and the sample report created in Hour 5 (chap5.rpt), one simple formula we might want to add is a Full Name field that comprises both the first and last name of the customer's contact person (Contact First Name and Contact Last Name in the Customer sample table) . To perform this task, implement the following steps:
By selecting Save in the Formula Editor, we return to the Field Explorer and the new formula, Full Name, is now available to be placed on the report. Finish this section by placing the Full Name Formula Field on to the report beside the Customer Name. Accessing SQL Expression FieldsThe SQL Expression fields branch of the Field Explorer tree is used to add existing or new SQL Expression fields to a report. A listing of previously created SQL Expressions will appear in this part of the Field Explorer tree. Once created, existing SQL Expressions are added to the report by either clicking and dragging and dropping or by selecting the SQL Expression using the Insert into Report button or action on the right-click menu and selecting the location. SQL Expressions are created in the same Formula Editor as formulas but use Structured Query Language (SQL) statements (see Hour 22 for more information) rather than the formula syntax. SQL Expressions are used in cases where report-processing efficiency is critical. Using SQL expressions can give report designers greater control over report processing, such as pushing data processing to the database server instead of the Crystal Reports engine because this is often most efficient.
Accessing Parameter FieldsParameter fields provide a means to create dynamic reports and provide your business users with an interactive method of driving the report content or layout they view. When a Crystal Report contains parameters, it requests certain pieces of information from the business user before processing. The involved Crystal Report can then use those inputted parameters to filter the data that is presented or even suppress entire report sections. Some examples of where parameters might be used include
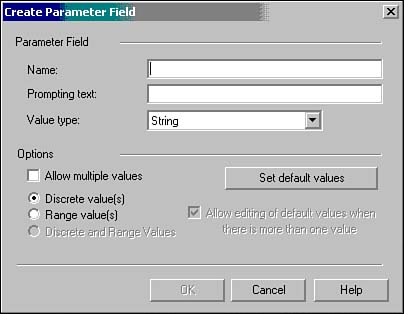
The parameter fields branch of the Field Explorer tree is used to add existing or new parameter fields to your report. A listing of previously created parameters (for example, Employee Name in Hour 5's sample report) will appear in this part of the Field Explorer tree. Once created, Parameter fields are added to the report by either clicking and dragging and dropping or by selecting the Parameter Field using the Insert into Report button or action on the right-click menu and selecting the location. If a new parameter is required, it can also be created directly from the Field Explorer by using the New toolbar button. You will be prompted to name the new parameter and enter some supporting information. This dialog is displayed in Figure 6.4. Figure 6.4. The Create Parameter Field dialog.
Detailed information on parameter creation and utilization as a means to filter report information is covered in Hour 12, "Implementing Parameters for Dynamic Reporting." At this point, it is only important to note the location of this field type. Running Total FieldsRunning total fields provide a means to incrementally calculate a total on a report as the records are processed. In contrast to the summary fields you will learn about later in the book, running total fields enable you to control how a total is calculated, when it is reset, and when it is displayed. Some examples in which running total fields might be used include
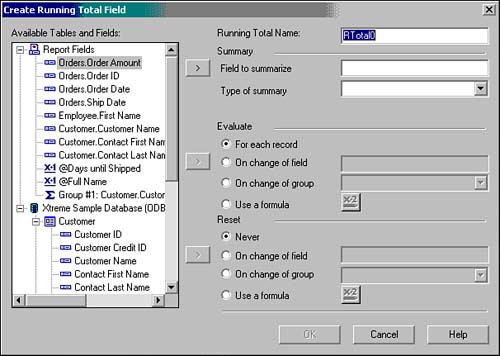
The running total fields branch of the Field Explorer tree is used to add existing or new running total fields to your report. A listing of previously created running totals will appear in this part of the Field Explorer tree. Once created, existing running total fields are added to the report by either clicking and dragging and dropping or by selecting the Running Total Field using the Insert into Report button or action on the right-click menu and selecting the location. If a new running total is required, it can be created directly from the Field Explorer by using the New toolbar button. You will be prompted to name the new running total. Select the field to calculate the running total on, the type of running total (for example, sum, average, variance, and so on), and some other supporting information about when the running total is to be evaluated and reset as shown in Figure 6.5. Figure 6.5. The Create Running Total Field dialog.
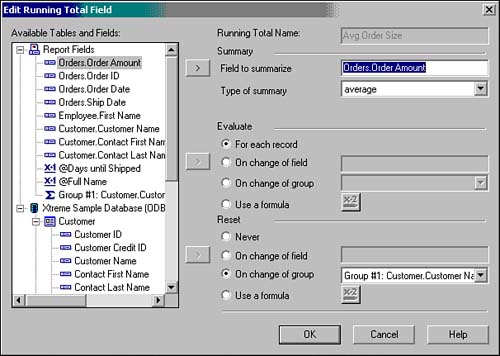
In our sample Customer Order Listing report from Hour 5, an interesting running total to add would be one on the average order amount over time for each sales rep. This running total will tell senior sales management if the average order size for each sales rep is increasing or decreasing over time. To create this running total:
The completed Running Total dialog is shown in Figure 6.6. Figure 6.6. The Edit Running Total Field dialog.
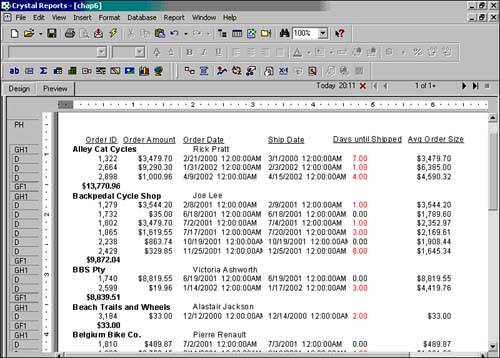
After the running total has been created, it only needs to be dragged on to the report in the appropriate section. In this example, the appropriate section is the Detail section to show a changing average order size for every order. The Updated Sample Customer Order report is shown in Figure 6.7. Notice the changing average order size being calculated for each record. This type of report can now provide increasing value to senior sales management. Figure 6.7. A sample Orders report with Running Average Total on Order Size for each sales rep.
As highlighted in the Running Total dialog, it is possible to both evaluate and reset the running total fields based on four different options. The first three are self-explanatory for each record, on the change of a specified field, or on the change of a specified group. The last option, using a Formula, is a powerful and flexible option that should be more fully explored after completing Hours 10 and 17 on formula creation. In its simplest description however, this option enables the creation of a conditional running total or the reset of that running total based on the results of a formula you have created. A good use of this conditional summing is the creation of a running total that calculates the sum of all orders, but only evaluates (or sums in this case) the running total when the total order amount on a given record is greater than a certain amount (for example, 1,000). This running total, in effect, would provide a running total of only large orders so that business analysts can determine the percentage of revenue derived from large orders. Group Name FieldsGroup Name fields will only exist in a report after you have specified one or more groups to add to your report. We will cover that functionality later in this hour. Group Name fields are created at the same time you add a Grouping to a report. Once created, existing Group Name fields are added to the report by either clicking and dragging and dropping or by selecting the Group Name using the Insert into Report button or action on the right-click menu and selecting the location. Special FieldsThe special fields provided in the Field Explorer are a number of system fields that Crystal Reports provides. These system fields and a brief description are provided in Table 6.1.
These special fields are added to the report by either clicking and dragging and dropping or by selecting the Special Field using the Insert into Report button or action on the right-click menu and selecting the location. |
EAN: N/A
Pages: 230