CREATING THE FLASH PROJECT
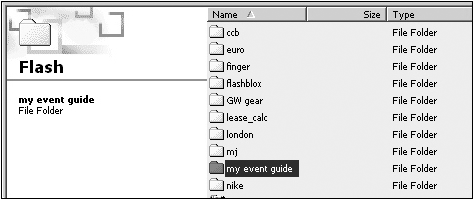
| Now it's time to start actually making the event guide in Flash. As you go through this example, remember that you can apply these steps to planning, developing, and implementing your own particular projects. If you are interested in creating your own Flash event guide for the Pocket PC, you can download the source files from the book's web site. Project RequirementsFirst, you need to identify the specific project requirements, the scope, the target platform, the content to be used, and the technologies to make everything come together. Don't skip this step; if you do, I can guarantee you will run into problems later on in the development cycle. Always remember that if something can go wrong, it probably will. Have a backup plan in place in case you lose your work or your device. From a development standpoint, you need to have the "right tools" to get the job done. These tools have been covered in the other chapters, but for a quick refresh, they are Flash 5 (or higher) to create the content, a Pocket PC device to test your application, and the Pocket PC Flash Player 5 to view your content on your Pocket PC. You don't really need a Pocket PC device to complete this chapter, but it helps you to see the completed animation on the target platform. Organizing the ProjectThis is what some people might consider a "pre-planning" phase for a project. In any project, it is a good habit to plan ahead so you can try to forecast any problems that might arise during the development phase. You can't predict problems that might occur; however, you can be prepared in case any happen. One way to plan is to sketch out a flowchart of how the navigation should work and the different sections that you plan to have. By doing this, you'll be able to foresee what resources you will need (artwork, photos, maps, and so on). Gathering ContentThe content you gather for your project can be any material that you need. Whatever it is will have to be converted to a digital format to be brought into Flash (such as scanning artwork, photographs, and so on). Organizing Your FoldersYou will probably have more than one Flash animation or application on your device at any one time, so it's a good idea to create separate folders for each Flash animation or application. Whether they are Flash animations that you've created yourself or ones you've downloaded, it's a good practice to keep each one in its own folder. Here is a screen shot of how I have my subfolders set up on my Pocket PC device (see Figure 5.4). Figure 5.4. Setting up your folders before you begin helps keep your project organized. Making the Event GuideYou might be asking yourself, "What are we making?" and "What content will it contain?" As I discussed earlier in this chapter, I'll be taking what I feel are the "core sections" of a printed event guide and converting them into an easy-to-use, Flash event guide designed for Pocket PC devices. For our purposes, I'll be explaining the steps involved for creating the Pocket PC Summit 2001 event guide and how you can apply some of the ideas to your own projects. I've broken down the development into five sections:
While I was defining this project, I made decisions to remove certain content that I didn't feel was important from the Flash event guide. For example, my decision to eliminate an advertising section was based on the fact that people who were using the Flash event guide wanted to have immediate access to the core content (conference schedule, map, and so on). For navigation, I felt that a slide-out type of menu would be the best solution. By doing this, I was able to maximize the available screen area for content, while still providing the user with easy access to the entire application all from a single tap. Are you ready? Okay, let's get into the development part of the project. 5.3.5.1 Laying the FoundationFirst, I created a new movie and then added and named the layers that I knew I would need for this project. Then, I added labels and some generic ActionScript to establish a working framework. After this was done, I imported and organized all the images I had prepped using Photoshop. Next, I brought in a layout template I had created to use as a template when creating the GUI in Flash. Depending on your project, you might want to consider creating a GUI mockup outside of Flash.
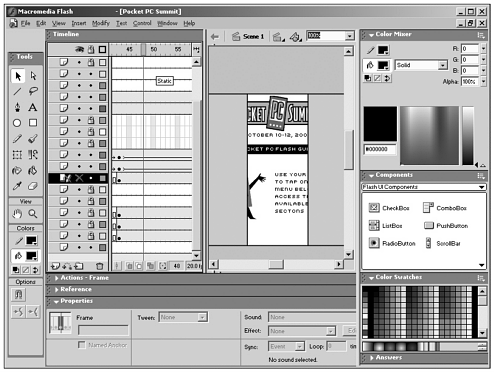
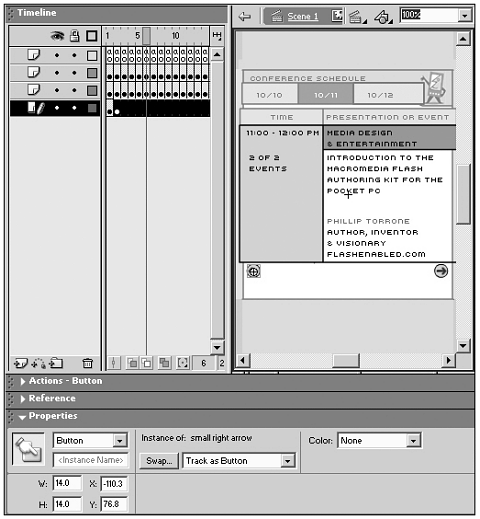
With a good framework in place, I then moved on to creating the opening sequence animation. Some motion tweens, text, and color tinting helped to create the look I was going after. Now that I had all of my pieces imported, my timeline in skeleton form, and my opening sequence, I could then move on to Part 2 (see Figure 5.5). Just a reminder: You don't have to do anything too complicated, but just enough work to get you ready for the other parts of the development phase. Figure 5.5. A pretty good foundation for the event guide. 5.3.5.2 Creating the SectionsFor the next part of the development phase I focused on the different sections of the event guide. During the planning part of the project I actually sketched out some ideas for each section along with some ideas of how to present the information to the users. In the case of the Pocket PC Summit event guide I only wanted to create six areas or "sections." Although the steps I used to create and set up each one of the sections are specific to the event guide, it's important to emphasize that if you can reuse elements or MCs throughout your project, you'll be able to save time and minimize testing. For example, each one of the sections in the event guide looks and functions similarly. Each one fades in and displays the section content; then, when you leave a section, it fades away. It was apparent that once I was able to get one section working correctly, I could duplicate it and change only certain variables and the main content. By doing this, I could create the "shells" for each section and then go back and spend time integrating the necessary content in the appropriate sections (see Figure 5.6). As you can see, by taking this approach to your project development, you can be more efficient with your time and eliminate unnecessary work. Figure 5.6. Now that the section "shells" are complete, you can add the section-specific content.
With the opening animation and sections pretty much complete, I needed to move on to the third part of the development cycle: the navigation. 5.3.5.3 Creating the NavigationYou can have the best Flash application with all the necessary content, beautiful pictures, and useful information but if the user does not understand how to use the navigation, your application is not useful. You need to put as much attention into your application navigation as you do with the other aspects of development.
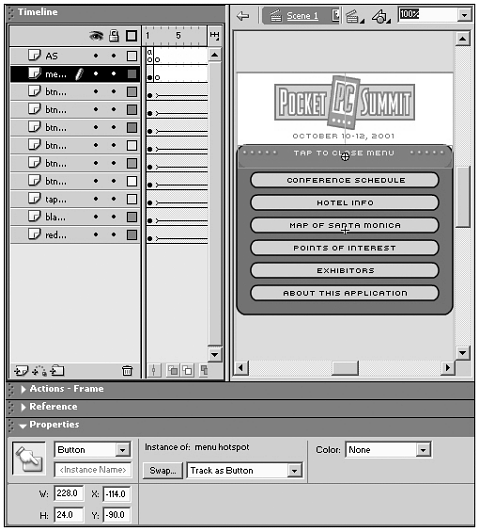
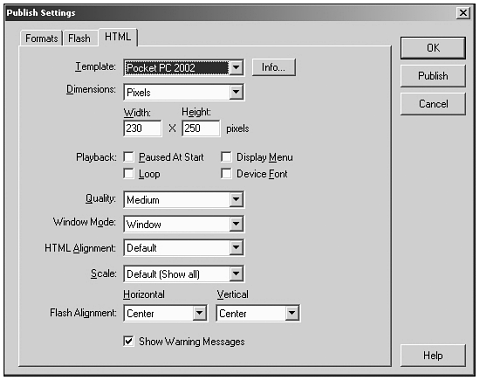
As I mentioned earlier, I felt that a sliding menu would offer the maximize screen area for the content. I could "open and close" the menu by simply tapping on the visible portion of the menu bar. To do this, I created the navigation as an MC and accessed it on the main timeline via ActionScript (see Figure 5.7). Creating the ActionScript for the menu wasn't difficult because the menu was similar to the sections. If you can get one of them to work, then you can get all of them to work. I applied the same "template" approach to create the navigation logic that I used for creating the sections; by doing this, I saved time and minimized my mistakes. Figure 5.7. Here you can see how the navigation is contained in one MC and is controlled by ActionScript. For your projects, try experimenting with different types of navigation, keeping in mind that the user will be touching the screen with a stylus or his finger. I've seen several Flash applications created for the Pocket PC with interesting navigation solutions. Whether it's the "sliding method," "drag and drop," "expand and contract," or others, try different styles with your application or take a look at what other Flash developers have created to get some ideas. However, remember that when designing your navigation, usability is your number one priority. After successfully integrating the navigation with the rest of the event guide application, you must test it on a Pocket PC 2002 device. There are only two parts left to the development and we'll be done. 5.3.5.4 TestingYou're done with the FLA file. Now you need to test it on a Pocket PC 2002 device. To do this, you need to export the final versions of the SWF and HTML files that will be synched to the Pocket PC 2002 device. From Flash MX, choose Publish Settings (File, Publish Settings) and click on the HTML option. In the HTML tab, choose the Pocket PC 2002 template from the drop-down list and accept the default settings (see Figure 5.8). Figure 5.8. Flash MX offers the "Pocket PC 2002" HTML template for publishing your Pocket PC 2002 Flash content.. Be sure that you set the Flash movie to publish as a Flash 5 movie. This is done by going to File, Publish Setting, Flash and setting the Flash movie to Flash 5. However, before you copy the HTML file over to the Pocket PC, you need to tweak the HTML file. You want to do this so that you can have the maximum amount of space for your Flash movie. To do this, you need to put the following code into the <Body> portion of your HTML code: leftmargin="0" topmargin="0" Keep in mind that if your Flash movie size is larger than the recommended maximum size for Pocket PC 2002 devices, adding the preceding tweak to your HTML code won't get rid of the scrollbars in Pocket IE. As you can see here, I've stripped out all the code that Pocket IE doesn't need. The event guide plays fine using this HTML code on a Pocket PC 2002 device. (Notice that there aren't a lot of lines of code to worry about.) <HEAD> <TITLE>Pocket PC Summit</TITLE> </HEAD> <HTML><BODY bgcolor="#FFFFFF" topmargin="0" leftmargin="0"> <OBJECT class WIDTH="230" HEIGHT="250" > <PARAM NAME=movie VALUE="Pocket PC Summit.swf"> <PARAM NAME=loop VALUE=false> <PARAM NAME=menu VALUE=false> <PARAM NAME=quality VALUE=medium> <PARAM NAME=bgcolor VALUE=#FFFFFF> </OBJECT> </BODY> </HTML> Be sure that you test the Flash movie on your Pocket PC 2002 device after tweaking the HTML code. You don't want to end up doing more work because you're missing a line of code in your HTML file.
After copying the files to the Pocket PC 2002 device, I thoroughly went through and tested all the sections, the navigation, buttons everything in an effort to break it. I found only a few minor things that I was able to quickly fix. One good way to test your application is to have someone else test it for you, someone who hasn't been involved with the project or is not familiar with the application. Give this person tasks to accomplish using your newly created Flash app and see how he uses it. Here are several things you should look for while observing others using your application:
You can use and modify this list any way you want to, but if you study people's reactions and behaviors when using applications, you can really learn a lot. Depending on the scope and budget of your project, you might be able to incorporate some user feedback before actually deploying your application. 5.3.5.5 DeploymentThis is the fun part of the project actually seeing the completion of all your efforts culminate in the delivery and deployment of your application. After you have distributed your Flash content, you might be called on to help with problems that arise from certain users it's inevitable. There's always at least one little problem that sneaks by when developing a project. It's a good habit to keep track of these little problems because if they happen again on another project, you'll know right away how to fix them. If you're just messing around and you've created something that you think other people might find interesting, be sure to get it out there for people to use and provide feedback. There's nothing more exciting than finding a really cool Flash app that is made for the Pocket PC. You can post your work at several sites. Check Appendix C, "Flash Device Resources," for more information. After your project is complete, archive all your source and completed files in case you need to reference something in the future. There are several ways of doing this, including burning a CD, saving to a Zip disk, or backing up to tape. |
EAN: N/A
Pages: 178
