| In this exercise, you will create the background graphic for drop-down lists in the Tech Bookstore. You'll then convert that into a graphic symbol, which will make it reusable without adding file size. Because there are three menus in the site, it makes sense to use this methodology because it gives you a way to control file size for your project. Don't sweat the details of symbols just now because you will learn all about them in Lesson 4. You'll use the Rectangle tool again, but this time you round out the corners using the Corner Radius button. You'll also work more with fill colors, tools, rulers, and guides. Note Graphic symbols can contain their own Timeline and layer structure. You can take advantage of this to make a more complex graphic without altering the main document Timeline.
1. | Open bookstore4.fla if it is not already open and save it as bookstore5.fla. Make sure that object snapping is turned on.
To make sure that object snapping is turned on, you can do one of two things. First, in the Tools panel, select the Selection tool, and in the options area, make sure that the Snap to Objects icon is highlighted (it looks like a magnet). You can also select View > Snapping > Snap to Objects.
| 2. | Create a new graphic symbol by selecting Insert > New Symbol and then create three new layers inside of it by clicking the Insert New Layer button in the Layers pane.
When you create a new symbol this way, you are leaving the main document Timeline behind and entering the Timeline of the symbol. All symbols in Flash, with the exception of the Font symbol, have their own Timeline panel, with their own layers. How those Timelines behave is based on what kind of symbol you choose to create.
Select Insert > New Symbol to create a new symbol. The Create New Symbol dialog box appears; it has two modes: Basic and Advanced. Basic is the default. If you press the Advanced button, it sends you to Advanced mode. You want Basic.
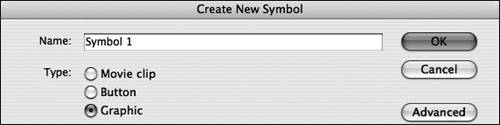 The Name field labels the symbol in your document Library panel, which you haven't learned about yet. The name is not important to Flash because it is a human organizational tool. The symbol type is important to Flash however because it tells Flash how the symbol should behave. Name the symbol grMenuGraphic, and select Graphic from the Behavior radio button group. Then click OK.
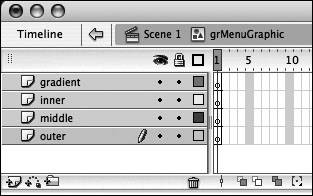
Tip The "gr" prefixing the name is just a convention you can use to determine quickly what kind of symbol you have, and is not necessary. But a good naming convention can mean the difference between a smooth project development and a bewildering project development. Pick a naming convention and stick with it. You are now in symbol-editing mode. If you look at the edit bar, you'll see a small icon and the name of your symbol next to Scene 1, indicating that you are editing the master symbol itself. In the Layers pane of the Timeline panel, you'll see that the symbol's Timeline now appears, with the default Layer 1. Create three more layers, then name them gradient, inner, middle, and outer from top to bottom. Remember that to rename a layer, double-click on its name.
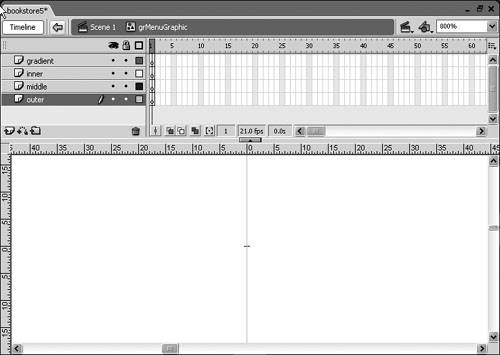
 | 3. | Zoom to 800% using the drop-down list in the edit bar and set up the outer guides for the menu graphic you are about to produce.
You need to set up a series of guides for the menu background, which will have several colors for an outline, to create a border effect. You will use a series of rounded rectangles layers on top of one another with differing colors to create the effect and you will use guides to help you layer the rectangles in the symbol.
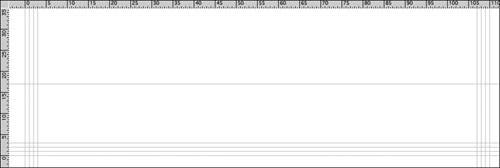
Turn on rulers by selecting View > Rulers if they are not already on. The rulers appear at the top left of the workspace. Remember that you can't use guides unless the rulers are on. From the Zoom menu at the far right of the edit bar, select 800%. This will make it easer to work because the menu will be only 110 pixels wide by 15 pixels tall.
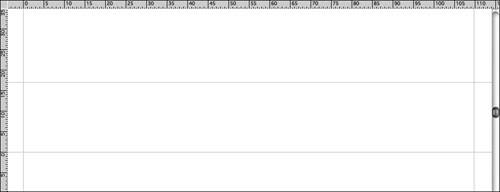
Click the vertical ruler and drag to produce a guide. Drag the guide to 0 on the horizontal ruler, which should line up with the vertical line of the cross hair on the Stage, which is the symbol's absolute center and the point of origin for its coordinate system.
 Repeat this step, dropping the guide at 110 pixels. Now, drag out upper and lower guides. The lower guide will be set to 0 in the vertical ruler, and the upper guide at 17 above the lower. Repeat this step, dropping the guide at 110 pixels. Now, drag out upper and lower guides. The lower guide will be set to 0 in the vertical ruler, and the upper guide at 17 above the lower.
 | 4. | Create three guides at one-pixel intervals from the sides and bottom of the menu.
To accurately line up each layer, you need to create guides for each shape to snap to when you create it. Create three more guides on the left of the Stage, but to the right of the guide set at 0, spaced one pixel apart. Drag three more guides at the right of the Stage, but to the left of the guide set at 110. Finally, drag three more guides set above the horizontal guide at 0. All the guides should be only one pixel apart.
 | 5. | Create the menu background on the outer layer using the Rectangle tool with a corner radius set to 2. Set the stroke color to None and the fill color to #666666. Create the rectangle within the outermost guides.
First, select the Rectangle tool and shut off Object Drawing by deselecting it. You need to edit a bunch of graphics at once in this exercise, and Object Drawing makes the process a little more difficult in this circumstance. Switching to Merge Drawing will make the edits easier.
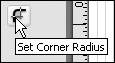
You need to create the outer edge of the menu background using a rectangle with rounded corners. Select the Rectangle tool and then press the Set Corner Radius button to open the Rectangle Settings dialog box. The Set Corner Radius button is found in the options area of the Tools panel. Enter 2 into the Corner Radius field and click OK. You will use the Rectangle tool with this corner radius for each layer.
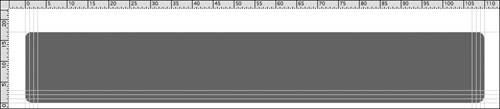
 Use the Fill Color controls and Stroke Color controls in the Tools panel to set your fill color to #666666 and your stroke color to No Color. Select the outer layer to create the first rectangle. The first rectangle snaps to each of the outside vertical guides placed at 0 and 100, and the horizontal guides at 0 and 17.
Tip You might want to lock your guides first by selecting View > Guide > Lock Guides, so that you don't inadvertently move them. Click the cursor very close to the upper-left corner of the guides and then drag the cursor diagonally to the lower-right corner of these guides. When the cursor is clicked or released close to one of the guides, it snaps right to the line.
| 6. | Create another rectangle in the middle layer, with a fill of #FFFFFF and no stroke. Create the rectangle one pixel in from the left, bottom, and right sides of the outer rectangle.
Now click the middle layer to make the next rectangle. Use the Tools panel to set your fill color to #FFFFFF and make sure that the stroke color is still set to No Color. Now you need to create a rectangle shape that is inside the rectangle on the outer layer by one pixel on the bottom left and right sides.
 Tip Use Ctrl+Z or Cmd+Z if you need to undo and redraw the shape. The third and fourth rectangles are created exactly the same way, except for moving in another pixel on each side and the bottom. For the rectangle on the inner layer, set the fill color to #999999 and the stroke color should still be off. For the gradient layer, for now, set the fill color to #CCCCCC. Later in this lesson, you will do an exercise on gradients, in which you will apply a linear gradient to this graphic.
| 7. | Trim the top of the menu and then lock the layers in place.
If you have locked any of your layers to prevent from drawing everything in the same layer, unlock them now. Drag a new guide line to 15 pixels on the vertical ruler. Next, with the Selection tool, click and drag from the upper-left corner, down to the 15 pixel guide, all the way to just past the 110 pixel vertical guide, and then let go. You'll see a crosshatch pattern, indicating that area has been selected. This selects the upper portion of all of the graphics only. Press Delete or Backspace to delete that portion of the menu graphic because you won't need it.
Click the Lock Layer icon at the top of the Layers pane to lock all your layers at once.
| 8. | Return to the Main Stage.
Return to the main Stage by clicking the Scene 1 icon at the far left of the edit bar. Remember that you are in symbol-editing mode. When you go back to the main Stage, you will not see your graphic. It is being stored in the library, waiting to be used.
Zoom back out to 100 percent by using the Zoom options menu at the far right of the edit bar.
Tip You can also double-click on the Zoom tool in the Zoom panel to do the same thing. | 9. | Save your work.
|
|