Adjusting Levels
| Levels are the basic tool used by Photoshop and Elements to correct shadows, midtones, and highlights in your images. The first stop for a levels adjustment should be the Auto Levels command, found by clicking Image > Adjustments > Auto Levels. Figures 8.7a and 8.7b show before and after views of what Auto Levels can do for your image. You can see a significant improvement in the midtones, as well as some improvement in shadow and highlight detail. Figure 8.7a. Before using Auto Levels, this image is lacking detail.
Figure 8.7b. After Auto Levels the image is much improved.
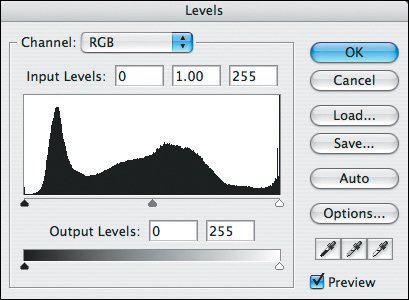
Note Throughout this chapter you'll see that I use adjustment layers for almost everything. The reason for this is safety. By making my corrections on adjustment layers, I don't modify the original image, which enables me to go back at any time to make changes if I like. Although Auto Levels can be a great way to adjust your photo, it isn't always the perfect adjustment. You want to go into the Levels control to make your own adjustments for more control, especially as you become more comfortable with image editing. By selecting Layer > New Adjustment Layer > Levels, you see the dialog box shown in Figure 8.8. Figure 8.8. The Levels command lets you control how the image data is seen.
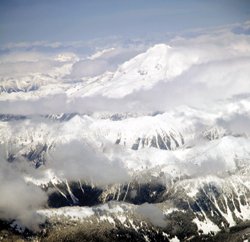
The Levels control looks very similar to the histogram, the basic bar graph of tonal values, ranging from pure black to pure white, on the combined red, green, and blue channels within your image. Black is on the left, and white on the right. Levels shows two different sets of controls: Input is the upper set of numbers and the ones associated with the histogram, and Output is the lower set of numbers associated with the bar below the histogram. For the time being, we're only worried about the Input levels. As you can see from Figure 8.8, by default the Input levels are set to 0, 1.00, and 255. In other words, black has a value of zero, the gamma (or luminance, or midtones) of the image is 1.00, and white is set to 255. By adjusting any of these numbers, you change what is considered black and white and can adjust the luminance. Under most circumstances, you want the image data to extend from one end of the chart to the other, maximizing the tonal range in the image. If, as you may frequently find, a photo has the bulk of its data at one end or at the center, the result is an image that doesn't have the full impact that it should. Figure 8.9 shows an example of this. The original image is underexposed, with most of the data in the lower half of the histogram. Figure 8.9. This image is underexposed with much of the image data on the lower end of the histogram. By moving the highlight slider to the right side of the image data, the tonal range of the image is spread out across the entire range, resulting in the photo shown in Figure 8.10. Figure 8.10. After adjusting the highlights there is more detail seen, but the midtones need correction.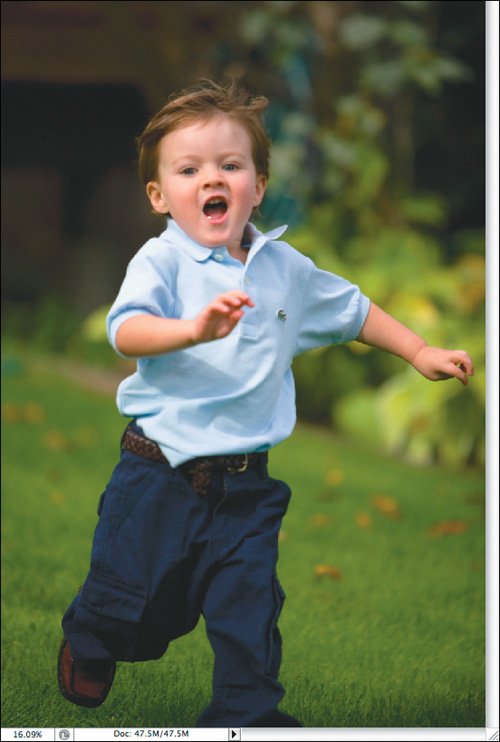 This adjustment has created some exposure problems in the midtones, however, and as you can see in Figure 8.10 they're a little too light. To correct this, I drag the gamma, or midpoint, slider down to restore some contrast and shadow detail to the image, as shown in Figure 8.11. Figure 8.11. Adjusting the midtone slider gives the image a final correction.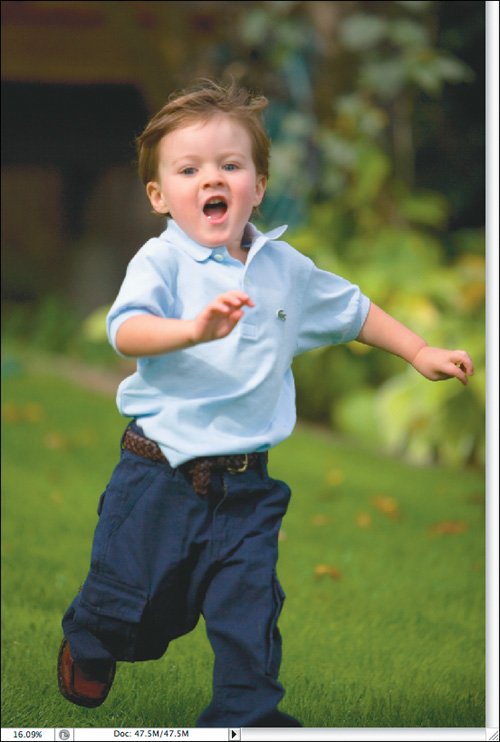 |

EAN: 2147483647
Pages: 91