| If your computer did not come preinstalled with Liquid Edition, you will need to install the software from CD. This is a simple operation, largely automated by wizards, but you should be ready to answer such questions as these: To which hard drive do you want to capture video clips? On which hard drive will you want to store render files?  Tips Tips
If you create a folder called Capture on your intended capture drive and another folder called Render on another drive before you install, you will greatly simplify this situation. Please read the "General Installation Tips" sidebar before attempting to install Liquid Edition 6.
To install Liquid Edition 6 1. | Insert the Liquid Edition CD into your computer. This should automatically bring up the Installation wizard. If it doesn't, browse to your computer's CD drive and double-click the autorun.exe file (Figure 1.1) found in the root directory of the CD. Some versions of Liquid Edition 6 may display a file called Setup.exe.
Figure 1.1. The autorun.exe shortcut. Click this to start the Installation wizard. 
Premiere Users, Read This If you are migrating from Adobe Premiere, you may find the terminology in Liquid Edition particularly strange, because many common functions have a different name. When this occurs, I will include a sidebar (similar to this one) in which I will translate that function from one system to the other. For example, what Premiere users would call capturing, Liquid Edition users would call digitizing. Essentially the process is the same; only the name is different. |
| 2. | Select the install language and click OK.
This brings up a license agreement page.
| 3. | Click Yes to agree to the license agreement and click Next at the welcome screen.
| 4. | At the prompt, select the drive to which you want to install the software. Unless you have a specific reason for doing so, it is always best to install the software to the same drive that holds Windows XP (Figure 1.2).
Figure 1.2. First choose where to install Liquid Edition… 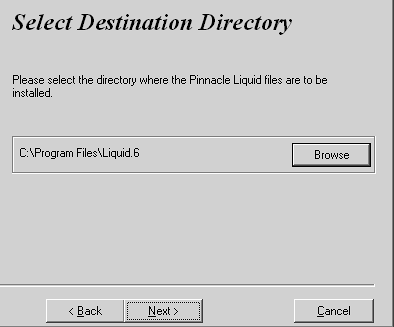
| 5. | The next screen asks you to choose which video standard and system language you want to use. This should default to the standard being used by Windows. Again, leave this set to the defaults and click Next (Figure 1.3).
Figure 1.3. …then which TV standard and language to use… 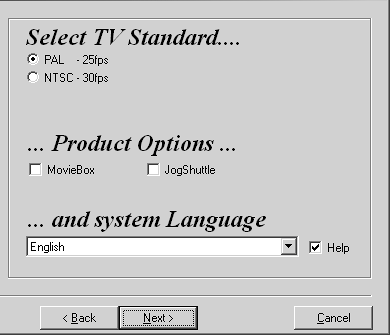
You can also choose to install the drivers for Jog/Shuttle controller or Moviebox from this screen if you have this hardware.
| 6. | Choose a drive on which you will store your render files (Figure 1.4). The optimal location will be a separate partition or hard drive that does not hold your operating system.
Figure 1.4. …then the target location for your render files… 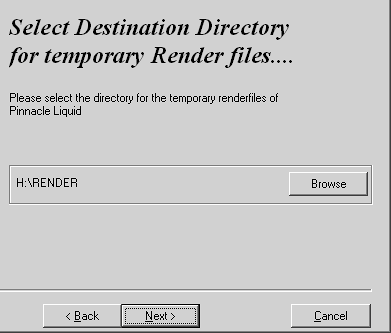
Choosing the optimal location is important because render files are created when:
- Real-time FXs are being displayed.
- Non-real-time effects are being rendered.
- A DVD is rendering prior to the burn process.
| 7. | Click Next and you will be asked to select your video drive (Figure 1.5).
Figure 1.5. …then the target location for your captured media… 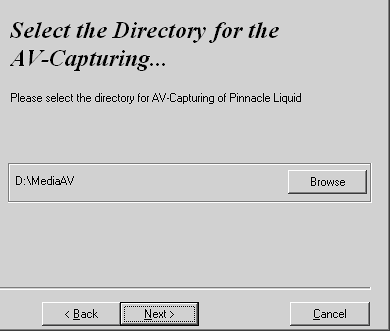
This is where your video clips will be stored when either digitized (captured) or imported. Approximately 16 minutes of digital video consumes 4 gigabytes (GB) of hard drive space, so clearly you'll need to select a very large hard drive to get the best out of this program.
| 8. | Click Next again and Liquid Edition will begin to install.
| 9. | Enter the serial number from your CD case. Make sure you enter letters in uppercase and then click Next. You'll also need to put some personal details in the required fields (Figure 1.6).
Figure 1.6. …and finally, enter your serial number and personal details, and wait for the installation to finish. 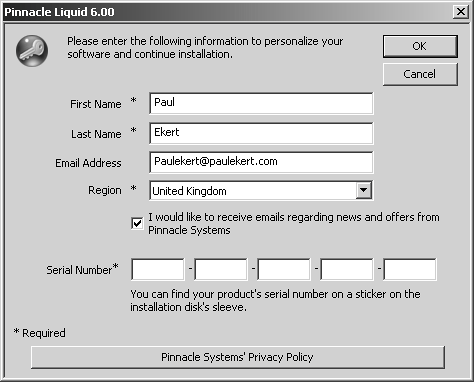
It may take anywhere from 5 to 10 minutes to completely install the various components that make up Liquid Edition. The Hollywood FX component is particularly slow to install, and in the beginning, it may appear as though nothing is actually happening. However, if you leave it for a while, the install process will eventually carry on.
At the end of this process (depending on which setup you have) you may be asked to install Title Deko. This process is largely automatic; just stick to the defaults and let the Installation wizard do the rest. Once all the components are installed, you may also have to reboot the computer.
|
 Tips Tips
Although both Render and Video locations have to be selected during installation, you can change them later using the Control Panel. See Chapter 4, "Managing Your Media." Further advice on setting up your computer and which hard drives to use for what can be found in the Appendix.
DV MovieBox Install Prompt Users of the DV MovieBoxsupplied with Pinnacle Studio 8 and 9will be asked to insert the original Studio CD during the install process. This is only a verification check and does not install any files from that CD. |
|
 Tips
Tips


