Section 7.7. Managing Windows Print Drivers
7.7. Managing Windows Print DriversCurrent versions of Samba support the downloading of print drivers on demand when clients connect to print shares. This feature is commonly referred to as point and print (p-n-p). The advantages of this configuration are that you are guaranteed that clients are using the print driver that you expect them to use and that you can deploy updated drivers and printer settings without touching the clients. Before you begin to think that this is too good to be true, there are a few catches. First, the drivers must be installed on the Samba server just as one would install them on a Windows print server. However, unlike with a Windows host, you must initialize the printer registry settings on the server. (More on this later.) Second, not all print drivers are created equal. You will find that most drivers work correctly when served from a Samba machine, but a few will be unusable due to bugs in the driver itself or a decision by the driver developers to utilize features that can be supported only by a Windows server. Luckily, for the majority of environments, Samba's level of support for p-n-p is more than adequate. 7.7.1. Point and Print PrerequisitesFor now, assume that we have already created all of the print shares (possibly with a single [printers] share) in smb.conf. It is possible to create new printers at runtime via the Windows Add Printer Wizard (APW), but to keep things simple, let's just deal with the driver installation issues for now. Later we discuss how to remotely add and delete printers on a Samba host. Samba maintains print driver metadata and files in two locations. The Windows driver files themselves are stored in a standard file share named [print$]. The service definition for this share is nothing out of the ordinary. It is important to note that all users who will be downloading drivers from the server must have read access to the data stored withing the share. However, only trusted accounts should be given the ability to add new files or modify existing ones. Because these files are downloaded automatically to clients, imagine what damage could be done if a malicious user were able to copy a virus infected DLL as part of a print driver.
The [print$] share defined here permits write access to members of the ntadmin Unix group only. All other accounts can connect but cannot modify the share contents. We also enforce world accessible permissions on files and directories. [print$] comment = Windows print driver files # Make sure the permissions on the top level directory # are 2775 with group ownership belonging to ntadmin path = /export/smb/printers read only = yes write list = +ntadmin inherit permissions = yes We must create two directories within the top level directory of this share. The WIN40 directory will hold drivers for print drivers for Windows 95/98 and Millenium. The W32X86 directory is needed for 32-bit Windows NT variants running on Intel platforms. $ cd /export/smb/printers $ mkdir WIN40 W32X86 $ chgrp ntadmin W* $ chmod 2775 W*
In addition to the driver files, a print server must maintain metadata about how the driver files are grouped together (ntdrivers.tdb); what paper sizes are supported by the server (ntforms.tdb); and printer attributes such as duplex settings, page orientation, and the currently assigned driver (ntprinters.tdb).[*] All three tdb files are stored in a Samba lock directory (/var/lib/samba or /usr/local/samba/var/locks). The authorization to update driver files is strictly controlled by the filesystem permissions and any access parameters associated with the file share. Updating information stored in these printing tdbs requires possession of the SePrintOperatorPrivilege. Refer to Chapter 5 if you need a refresher course on managing user rights in Samba.
Prior to 3.0.11, Samba relied on the printer admin option for authorizing users to update information in the printing tdbs. This parameter has since been deprecated and will be removed in a future release. Now that we have moved past the prerequisite file shares and permissions, we can focus on installing a print driver and binding it to a printer. 7.7.2. Installing Print DriversWindows 2000 and later clients provide an interface to upload print drivers without associating the driver with any specific printer. The print driver management screen is integrated into the server properties dialog box. You can reach the Server Properties for a Samba host by browsing to the server's Printers folder from a client running Windows 2000 or later. Windows XP and Windows Server 2003 have renamed this folder to Printers and Faxes. Once you have arrived at the folder, select the File Figure 7-3. Driver tab in the Server Properties dialog box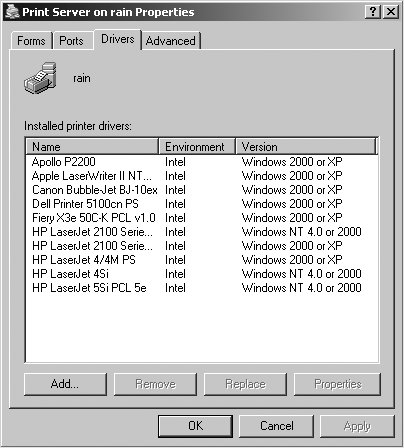 If you have connected using an account that posseses the SePrintOperatorPrivilege privilege, the Add, Remove, and Replace buttons are available. If they are disabled, make sure that your user account has the necessary privilege or that you are a member of a group that does. Also remember that updates to privilege assignments are applied only for a new CIFS session. So if the right privilege was assigned while the account was connected, you have to disconnect and relogin to the server. The most effective means of ensuring that the session is torn down and reestablished is to log out and back in again on the Windows client. A new driver upload is begun by clicking Add. The Add Printer Driver Wizard (APDW) dialog box shown in Figure 7-4 will appear. Figure 7-4. Add Printer Driver Wizard dialog box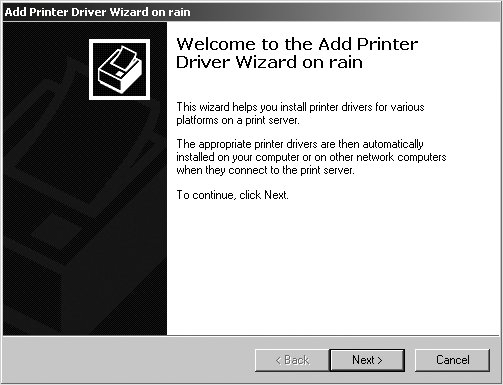 Click Next to get to the Driver Selection dialog box. At this point, you can either select the print drivers distributed with Windows or select an alternative location in case you have downloaded newer or additional drivers from the printer's manufacturer. Once you have selected a driver to upload to the server, Windows prompts you to select the architectures to support with the driver to install. For example, if you wish to install a driver with support for Windows 2000 and NT clients as well as Windows 9x, it is possible to do so here. You can always upload other architectures for a given driver by running the APDW again. Windows asks you for driver files for any alternative architectures that have been selected once it begins copying the files to the server. Windows NT-only drivers are often referred to as version 2 drivers, because the driver files are stored under \\server\print$\W32X86\2 directory. Windows 2000 and later drivers are referred to as version 3 and hence stored in \\server\print$\W32X86\3. The real difference between these two types of drivers is how they interact with the Windows kernel. Version 2 drivers are kernel-mode drivers, and version 3 drivers are executed in user-space. The final dialog box allows you to begin the copying process and issue the commands to create the printer driver object on the destination machine. If the process completes successfully, you will see the newly installed driver listed in the Server Properties window. If the driver files fail to copy with an "Access Denied" error message, verify that the account used to upload the drivers has write permission to the [print$] share and its immediate subdirectories. 7.7.3. Assigning Print Drivers and Initializing DeviceModesOnce the driver has been installed on the server, it is time to associate it with a specific printer. A printer created on a Windows server uses the driver libraries to fill in a data structure referred to as a DeviceMode for options such as duplex printing features and landscape or portrait page orientiation. This DeviceMode and associated registry data (PrinterDriverData) define the printer's settings. A Windows print server executes the driver when it is assigned to a printer in order to generate the required printer data. Samba is not able to natively execute Win32 code nor is it restricted to Intel hardware. Therefore, a little bit of assistance is needed to generate and store the required settings for a printer. To bind a driver to a specific printer, first launch the printer properties dialog for that device by right-clicking the printer's icon and selecting the Properties option. You will be immediately informed that the server does not have an appropriate driver installed for the printer (because you have not assigned one yet) and asked if you would like to install a local copy of the driver. Your first inclination may be to reply Yes, because you are trying to assign a driver to the printer. However, doing so installs a new print driver on the client machine only and creates a local print object that points back to the server. You want to assign a driver to the printer object on the server, not the client. Selecting No here causes the Properties dialog box to be launched instead, as shown in Figure 7-5. Figure 7-5. Printer Properties dialog box for \\rain\hp2100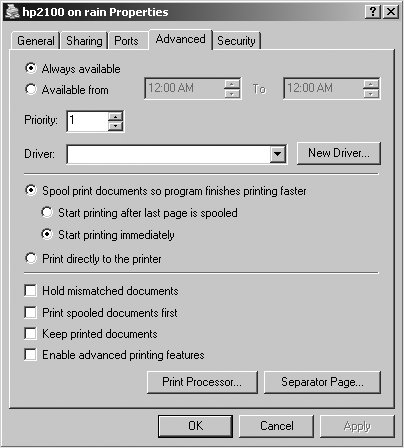 The driver selection list can be found under the Advanced tab. Selecting this drop-down list displays the names of the Windows NT and 2000/XP drivers installed on the server. Drivers that have only a Windows 9x version installed are not displayed. You can select any one of the drivers listed and then click the OK button. If all of the options are disabled, this means that you have not connected to the server as a user possessing the SePrintOperatorPrivilege. (In the next section, we show how you can grant administrative rights for a single printer to a user or group.) If all goes well, the client will make the change to the printer and the dialog box will silently go away. Upon returning to the Printers and Faxes folder on the Samba server, you will likely notice that the printer has been renamed to match the driver name just assigned. On a Windows print server, the printer name and the share name are stored as two different attributes of the printer. To be fully compatible and allow migrations from Windows print servers, Samba has to support renaming requests from clients such as this one. Some people like it; others find it annoying. If you would prefer to prevent clients from renaming the printer displayed in the "Printers and Faxes" window, enable the force printername parameter in the print service definition. This time, when the printer properties dialog box is launched, you should no longer be prompted to install a driver on the client. In fact, if all has gone well, the client has already silently downloaded and installed the driver in order to display all of the associated settings. There are two things that can occur when the client attempts to launch the properties dialog box. The desired result is that window displays without any errors. However, some drivers will crash the Windows Explorer. or perhaps even the client's spooler service itself.
Client crashes at this stage are caused by the lack of a printer DeviceMode. Some drivers appear to be more sensitive (or more assuming) than others. One workaround is to have smbd create a generic DeviceMode for the printer, by setting default devmode = yes in the print share's section of smb.conf. Frequently, this step is enough to at least display the printer's Properties window. Once the properties are displayed, navigate to the Advanced tab and select the Printing Defaults . . . button. Windows 2000 introduced the concept of Printing Preferences, which are stored on a per-user basis, and Printing Defaults, which are stored with the printer on the server. Note that Windows NT 4.0 supports only global printer settings for all users and Windows 9x supports only printer preferences, and only on the local system. In fact, Windows 9x ignores attributes assigned to a printer on the server and initializes the local printer object to the driver defaults. When you set a value in the Printing Defaults window, the client executes the driver on your behalf and stores the required printer data on the server. Setting any attribute stored in the DeviceMode appears to have the same effect, but the attribute that has been most tested is the page orientation. A change from portrait to landscape and back, clicking Apply between the changes, initializes the printer on the server. Figure 7-6 displays the page orientation settings for an HP LaserJet printer. Figure 7-6. Initializing printer data using the page orientation field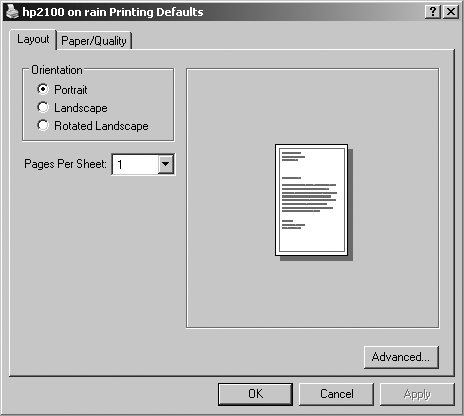 Finally, exit from the property dialog boxes by clicking OK until you are back to the Printer and Faxes folder. The printer is now ready for use by Windows clients. 7.7.4. Testing Point and PrintIf everything has been sucessfully completed up to this point, testing p-n-p from a client should go smoothly. Select a Windows client that matches the driver architectures installed on the server for your printer. There are many ways to establish a printer connection in Windows, and it can also vary from one OS release to another. One method that is common to all Windows clients is to browse to the server's Printers and Faxes folder and right-click on the printer. When you select Connect from the menu, the client downloads the driver and creates a printer connection that can be seen from the client's own Printers folder (Start Figure 7-7. Printer connection to \\rain\hp2100 on a Windows XP client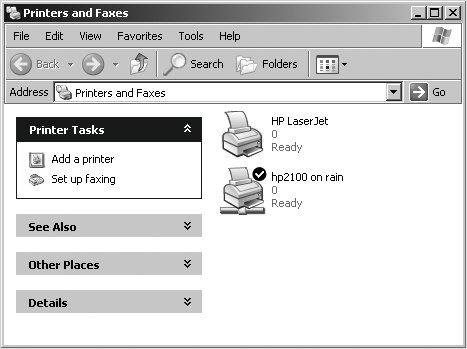 Because they use an older printing protocol, Windows 95/98/Me never see the Printers and Faxes folder on the Samba server. However, it is still possible to browse to the server, right-click a print share, and select Install from the context menu. The client will download the driver and create a local printer pointing back to the server. It will not, however, associate any of the printer settings on the server, such as duplex or page size, with the local printer object. The user on these systems must manually define these settings for each printer he connects to. Failures when connecting to a printer can often be traced to authorization failures. In the next section, we examine how to enforce security checks on on Samba print shares. |

 Server Properties for the dialog box shown in Figure 7-3.
EAN: 2147483647
Pages: 135