Foundation and Supplemental Topics
Advanced Signature ConfigurationTuning existing signatures and creating custom signatures is a powerful feature of Cisco IPS. Understanding this functionality enables you to fine-tune your Cisco IPS solution to provide the best protection for your network. This chapter focuses on the following:
Before broaching these important topics, however, it is helpful to explain the following topics in more detail:
Regular Expressions String MatchingMany signatures look for intrusive activity by searching for patterns in the analyzed traffic. These patterns are specified as regular expressions (regex). You create regex by using a powerful and flexible notational language that allows you to describe simple as well as complex textual patterns. Using various special characters, you can easily specify succinct expressions that search for almost any arbitrary pattern. The regex syntax options (for Cisco IPS version 5.0) are shown in Table 7-2.
Understanding regular expressions can be confusing if you are not familiar with them. To help clarify how regular expressions operate, Table 7-3 outlines numerous regular expressions in conjunction with the patterns that they try to match.
Signature FieldsTo understand how to tune existing signatures or create custom signatures, you must understand the various fields that comprise a Cisco IPS signature. The fields fall into the following categories:
Basic Signature FieldsEach signature has the following four basic fields that identify the signature:
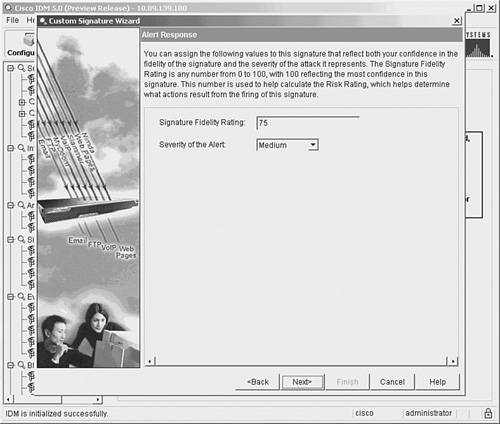
Together, the Signature ID and SubSignature ID uniquely identify the signature. Both fields are numeric. The SubSignature ID enables you to have multiple signatures under a broader signature identified by the Signature ID. The Signature Fidelity Rating indicates the likelihood that the signature will detect attack traffic (as opposed to normal user traffic) without the sensor having specific knowledge about the target system's operating system or applications. The signature creator assigns a default Signature Fidelity Rating for each signature, but you can change this value if needed. For any custom signatures that you create, you will need to assign an appropriate Signature Fidelity Rating. To help network security administrators determine the potential severity of a signature, each signature has an associated Alert Severity. The Alert Severity level indicates the relative seriousness of the traffic that has been detected. Each signature has a default Alert Severity, but you can change this value to match your own network environment. The defined severity levels for Cisco IPS signatures, from highest to lowest, are as follows:
Note When a signature triggers, the event is assigned a Risk Rating based on the combined values of the following items:
Signature Description FieldsSignature description fields define some basic characteristics of a signature. You can use these descriptions to differentiate signatures and textually explain their functionality. Signature descriptions comprise the following five fields:
The signature name provides a textual description for a signature. This name is more meaningful for the security analyst than the basic Signature ID field, which identifies the signature by a numeric value. The Alert Notes and User Comments fields enable you to record notes about the signature and how it operates on your network. Similarly, the Alert Traits field is a numeric field (0 65535) you can use to develop your own custom categorization scheme. The Release field indicates the software release at which the signature was introduced into the Cisco IPS software. Engine-Specific FieldsEngine-specific fields enable you to define fields that determine which type of network traffic the signature will match. Each engine has unique characteristics. Refer to Chapter 6, "Cisco IPS Signature Engines," for more information on engine-specific fields. Event Counter FieldsBy configuring the following event counter fields, you specify how many instances of the signature's traffic are required to cause an alert:
The Event Count field identifies how many instances of the signature's traffic need to occur before an alert is generated. The Event Count Key field determines which IP addresses or ports are used when determining unique instances of the signature's traffic. Possible values for the Event Count Key are as follows:
Note For most signatures, the attacker address value refers to the source IP address of the offending network traffic, whereas the victim address value refers to the destination IP address of the offending network traffic. If the Swap Attacker Victim signature field is set to Yes, then the addresses are reversed, with the attacker address being the destination IP address of the traffic and the victim address being the source address of the traffic. The final event counter parameter is the Alert Interval. By specifying an Alert Interval, you indicate the time period (in seconds) over which the sensor must see the number of instances of the intrusive traffic equal to the Event Count in order to generate an alert. For instance, if the Alert Interval is set to 60 and the Event Count is 5, then the sensor must see five instances of the signature's traffic in 60 seconds before it generates an alert. At the end of the alert interval, the instance count is reset to 0. You can also configure a signature without an Alert Interval parameter. In that situation, an alert is generated when the instances of the signature's traffic reach the Event Count, regardless of the time interval. Alert Frequency FieldsManaging alerts efficiently is vital to the success of your Cisco IPS deployment. To enhance your ability to control the volume of alerts generated by your sensors, Cisco IPS supports several alert modes (including alert summarization). Each of the alert summary modes is designed to assist you in regulating the number of alerts generated by intrusive traffic in different situations. Alert frequency fields are explained in detail in Chapter 5, "Basic Cisco IPS Signature Configuration." Status FieldsThe following status fields indicate whether the signature is enabled and whether the signature has been retired:
The valid options for each field are Yes and No. The main difference between the two options is that disabling a signature only prevents it from generating alerts. Retiring a signature actually removes the signature from the signature engine, thus preventing the signature from having any impact on the sensor's performance. Meta-Event GeneratorA powerful new functionality incorporated into Cisco IPS version 5.0 is the Meta-Event Generator (MEG). The MEG enables you to create compound signatures based on multiple individual signatures. For instance, suppose that a new attack triggers the following five existing signatures:
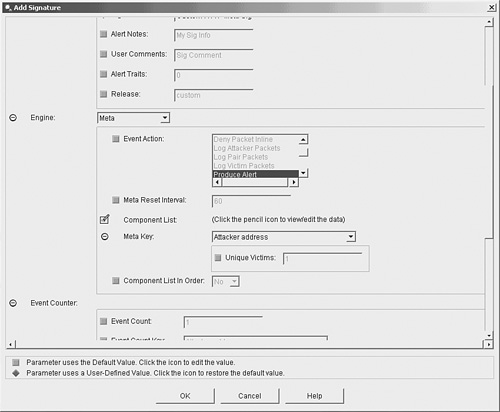
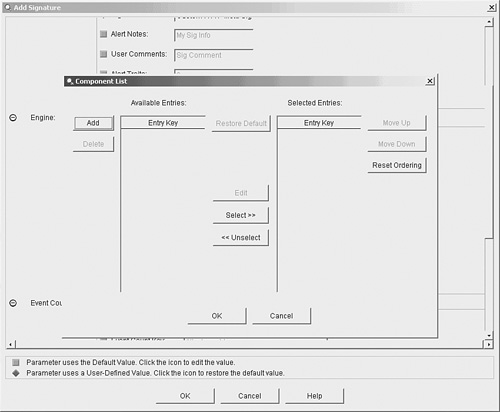
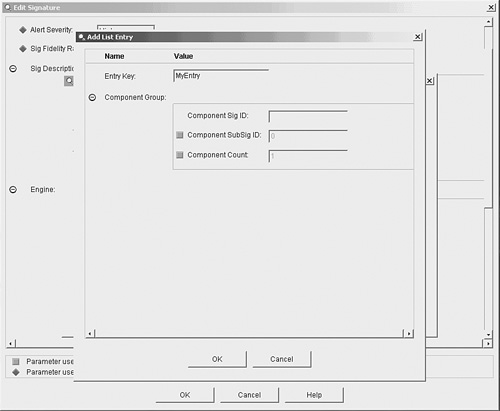
By default, these signatures are not enabled. You could enable each of these signatures and have your security analyst try to determine when all of the five signatures trigger within a specific period of time (potentially indicating a new attack). This correlation, however, can become very difficult if some of these signatures are triggering because of other traffic on the network (not related to traffic from your new attack). Using the MEG, you can easily create a compound signature that triggers only when each of the five individual signatures trigger within a specific time period. When defining a meta signature (a signature based on the meta signature engine), you need to define the following parameters:
Note Besides defining individual signatures based on the meta signature engine, you must also verify that the MEG is enabled (the default) in order to use these signatures. You enable MEG by selecting the Use Meta Event Generator check box on the General Settings configuration screen (see Figure 7-1), which you get to by clicking Event Action Rules > General Settings. Figure 7-1. General Settings Configuration Screen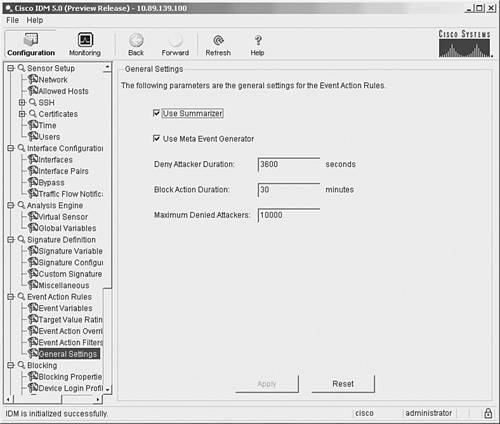 In the ongoing example, suppose that you want to trigger your new meta signature when the five signatures all occur within 90 seconds in the following order:
Furthermore, you want the signature to trigger when all of the signatures originate from a single attacker (or source) IP address. You also want to use the following basic signature parameters:
The steps to define the new meta signature are as follows:
Now when your new meta signature generates an alert, you know that all five of the configured signatures have been detected in a specific order within 90 seconds. This automatic correlation performed by the sensor software is much more effective than manually performing the correlation based on the events generated by the individual signatures. Furthermore, using these meta signatures provides you with the ability to create very complex signatures with a minimal amount of effort. Understanding HTTP and FTP Application Policy EnforcementHTTP is a protocol that commonly traverses firewalls on many networks. Because of this, many applications (and attackers) have started using this protocol to tunnel non-HTTP traffic through firewalls in an attempt to circumvent the security policies on various networks. Cisco IPS version 5.0 enables you to conduct a more thorough analysis of HTTP and FTP through application policy enforcement. Currently, application policy enforcement is available for both HTTP and FTP. Some HTTP checks include the following:
Using a destination port of 80 for traffic that is not related to HTTP is known as tunneling traffic through port 80, since port 80 is allowed to provide HTTP access. The easiest way to detect this traffic is to compare traffic going to port 80 against the structure specified in RFC 2616, "Hypertext Transfer Protocol." For instance, a built-in signature that checks for RFC 2616 compliance is signature 12674, "Alarm on non-http traffic." Comparing traffic against the HTTP RFC can also identify malformed requests and illegal HTTP methods. HTTP traffic can also include traffic encoded using various MIME types. Some of these encodings are commonly used worms and viruses attempting to bypass detection (since the expected content has been encoded in a different form). In other situations your security policy may not allow transferring data using certain transfer encoding mechanisms. You can create signatures using application policy enforcement to filter out unwanted MIME extensions. For instance signature 12090, "Define Transfer-Encoding Gzip," can be enabled to disallow the transfer of gzip-compressed files to port 80. Finally, you can regulate which HTTP methods are allowed based on your security policy. For instance, your security policy may disallow your internal web servers from enabling certain HTTP methods (such as TRACE and DELETE). You can use the following signatures to enforce these security policy requirements:
The following signature engines provide the HTTP and FTP application policy enforcement functionality:
Note The Application Inspection and Control (AIC) engines provide deep-packet inspection from Layer 4 through Layer 7, enabling a much more granular verification of your defined security policy. Tuning an Existing SignatureYou can tune the characteristics for all the signatures in Cisco IPS. This tuning capability enables you to customize Cisco IPS to suit many different network environments. Because of the comprehensive list of available built-in signatures, most of your signature configuration will probably involve tuning existing signatures. Furthermore, you can easily restore the default values for any signature field that has been altered simply by clicking on the diamond to the left of the field. Tuning signatures involves performing one or more of the following:
Note The following actions are generally not considered signature tuning:
Basically, tuning a built-in signature involves changing the way it operates to match the needs of your network environment. A simple example of tuning would be to change the Summary mode from Fire Once to one of the alarm summarization modes (such as Global Summarize) to reduce the quantity of alarms that your security operator needs to analyze (especially for certain low-severity signatures). The basic steps involved in tuning a Cisco IPS signature are as follows:
Tuning ExampleAn example may facilitate your understanding of signature tuning. Suppose that the following factors apply to your business:
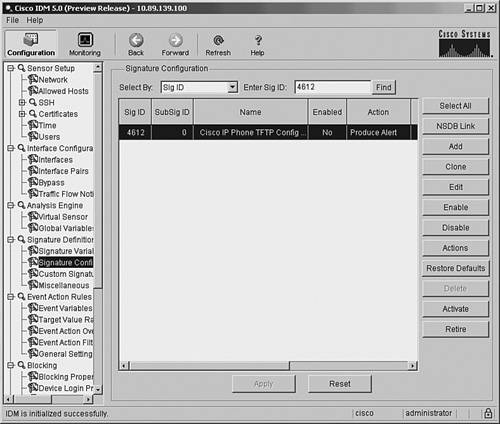
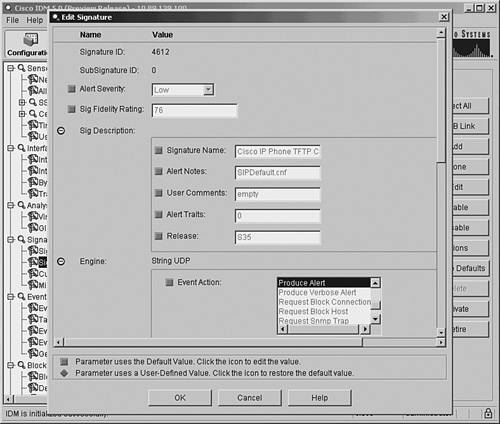
Examining the signatures provided with Cisco IPS, you see the built-in signature 4612, "Cisco IP Phone TFTP Config Retrieve." This signature is close to what you want, but it requires some tuning since it does not provide the following functionality:
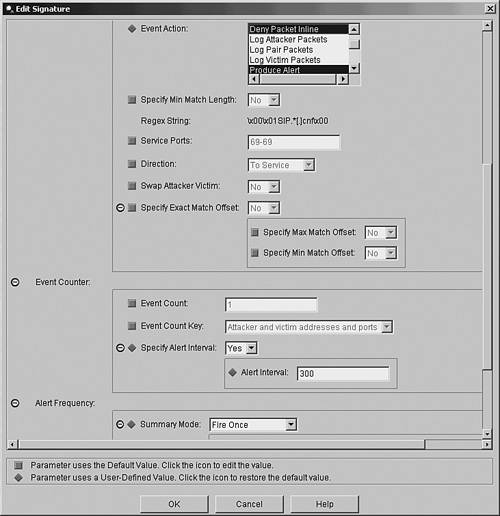
The following steps indicate how to use IDM to tune this signature to match your requirements:
Now that you have tuned the existing signature, there is potentially one more step in this example that is necessary to make the signature effective. In its current state, the signature will work correctly only if your TFTP server is on the IP Phone network segment and the Cisco IPS sensor is operating inline between the IP Phone network segment and the rest of the network. In this configuration, the traffic between the IP phones and the TFTP server (both on the IP Phone network segment) will not be examined by the sensor (so only external traffic is prevented from accessing the TFTP server on the IP Phone network segment). If the sensor is located in a location where it examines TFTP requests generated by your IP phones, then you must also configure an event filter to allow access for the IP phones while allowing the signature to restrict traffic for other systems. Configuring event filters is explained in Chapter 8, "Sensor Tuning." Creating a Custom SignatureWith the wealth of signatures supplied by Cisco IPS, you should rarely need to create custom signatures. You can usually modify or tune existing signatures to meet your intrusion-prevention needs. Sometimes, however, custom signatures are necessary. When creating custom signatures, you need to complete the following tasks:
Choose a Signature EngineThe various Cisco IPS signatures enable you to create a wide range of custom signatures. When choosing which signature engine to use for a new signature, you need to consider several factors about the traffic being detected, such as the following:
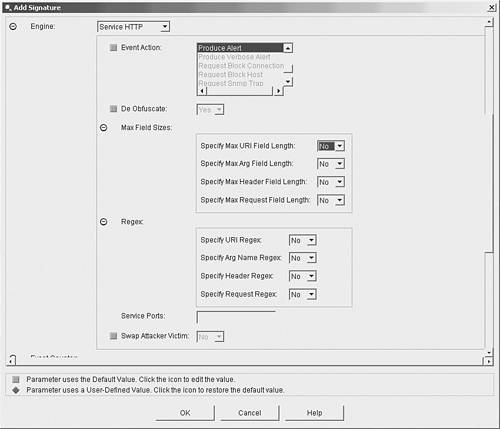
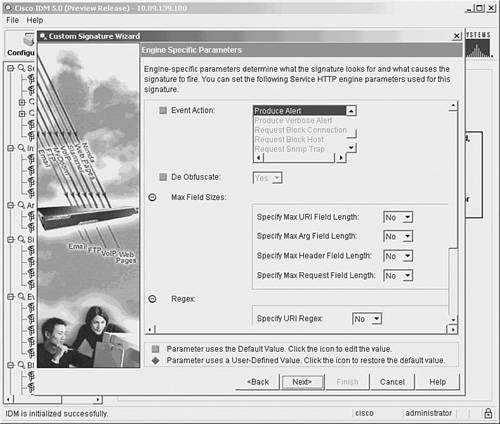
Network ProtocolBefore creating a new signature, you must first determine the network protocol that needs to be examined to locate the intrusive traffic. Normally, for instance, the protocol for your signatures is fixed based on the signature engine selected. Sometimes you may need to use a signature engine that enables you to specify the protocol to look for. For instance, suppose you want to create an Enhanced Interior Gateway Routing Protocol (EIGRP) signature. This signature requires a signature engine that enables you to specify the IP protocol number because EIGRP uses IP protocol 88. A quick examination of the signature engines reveals that the Atomic IP engine provides the capability to specify the IP protocol number by using the Specify Layer 4 Protocol parameter. Therefore, this engine is a probably a good candidate engine for your new signature. Target AddressAttacks are directed at specific systems on your network. Some attacks target a specific host whereas others target many hosts on the network. For instance, if you are creating a signature to detect an attack that floods your network with Internet Control Message Protocol (ICMP) traffic, you will probably use a Flood signature engine. If the target is a single host, then you will use the Flood Host signature engine. If, on the other hand, you are concerned about a flood of traffic against your network, you will use the Flood Net signature engine. Target PortDetermine the anticipated port or ports that the attack traffic will be sent to. For instance, the Sweep signature engine enables you to detect User Datagram Protocol (UDP) connections to a single UDP port or multiple UDP ports. Attack TypeSometimes the type of attack that you want to detect will lead you toward the appropriate signature engine. Flood signature engines, for instance, are almost always used to detect denial-of-service (DoS) attacks. Similarly, sweep signature engines are usually used to detect reconnaissance attacks against your network. Note Although the various engines were designed to detect specific types of attacks, their detection abilities are not limited to those attacks. For instance, some DoS attacks are detected by using atomic signature engines. Inspection CriteriaSome signatures detect specific packet characteristics such as IP addresses and ports or header length fields. Other signatures require the signature engine to analyze the payload of a packet for a specific string pattern. Many signature engines enable you to specify a string pattern that the signature will trigger on when it is detected in network traffic. The string signature engines enable you to search for a specific pattern in various types of network traffic. Verify Existing FunctionalityAfter you have determined the signature engine that provides the functionality your custom signature needs, you need to verify that an existing signature does not already perform the functionality you desire. You can do this by examining all of the signatures supported by the chosen engine to determine if any of them already do what you want your new signature to accomplish. In some situations, you may be able to easily tune an existing signature to gain the new functionality you desire. Note Besides examining all of the signatures for a specific engine, you may also view the available signatures based on another characteristic (such as L2/L3/L4 protocol or attack), looking for signatures that use the signature engine that you are interested in. This will narrow the list of available signatures that you need to analyze. Define Signature ParametersAfter selecting a signature engine, you need to decide which values you will use for all of the required parameters as well as determine which optional parameters you need to configure to match the intrusive traffic that you want to detect. When defining parameters, try to consider situations in which the new signature may accidentally alarm on normal user activity. For instance, suppose that you create a signature to detect spam e-mail messages by looking for e-mail messages addressed to a large number of recipients. Certain mailing list programs generate mail messages that have many recipients as well; these messages should not be considered spam. Minimizing false positives is a key consideration when you develop custom signatures. Note Spam refers to unsolicited e-mail messages (all having essentially the same content) that are sent to a large number of recipients, usually to promote products or services. Test Signature EffectivenessOnce you have created a custom signature, you need to test the signature on your live network. First verify that the signature detects the intrusive traffic that you built it to detect. (You might observe that the new signature alarms on traffic that you did not consider.) You should also make sure that your new signature does not significantly impact the performance of your senor. Custom Signature ScenarioSuppose that your web server contains sensitive files that are located in a directory called Corporate Reports. You might want to create a custom signature that alarms when HTTP requests access this directory. Note To minimize false positives, you will also probably want to establish signature filters that prevent the signature from triggering when the Corporate Reports directory is accessed from legitimate systems or networks. To define your custom signature, you need to first choose the signature engine that best fits the functionality required. In this situation, you need to search for HTTP requests that access a specific directory on your web server. The Service HTTP signature engine contains a parameter named URI Regex that enables you to define a search pattern that examines the uniform resource identifier (URI) portion of an HTTP request. That is exactly the functionality you need. Besides the default values, your custom signature will use the following parameters:
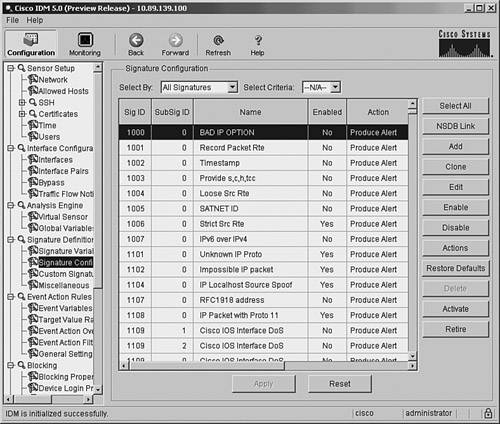
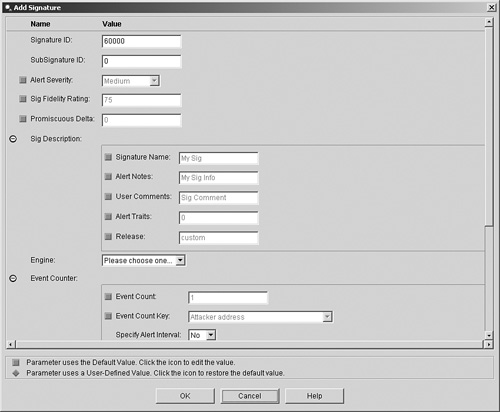
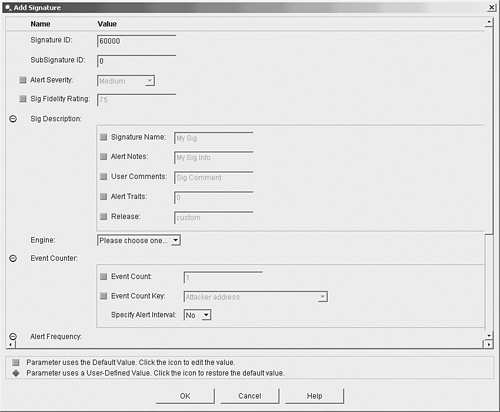
Creating Custom Signatures Using IDMOne way to create a custom signature in IDM is by using the Add button from the signature configuration screen. Creating your custom HTTP signature by using this approach involves the following steps:
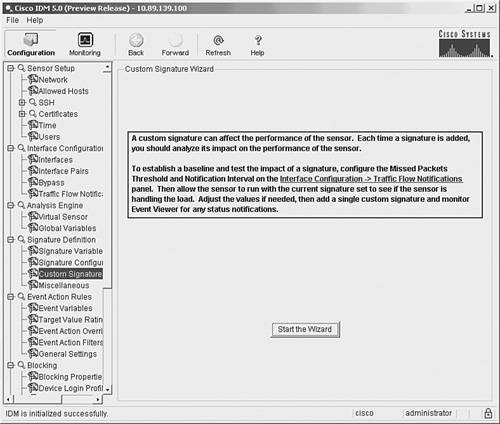
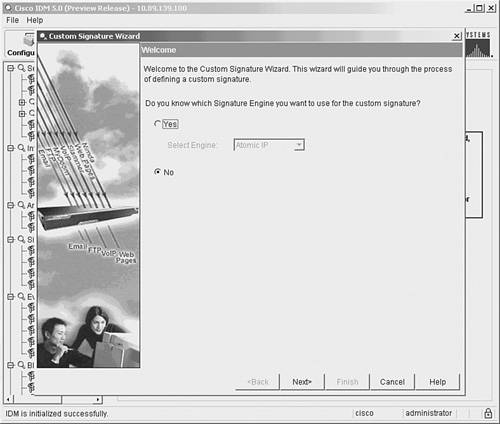
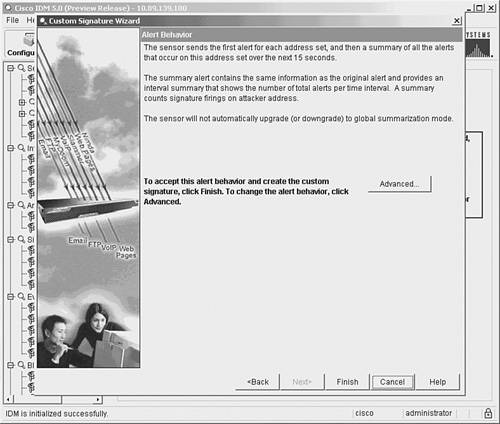
Note By default, the De Obfuscate parameter is set to Yes. This causes the signature engine to convert different representations (such as Unicode characters) before examining the HTTP request. That should enable your signature to match on various encodings for the CorporateReports directory using the single regex. Using IDM Custom Signature WizardIn addition to using the Add button from the signature configuration screen, you can also create custom signatures by using the Custom Signature Wizard. Unlike using the basic Add functionality, in the Custom Signature Wizard you use a series of graphical windows to simplify the creation process. Creating your custom HTTP signature by using the Custom Signature Wizard involves the following steps:
Figure 7-18. Create Custom Signature Popup Window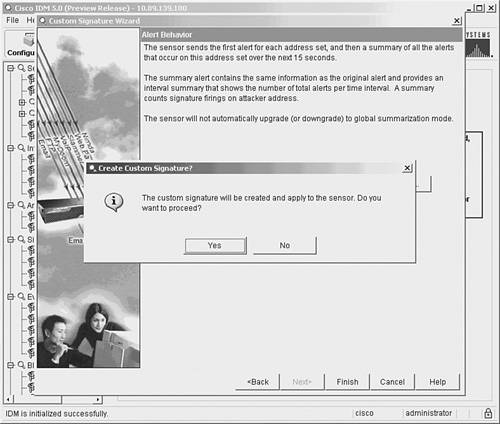 Cloning an Existing SignatureSometimes you need to create a new signature that closely matches an existing signature. Instead of using the Add button on the Signature Configuration screen, you can use the Clone button. When you use Clone instead of Add, most of the signature fields are already populated with the values of the signature being cloned (the highlighted signature). Other field values are changed. For example, a new Signature ID is assigned, and the Signature Name field is assigned the original signature's name with the word Clone appended to it. Other than having some of the fields already populated, the process for adding a signature by using Clone is identical to the process for adding a signature using Add. |

EAN: 2147483647
Pages: 119