| The process of selecting a record to delete is similar to the process of selecting a record to update. You need to provide a way for the user to select the record to delete, either with a master page or with a search page. Then you add links and URL parameters to the master page for selecting the record. Once you've finished making it possible to select the record, you must be able to display it on the delete page, which involves creating the delete page and adding an HTML form. The form includes a hidden dynamic form field for the primary key so that the server can identify the unique record to delete when the form is submitted. In addition to the form, the delete page includes dynamic text fields to display the record data. The user simply clicks a button to submit the form data and delete the record. In the tasks in this section, you will modify the master page you created earlier in this chapter so that you have a master page for selecting a record to delete; create a delete page and add a filtered recordset; add a dynamic form; and then display the record to be deleted and add the finishing touches to the dynamic form. To select a record to delete: 1. | Open the select2.php page you saved in the last task. Save it as select3.php.
| 2. | Select the link in the dynamic table, and change the page name in the link to confirmDelete.php (Figure 12.41). Make sure you change only the link name, not the URL parameter code at the end of the link name. Save the page.
Figure 12.41. Change the name of the linked page in the Property inspector. 
You've just created the master page for selecting a record to delete. It is exactly the same as the previous master pages in this chapter, except that the link name is different.
|
To create a delete page and a filtered recordset: 1. | Open a new PHP page by choosing File > New > Dynamic page > PHP. Save it as confirmDelete.php.
| 2. | Follow Steps 2 through 10 of "To create an update page and a filtered recordset," earlier in this chapter. Name the recordset deleteRecord.
You've just created a delete page with a filtered recordset, which you'll use in the following task so that you can display data from the record that's selected on the master page.
|
To add a dynamic delete form: 1. | Open the confirmDelete.php page that you created in the preceding task.
| 2. | From the Insert menu, select Form > Form to add a form to your page.
| 3. | From the Insert menu, select Form > Hidden Field to add a hidden field to your page (Figure 12.42).
Figure 12.42. Use the Insert menu to add a Hidden Field to your form. 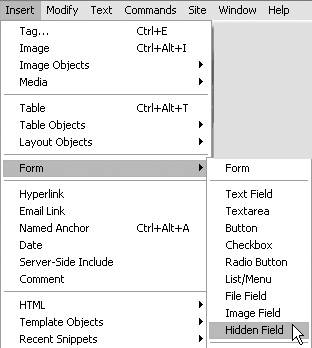
You've added a hidden field to the form, which you'll use to store the ID of the record that's selected on the master page.
| 4. | In Design view, select the hidden field (Figure 12.43). (If you don't see the yellow shield icon that represents the hidden field, choose View > Visual Aids > Invisible Elements.)
Figure 12.43. The yellow shield icon is used in Design view to represent a hidden form field. 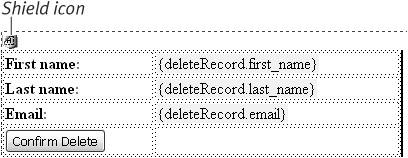
| 5. | In the Property inspector, type record in the HiddenField name box, and click the lightning bolt button next to the Value field (Figure 12.44).
Figure 12.44. Enter a name in the Hidden-Field name box, and click the lightning bolt button next to the Value field to bind dynamic data to this field. 
We're naming the hidden form field record because it stores the value of the URL parameter named record that you added to the end of the link on the master page. The value of the record parameter is an ID for a record in the members table.
The Dynamic Data dialog appears. You'll bind the id field to the record field using this dialog.
| 6. | Click the plus button to expand the deleteRecord recordset and display the field names. Select the id field (Figure 12.45).
Figure 12.45. Select the id field in the deleteRecord recordset to bind this field to the hidden field. 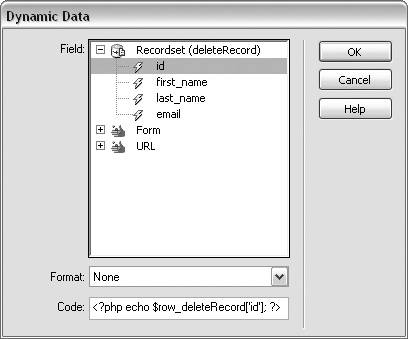
In the Code field, Dreamweaver automatically inserts PHP code to bind the data from the id field to the hidden field in the form.
You've just created a binding between the hidden form field and the primary key of the members table, the id field.
| 7. | Click OK to close the dialog and save the dynamic data.
| 8. | Save the page.
|
To display the record to delete: 1. | Open the confirmDelete.php page from the previous task.
| 2. | Place the insertion point inside the boundaries of the form. (If you don't see the form boundaries, choose View > Visual Aids > Invisible Elements.)
We'll insert the table within the form so that we can insert a button in a table cell in Step 9.
| 3. | Choose Insert > Table to add a table to your page (Figure 12.46). The Table dialog appears.
Figure 12.46. Use the Insert menu to add a table to your page (Insert > Table). 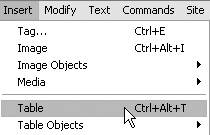
| 4. | In the Rows field, type 4 (Figure 12.47). In the Columns field, type 2. In the Table Width field, type 400, and select pixels from the drop-down list. In the Border Thickness field, type 0; in the Cell Padding field, type 2; and in the Cell Spacing field type 0. Click OK to close the dialog and insert the table.
Figure 12.47. In the Table dialog, set table properties, including number of rows and columns, border size, cell padding and cell spacing. 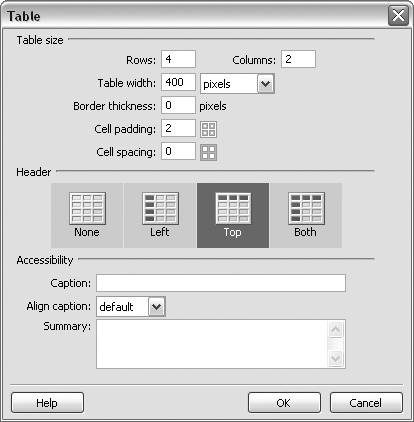
You've added a table with four rows and two columns that's 400 pixels wide. You'll use this table to display dynamic text from the deleteRecord recordset.
| 5. | In the Application panel group, click the Bindings tab to access the Bindings panel.
| 6. | Click the plus (+) button to expand the deleteRecord recordset and display the field names.
| 7. | Select the first_name field, and drag the field to the first cell in the second column of the table. Drag the last_name field to the second cell in the second column, and the email field to the third cell in the second column.
Dynamic text placeholders appear in each cell after you drag the field name to the cell.
| 8. | Add labels to the cells in the first column for First name, Last name, and Email (Figure 12.48).
Figure 12.48. Add labels and dynamic-text placeholders to the table cells. 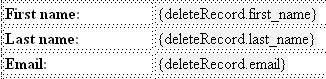
When the user clicks a link on the master page to select a record to delete, the selected record data for the first_name, last_name, and email fields appears in the table cells on the delete page.
| 9. | Place the insertion point in the last cell of the first column of the table (Figure 12.49). Choose Insert > Form > Button to add a submit button to the form.
Figure 12.49. Place the insertion point in the first cell in the last row of the table. 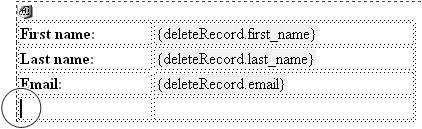
| 10. | In Design view, select the button. In the Property inspector, enter submit in the Button Name box (Figure 12.50). In the Value field, enter Confirm Delete. In the Action section, select the Submit Form radio button.
Figure 12.50. In the Property inspector, add a name, a value, and an action to the button. 
|
This completes the form, but the Delete Record server behavior needs to be added before you can use the button to delete the record. You'll complete the delete page by adding the Delete Record server behavior in the next section. |