Accessing the Toolbox
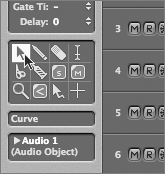
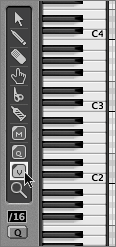
| Logic's toolbox offers essential graphic manipulation of data within a variety of windows. These tools are indispensable, changing the pointer to act in a variety of helpful ways. It is therefore extremely important that we have easy access to these regularly used objects. Let's take a moment to discuss the ways we can gain quick access to the toolbox. There are many areas within Logic that offer a toolbox. The choices represented change in correlation to a window or editor's function: Arrange window
Event List
Score Editor
Hyper Editor
Matrix Editor
Environment
Audio window
Sample Editor
Audio Configuration window
As you can see in the pictures above, these toolboxes vary in number as well as types of tools. Even so, there is a great deal of overlap with common tools (the Arrow, for instance). In all cases, the toolbox is located on the far left side of the screen, usually a distance away from where you wish to utilize the tool. This distance may seem small the first few times you drag your pointer across the screen, but if you find yourself switching tools often while editing (and most of us do), then this can grow to be tedious and un-ergonomic. In the following exercises, you will a look at Logic's shortcuts to allow quick access to the toolbox, enabling you to work in a more efficient manner. Using the Alternate ToolWhen working with objects in any window, you always have two tools available at the mouse position: the currently selected tool and an alternate tool available when depressing the Command key. Being able to switch at the place where you are actually performing your work (mouse position) enables you to quickly toggle back and forth between often-used tools, which speeds workflow.
This is referred to as the alternate tool. You can think of it as a momentary toggle to another tool that you preset. Assigning the Alternate ToolThe assignment of the alternate tool consists of two steps:
This assignment can be different for each window that has a toolbox. These alternate assignments are saved with the screenset, so let's add these to the screensets that you created earlier in this chapter.
You now have independent assignments for the alternate tool for each screenset. Try toggling back and forth with the alternate tool in each screenset (1 and 4). TIP Take some time to think about which tools are used most often in each of the editors, and assign alternate tools in your screensets using the technique you just learned. Quickly Accessing the Toolbox
This can save many a trip across the screen to select a new tool, bringing up the toolbox when and where you need it for editing. TIP Many users prefer assigning key commands to their most used tools. This has a distinct advantage in that it lets you access common tools that are shared by separate editors (the Arrow tool, for instance). Try searching for the tool names in the Key Commands window to see your choices. Working with Hardwired Toolbox CommandsJust as holding down the Command key lets you momentarily toggle to an alternate tool, Logic can carry out common functions by using tools in conjunction with a modifier key. These "hardwired" commands aren't listed within menus, so a list of the most useful ones is provided for reference.
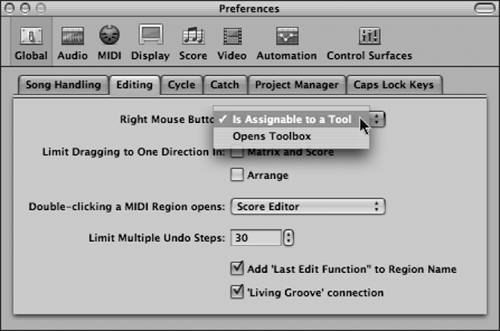
Controlling the Toolbox with a Two-Button MouseWhen using a two-button mouse with Logic, you gain more options to access the toolbox. To do this, you must first designate the function of the right mouse button, choosing between two modes of operation. Choosing the Mode of OperationThese options are set within Logic's preferences.
Assigning a ToolThe assignment of a tool to the right mouse button follows a similar process to that of assigning an alternate tool.
NOTE This assignment is independent with respect to the different editors. Each of Logic's editors offers slightly different tool choices, and each can have its own alternate or right-button tool. |
EAN: 2147483647
Pages: 166
- Chapter IV How Consumers Think About Interactive Aspects of Web Advertising
- Chapter VIII Personalization Systems and Their Deployment as Web Site Interface Design Decisions
- Chapter XI User Satisfaction with Web Portals: An Empirical Study
- Chapter XII Web Design and E-Commerce
- Chapter XIV Product Catalog and Shopping Cart Effective Design


