Section 10.7. Print Sharing
10.7. Print SharingSince the earliest AppleTalk networks, the Mac OS has focused on simplicity in its printer sharing. Mac OS X continues this tradition by including a print system that makes sharing your printers with others quite simple. It even lets you share printers with Windows and Unix users, just as easily as sharing them with another Mac. There are two ways to enable printer sharing on Tiger. You can either enable Printer Sharing in the Sharing preference panel (System Preferences Figure 10-10. Enabling printer sharing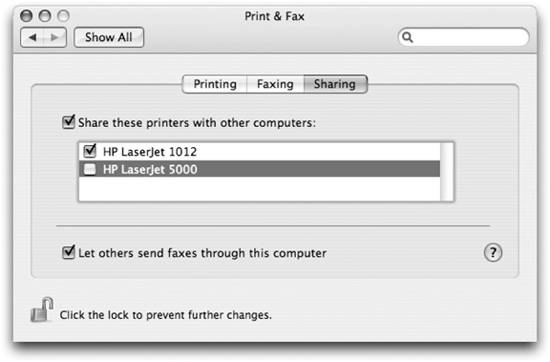 10.7.1. Connecting to the Shared PrintersSharing out your Mac's printers is the easy part. Things get more complicated when it's time to connect to the shared printer from another machine. Adding the printer to another Mac is a pretty simple process, just add it using Bonjour as discussed in the Adding and Configuring Printers section earlier in this chapter. For those Windows and Unix users, you'll find instructions for adding the printer to your system in the next section. 10.7.1.1. Connecting from a Windows machineAs mentioned earlier, you'll need to have both Windows Sharing and Printer Sharing enabled for Windows users to be able to print through to your Mac. Once that's done, you can navigate through the Windows Network Neighborhood, where your Mac sits side by side with the other Windows machines on your network. Double-clicking the Mac shows you its shares in Windows Explorer (as shown in Figure 10-11), including your shared printers. To add a shared printer to the Windows machine, double-click it in Windows Explorer and use the Add Printer wizard to confirm the make and model of the printer. If your printer model is not listed, you may need to acquire the appropriate driver from the printer's manufacturer. Once you've completed the wizard, the printer is available for use on the Windows machine. Figure 10-11. A Mac's shares viewed from Windows Explorer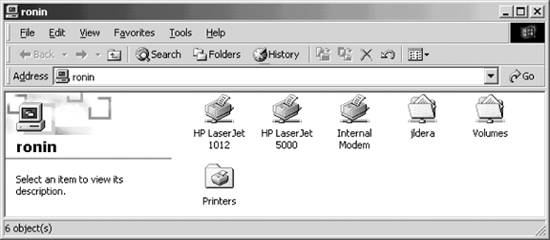 10.7.1.2. Connecting from a Unix clientThe same CUPS software that is included with Mac OS X also forms the print system of most Unix and Linux operating systems. Unix clients can connect to a Mac OS X printer using either IPP or LPD. To add a printer using CUPS, open a web browser on the Unix machine and navigate to http://localhost:631/. Using the web interface, select Manage Printers and then click the Add Printer button, as shown in Figure 10-12. Figure 10-12. Adding a printer using the CUPS web interface After entering the necessary credentials, you'll be prompted for some information about the printer. Enter the printer's name, location, and a brief description, and then click the Continue button. CUPS then asks you for the type of device to use. Select LPD/LPR Host and click Continue once again. On this page, you'll need to enter the IP address of your Mac and the queue name for the desired printer. After entering the address information for the printer, CUPS prompts you for the make and model of the printer. Finally, CUPS confirms that the printer was added successfully. At this point, you can click over to the Printers tab to double-check that the printer was added properly by printing a test page to it. |
 Sharing
  Services
 EAN: 2147483647
Pages: 166