Section 9.7. Disk Images
9.7. Disk ImagesDisk images (files with a .dmg extension) have become a frequent part of life on Mac OS X. Originally created to store the block-for-block contents of a floppy disk for ease of duplication, the disk images created and used by Mac OS X are based on a format called Universal Disk Image Format (UDIF). UDIF allows the storage of the same partition tables, disk drivers, and volumes found on physical disks, which lets disk images serve as intermediaries in the duplication of any kind of disk, including CDs and DVDs. Beyond their origin as a disk duplication formatand because of their ease of usedisk images are used by many software vendors, including Apple, as a distribution format instead of .sit (StuffIt), .tar, or .zip files. When you double-click a disk image (or use Disk Utility to open it), Mac OS X uses the contents of the image as the data for a disk that it mounts into the filesystem, which shows up in the Finder as shown in Figure 9-11; Figure 9-12 shows the same disk image in Disk Utility. Figure 9-11. A disk image mounted in the Finder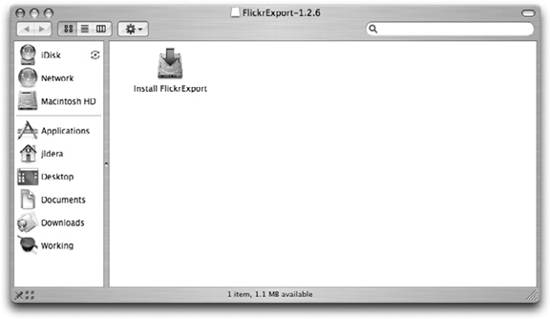 9.7.1. Types of Disk ImagesBecause they can be used for many different purposes, disk images have several different types . These are:
9.7.1.1. Encryption and disk imagesOne attribute that disk images don't share with their physical cousins is that all the data on a disk image can be encrypted. This enables you to store data on public disks that can't be accessed by anybody who doesn't have the proper password. For example, you could store valuable data on a keychain USB flash drive using an encrypted disk image with the knowledge that if somebody gains access to your keys, he won't be able to gain access to the data stored on the USB drive. These encryption features are also used by FileVault to protect your Home directory, if you enable this feature in System Preferences.
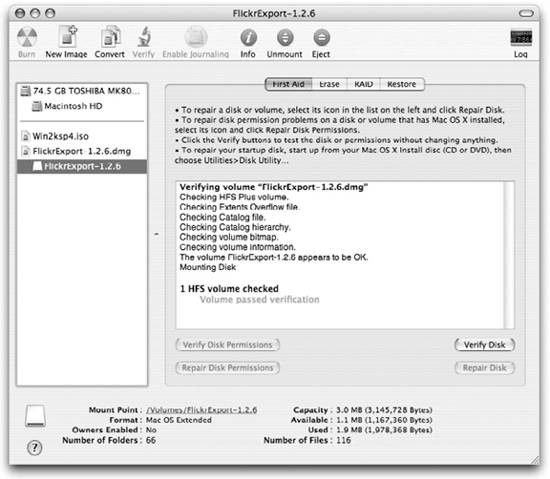
9.7.2. Working with Disk Images on the Command LineIn addition to Disk Utility, Mac OS X provides the hdiutil command-line tool to work with disk images. This tool has a wealth of options to create and manipulate disk images, many of which venture into very arcane territory. Some of the more commonly used features of hdiutil are covered here, so you can see how to manipulate disk images from the command line. To mount a disk image from the Terminal, use the following command: hdiutil mount imagename This command mounts the contents of the disk image into the /Volumes folder and it appears as a disk in the Finder's Sidebar. Example 9-7 shows a disk image named FlickrExport-1.2.6.dmg being mounted. Example 9-7. Mounting a disk image using hdiutil$ hdiutil mount FlickrExport-1.2.6.dmg /dev/disk2 /Volumes/FlickrExport-1.2.6 When you mount a disk image, you'll see several items that should be familiar from looking at disks. There is a series of slices to the disk, including a partition map. The output of the hdiutil command also gives you the filesystem location where the disk image was mounted. You aren't limited to mounting disk images into the /Volumes folder. The following command can be used to mount the contents of a disk image into any directory in the filesystem: hdiutil mount -mountpoint directory imagename The only catch here is that the directory you are mounting the disk drive into has to exist in the filesystem first. The contents of the directory that you are mounting the disk image into will also be hidden by the contents of the disk image. Example 9-8 shows an example of this command. Example 9-8. Mounting a disk image into the filesystem$ hdiutil mount -mountpoint /Foo test.dmg Password: Initializing... Verifying... Checksumming DDM... DDM: verified CRC32 $70362E53 Checksumming Apple (Apple_partition_map : 0)... Apple (Apple_partition_map : 0): verified C RC32 $DFA2282D Checksumming (Apple_Free : 1)... (Apple_Free : 1): verified CRC32 $00000000 Checksumming Apple_HFS_Untitled_2 (Apple_HFS : 2)... .............................................................................. Apple_HFS_Untitled_2 (Apple_HFS : 2): verified CRC32 $2877B09E Checksumming (Apple_Free : 3)... (Apple_Free : 3): verified CRC32 $00000000 Verification completed... verified CRC32 $3CAEE635 Attaching... Finishing... Finishing... /dev/disk5 Apple_partition_scheme /dev/disk5s1 Apple_partition_map /dev/disk5s3 Apple_HFS /Foo To unmount a disk image, use the following command: hdiutil unmount mountpoint Here, the mountpoint is the path of the folder where the disk image is mounted. 9.7.3. Creating a New Disk ImageTo create a new empty read/write disk image using Disk Utility:
Figure 9-13. Options for creating a disk image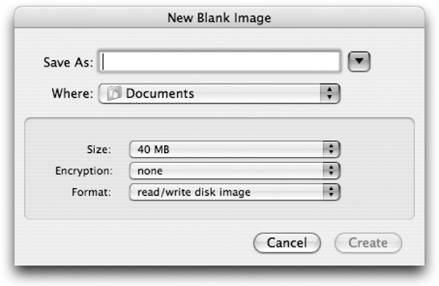 When you hit the Create button, a disk image is created and mounted in the Finder and into the filesystem in /Volumes. By default, the disk image contains a single HFS+ volume. To change the format of the volume to HFS or to UFS, simply highlight the volume in Disk Utility and use the Erase tab, just as you would with an actual physical disk. To create a disk image on the command line, use the following hdiutil command: hdiutil create -volname volumename -fs fstype -size size imagename where volumename is the name of volume you want to create, fstype is one of the filesystem types listed in Table 9-2, and size is the size of the disk image expressed as a number followed by either b (which stands for sectors, not bytes), k (for kilobytes), m (for megabytes), g (for gigabytes), t (for terabytes), p (for pentabytes), or e (for exabytes).
Example 9-9 shows how to create a 10 MB disk image. Example 9-9. Creating a new disk image$ hdiutil create -volname Foo -fs HFS+ -size 10m foo.dmg Initializing... Creating... ............................................................................... Finishing... created: /Users/duncan/foo.dmg To create an encrypted disk image, add the -encryption argument to the command. Applied to the command in Example 9-9, it looks like: hdiutil create -encryption -volname Foo -fs HFS+ -size 10m foo.dmg By default hdiutil create creates read/write disk image files. Creating other kinds of disk image files requires the use of the -format argument along with a four-letter code. The complete list of codes is given in Table 9-3. For example, to create a sparse disk image, you would use the following command: diskutil create -format UDSP -voname Foo -fs HFS+ size 10m foo.dmg
9.7.4. Creating a Disk Image from a FolderTo create a disk image that holds the contents of a folder using Disk Utility:
When you hit the Create button, the disk image is created. Unlike when you create an image, it will not be mounted. Figure 9-14. Options for creating a disk image from a directory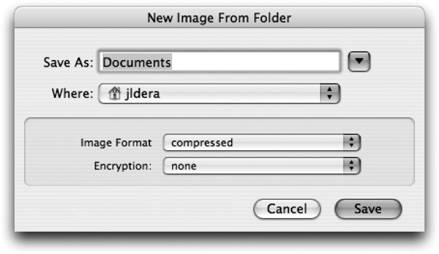 To create a disk image from a folder on the command line, use the following hdiutil command: hdiutil create -srcfolder folder imagename where folder is the path to the folder that you want to image and imagename is the name of the resulting image. Example 9-10 shows the creation of a disk image from the Documents directory in the Home directory. Example 9-10. Creating a disk image with the contents of a directory$ hdiutil create -srcfolder ~/Documents Documents.dmg ................................................................ created: /Users/jldera/Documents.dmg By default, the disk images that hdiutil creates from a directory are read-only. To create a read/write disk image, use the following syntax for the hdiutil command: hdiutil create -srcfolder folder -format UDIF imagename 9.7.5. Creating a Disk Image from a DeviceSince disk images can hold all the data on a disk drive, including the partition map, it's natural that you can create a disk image directly from either a disk drive or a volume on it. By creating a disk image from a drive, you can later restore that image back onto the drive or onto any other drive. You can use this for backup purposes or to create a master disk image for a department or company, making it easy for you to clone one installation onto every machine. To create a disk image from a disk drive using Disk Utility, select the drive and then select File
Creating an image of a device from the command line is a bit trickier. There isn't a direct command in hdiutil, so you have to use the convert command and convert from the disk's device in the /dev directory. Example 9-11 shows how to create a compressed disk image of an external FireWire drive mounted at /dev/disk1. Since this command accesses the raw device of the disk, the command must be run by a user with administrative privileges. Example 9-11. Creating a disk image from a device$ sudo hdiutil convert /dev/disk1 -format UDZO -o /FirewireBackup.dmg Preparing imaging engine... Reading DDM... (CRC32 $70362E53: DDM) Reading Apple_partition_map (0)... (CRC32 $DFA2282D: Apple_partition_map (0)) Reading Apple_Free (1)... (CRC32 $00000000: Apple_Free (1)) Reading Apple_HFS (2)... .............................................................................. (CRC32 $15DC1C94: Apple_HFS (2)) Reading Apple_Free (3)... ............................................................................... (CRC32 $00000000: Apple_Free (3)) Terminating imaging engine... Adding resources... ............................................................................... Elapsed Time: 11.784s (1 task, weight 100) File size: 1433395 bytes, Checksum: CRC32 $43A4EE39 Sectors processed: 58605120, 62161 compressed Speed: 2.6Mbytes/sec Savings: 100.0% created: FirewireBackup.dmg 9.7.6. Converting a Disk ImageOnce you have worked with a disk image in one format, such as read/write, you may want to convert it to read-only format, so that it is compressed and ready to post to the Internet, or convert it into a CD master that is ready for duplication. To convert an image using Disk Utility, use the Images Figure 9-15. Converting a disk image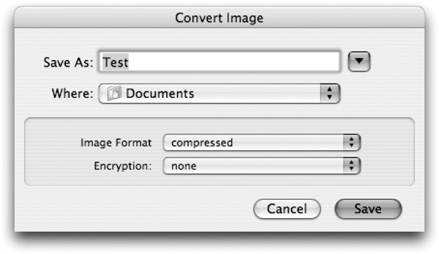 To convert a disk image on the command line, use the hdiutil convert command as follows: hdiutil convert -format format -o outputfile imagefile where format is the four-letter code that the disk image will be converted to, outputfile is where the new disk image will be saved, and imagefile is the disk image to convert. Example 9-12 shows how to use this command to convert a disk image to a compressed disk image. Example 9-12. Converting a disk image to a compressed disk image$ hdiutil convert -format UDZO -o Compressed.dmg Documents.dmg Preparing imaging engine... Reading DDM... (CRC32 $EEB3C0C1: DDM) Reading Apple_partition_map (0)... (CRC32 $5A2C9F73: Apple_partition_map (0)) Reading Apple_HFS (1)... .............................................................................. (CRC32 $C7097C7F: Apple_HFS (1)) Reading Apple_Free (2)... ............................................................................... (CRC32 $00000000: Apple_Free (2)) Terminating imaging engine... Adding resources... ............................................................................... Elapsed Time: 23.061s (1 task, weight 100) File size: 48394357 bytes, Checksum: CRC32 $79BEA1E4 Sectors processed: 258898, 238321 compressed Speed: 5.0Mbytes/sec Savings: 63.5% created: Compressed.dmg 9.7.7. Burning a Disk Image to CD or DVDBurning an image to CD or DVD from Disk Utility is simple; just select the disk image and click the Burn button. Make sure that the image doesn't contain more data than the disc you are burning to can hold. CDs can hold up to 700 MB and DVDs can hold up to 4.7 GB. Burning to disc is just about as easy from the command line. Simply use the hdiutil burn command as shown in Example 9-13. Example 9-13. Using the hdiutil burn command$ hdiutil burn Documents.dmg Please insert a disc: Preparing data for burn Opening session Opening track Writing track ............................................................................... Closing track Closing session Finishing burn Verifying burn... Verifying ............................................................................... Burn completed successfully ............................................................................... hdiutil: burn: completed 9.7.8. Restoring a Disk Image to a DriveTo restore the contents of a disk from a disk image, use Disk Utility's Restore panel, as shown in Figure 9-16, and use the following process: Figure 9-16. Using Disk Utility to restore a disk image to a drive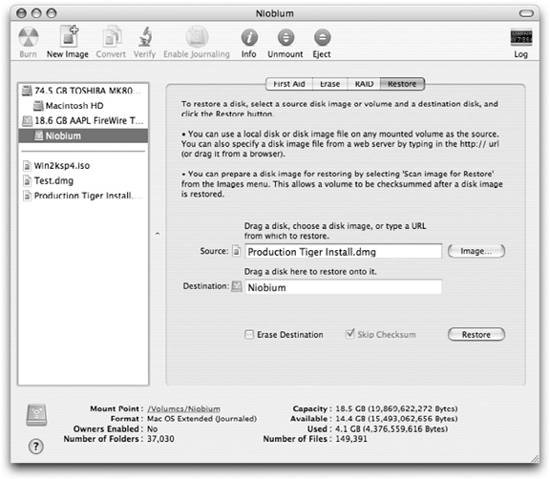
9.7.9. Moving the Contents of One Drive to AnotherYou can use the Restore panel of Disk Utility to copy one disk to another. This is useful when you want to move a perfect copy of your boot disk to another drive. For example, you could copy a disk to an external FireWire drive and then use that drive as a master disk image for restoring the disk onto other machines. To do this using the Restore panel, select a disk as the source instead of a disk image. This feature is especially handy when you want to upgrade the boot drive in a machine. For example, if you wanted to upgrade the hard drive in your PowerBook, you could use the following process:
When Disk Utility finishes, you're almost done. You just need to check to make sure that your disk is set up to boot. Usually Disk Utility does the right thing if each disk has only a single partition on it, but when you are moving data around on disks with multiple partitions, things might not always work out so well. You can check the boot status of your drive with the Startup Disk tool. To open the Startup Disk tool, select Utilities |
 New
New  Blank Disk Image menu, or the New Image button on Disk Utilitys toolbar. A dialog window opens, as shown in Figure 9-13.
EAN: 2147483647
Pages: 166