| Cascading Style Sheets introduce a few extra list-formatting possibilities, as Table 52.2 shows. Table 52.2. CSS List AttributesATTRIBUTE | CONTROLS | POSSIBLE VALUES | EXAMPLE |
|---|
list-style-image | The image to display in place of a bullet or leading character | url(imagepath), none | ul { list-style-image: url(../images/bullet.gif); } | list-style-position | The position of the bullet or leading character in the list items | inside, outside relation to | ol { list-style-position: inside; } | list-style-type | The type of bullet or leading character to display | disc, circle, square, decimal, lower-roman, uppper-roman, lower-alpha, upper-alpha, none | ol { list-style-type: lower-roman; } |
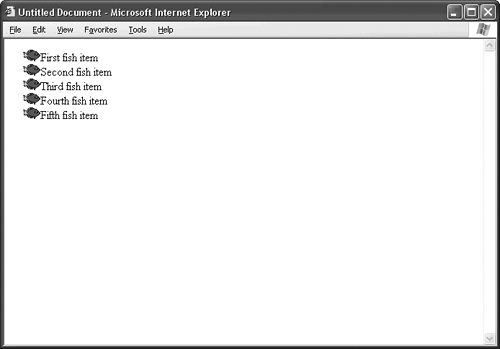
Replacing Bullets with an Image Probably the most fun of these attributes is list-style-image, which allows you to specify an image file instead of a standard disc, circle, or square bullet, as in Figure 52.3. Figure 52.3. Use the list-style-image attribute to replace standard bullets with your own image file. 
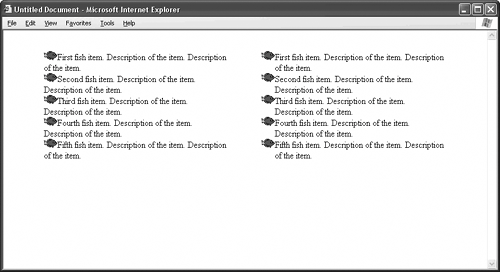
Changing the Position of the Leading Character The list-style-position attribute determines where the bullet or leading character appears in relation to the list items. Setting this attribute to outside hangs the leading character outside the main block of the list, while setting list-style-position to inside brings the character inside the main block, as in Figure 52.4. Listing 52.2. View Source for Figure 52.3. <head> <style type="text/css"> ul { list-style-image: url(images/fish.gif); } </style> </head> <body> <ul> <li>First fish item</li> <li>Second fish item</li> <li>Third fish item</li> <li>Fourth fish item</li> <li>Fifth fish item</li> </ul> </body>
Listing 52.3. View Source for Figure 52.4. <style type="text/css"> /* First, change the bullet of all ul tags, regardless of class. */ ul { list-style-image: url(images/fish.gif); } /* Now, define classes for the values of list-style-position. */ ul.in { list-style-position: inside; } ul.out { list-style-position: outside; } </style>
Figure 52.4. Use the list-style-position attribute to determine where the bullet or leading character appears in relation to the list items. The list on the left has a value of inside for this attribute, while the list on the right has a value of outside. 
TIP The View Source for Figure 52.4 employs a handy CSS trick. First, the style rule for the ul tag changes the bullets of all unordered lists to the fish image. Two tag-specific class styles follow, one for each value of list-style-position. The following style sheet has the exact same effect: ul.in { list-style-image: url(images/fish.gif); list-style-position: inside; } ul.out { list-style-image: url(images/fish.gif); list-style-position: inside; }
The advantage to writing the style sheet as in Figure 52.4 is that you don't have to repeat yourself with the list-style-image attribute. Instead, you give it once, in the global redefinition of the tag. The two classes simply fine-tune this general style. |
Redefining the Browser's Default List Type The list-style-type attribute is handy for redefining the ol and ul HTML tags so that you don't have to keep setting the individual type attributes for every list on your page: ul { list-style-type: square; }
TIP To create a "nude" list without bullets or leading characters of any kind, set the list-style-type attribute to none in the style definition for that list. |
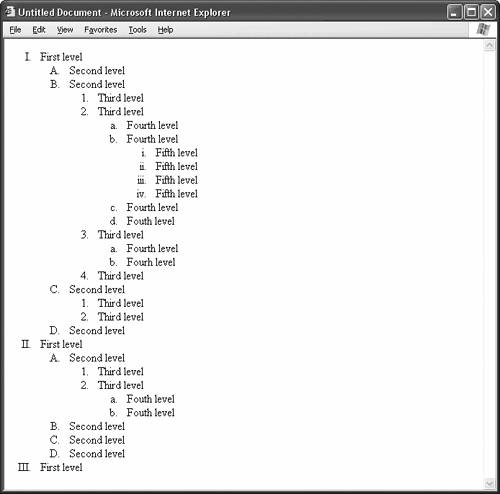
A page with this style rule automatically formats all all unordered lists with the square bullet.  | TOOL KITCreating an Automatic Outline Style for Ordered Lists When you nest ordered lists, HTML doesn't cycle through list types to give you an outline effect like it typically does for unordered lists. A simple style sheet remedies this oversight (see Figure 52.5). Place this style sheet between style tags in the head section of your HTML page, or copy it exactly as it is and save it in an external CSS file. [View full width] /* Order the first level of the outline with capital Roman  numerals (I, II, III, etc.). */ ol { list-style-type: upper-roman; } /* The second level of the outline is a nested list, or an ol tag numerals (I, II, III, etc.). */ ol { list-style-type: upper-roman; } /* The second level of the outline is a nested list, or an ol tag  somewhere inside another ol tag. A contextual selector does the somewhere inside another ol tag. A contextual selector does the  job. */ ol ol { /* Order the second level of the outline with capital letters (A, job. */ ol ol { /* Order the second level of the outline with capital letters (A,  B, C, etc.). */ list-style-type: upper-alpha; } /* The third level of the outline is a nested list within a B, C, etc.). */ list-style-type: upper-alpha; } /* The third level of the outline is a nested list within a  nested list, or an ol tag somewhere inside another ol tag nested list, or an ol tag somewhere inside another ol tag  somewhere inside another ol tag. You need another contextual somewhere inside another ol tag. You need another contextual  selector. */ ol ol ol { /* Order the third level of the outline with decimal numbers (1, selector. */ ol ol ol { /* Order the third level of the outline with decimal numbers (1,  2, 3, etc.). */ list-style-type: decimal; } /* The fourth level of the outline is a nested list within a 2, 3, etc.). */ list-style-type: decimal; } /* The fourth level of the outline is a nested list within a  nested list within a nested list, or four ol tags deep. */ ol ol ol ol { /* Order the fourth level of the outline with lowercase letters nested list within a nested list, or four ol tags deep. */ ol ol ol ol { /* Order the fourth level of the outline with lowercase letters  (a, b, c, etc.). */ list-style-type: lower-alpha; } /* The fifth level of the outline is a nested list within a (a, b, c, etc.). */ list-style-type: lower-alpha; } /* The fifth level of the outline is a nested list within a  nested list within a nested list within a nested list, or five ol nested list within a nested list within a nested list, or five ol  tags deep. */ ol ol ol ol ol { /* Order the fifth level of the outline with lowercase Roman tags deep. */ ol ol ol ol ol { /* Order the fifth level of the outline with lowercase Roman  numerals (i, ii, iii, etc.). */ list-style-type: lower-roman; } numerals (i, ii, iii, etc.). */ list-style-type: lower-roman; }
Figure 52.5. This outline style sheet automatically displays nested ordered lists in outline format. 
|
|
 | FAQHow many levels can I add to my outline? This style sheet works with outlines up to five levels deep. If your outline extends beyond five levels, the browser reverts to normal list numbering. You can counter this effect by adding style rules for as many outline levels as you want, following the pattern that the existing style rules establish. |
|
TIP If you feel like tinkering, use CSS to adjust the spacing of the li elements and the margins of the ol tag to create a more attractive presentation. |
|


