Installing PostgreSQL
| Now that you know how a typical PostgreSQL installation is arranged on disk, it's time to actually create a typical installation. In the next few sections, I'll show you how to install PostgreSQL on Unix/Linux hosts and on Windows hosts . In either environment, you can install PostgreSQL from prebuilt installation packages, or you can compile PostgreSQL from source code to create a fully customized installation. Unix/LinuxPostgreSQL was originally written for Unix, so you will find that installing PostgreSQL on a Unix host is very easy. Installing PostgreSQL on a Linux host is even easier because of the availability of prebuilt distributions. From BinariesThe easiest way to install PostgreSQL on a Unix (or Linux) system is to use a precompiled package, such as a RPM installer. You can find RPM packages for PostgreSQL at the PostgreSQL web site (www.postgresql.org or ftp.postrgesql.org). The process of installing PostgreSQL using a RPM package is described in Chapter 1, "Introduction to PostgreSQL and SQL." Refer to the section titled "Installing PostgreSQL Using a RPM" for more information. From SourceGiven the choice between building a package (such as PostgreSQL) from source and installing a package from a precompiled package, I'll always choose to build from source. When you build from source, you have complete control over the optional features, compiler options, and installation directories for the package. When you install from a precompiled package, you're stuck with the choices made by the person who constructed the package. Of course, using a precompiled package is much simpler. If you want to get up and running as quickly as possible, install from a binary package. If you want more control (as well as a better understanding of the options), build your own copy from source code. There are four steps to follow when you install PostgreSQL from source code. If you have built other open -source products from source, you're probably comfortable with this procedure. If not, don't be afraid to try the build procedure yourself; it's really not difficult. We'll walk through the four steps in this section, which are
Downloading and Unpacking the Source CodeThe first step is to load the source code onto your system. PostgreSQL source code is distributed in a set of compressed archive ( tar ) files. The exact content of each archive can vary from release to release, but since release 7.1, the PostgreSQL source code is composed of the following archives: postgresql-base-7.3b2.tar.gz 6598Kb postgresql-docs-7.3b2.tar.gz 2539Kb postgresql-opt-7.3b2.tar.gz 451Kb postgresql-test-7.3b2.tar.gz 1047Kb postgresql-7.3b2.tar.gz 10642Kb The file sizes shown here are for release 7.3b2 (the second beta version of release 7.3). The "base" archive ( postgresql-base-7.3b2.tar.gz ) contains all the source code necessary to build a PostgreSQL server, the psql client, administrative tools, and contributed software. The "docs" archive contains the PostgreSQL documentation in HTML form (the base archive contains the PostgreSQL man pages). Optional features (that is, things that you have to specifically enable when you build from source code) are included in the "opt" archive. The "test" package contains a suite of regression tests that will ensure that your copy of PostgreSQL is functioning as expected. The last archive ( postgresql-7.3b2.tar.gz ) contains all the source code combined into a single archive. If you want to install as little software as possible, download the base package. If you want to be sure you have everything that you might need, download the combined package. Table 19.2 shows the detailed contents of each package [1] .
Table 19.2. Source Package Contents
In the discussion that follows , I'll assume that you have downloaded the combined package. Configuring the Source CodeAfter you have downloaded the source package that you want, you can unpack the archive with the following command [2] :
$ tar -zxvf postgresql-7.3b2.tar.gz The source package extracts to a directory named postgresql-7.3b2 (or, postgresql- version in the more general case). The next step is by far the most complex: configuration. Configuration is not difficult , it just requires a bit of thought. When you configure source code, you select the set of features that you want and define compiler and linker options. Like most open-source packages, PostgreSQL source code is configured using the configure command. The set of configurable features and options varies from release to release, so you should study the output from the configure --help command carefully . Here is a sample of the output from this command: $ cd postgresql-7.3b2 $ ./configure --help=short Configuration of PostgreSQL 7.3b2: Optional Features: --disable-FEATURE do not include FEATURE (same as --enable-FEATURE=no) --enable-FEATURE[=ARG] include FEATURE [ARG=yes] --enable-integer-datetimes enable 64-bit integer date/time support --enable-recode enable single-byte recode support --enable-nls[=LANGUAGES] enable Native Language Support --disable-shared do not build shared libraries --disable-rpath do not embed shared library search path in executables --enable-debug build with debugging symbols (-g) --enable-depend turn on automatic dependency tracking --enable-cassert enable assertion checks (for debugging) --disable-largefile omit support for large files Optional Packages: --with-PACKAGE[=ARG] use PACKAGE [ARG=yes] --without-PACKAGE do not use PACKAGE (same as --with-PACKAGE=no) --with-includes=DIRS look for additional header files in DIRS --with-libraries=DIRS look for additional libraries in DIRS --with-libs=DIRS alternative spelling of --with-libraries --with-pgport=PORTNUM change default port number 5432 --with-maxbackends=N set default maximum number of connections 32 --with-tcl build Tcl and Tk interfaces --without-tk do not build Tk interfaces if Tcl is enabled --with-tclconfig=DIR tclConfig.sh and tkConfig.sh are in DIR --with-tkconfig=DIR tkConfig.sh is in DIR --with-perl build Perl modules (PL/Perl) --with-python build Python interface module --with-java build JDBC interface and Java tools --with-krb4[=DIR] build with Kerberos 4 support [/usr/athena] --with-krb5[=DIR] build with Kerberos 5 support [/usr/athena] --with-krb-srvnam=NAME name of the service principal in Kerberos postgres --with-pam build with PAM support --with-openssl[=DIR] build with OpenSSL support [/usr/local/ssl] --without-readline do not use Readline --without-zlib do not use Zlib --with-gnu-ld assume the C compiler uses GNU ld default=no Some influential environment variables: CC C compiler command CFLAGS C compiler flags LDFLAGS linker flags, e.g. -L<lib dir> if you have libraries in a nonstandard directory <lib dir> CPPFLAGS C/C++ preprocessor flags, e.g. -I<include dir> if you have headers in a nonstandard directory <include dir> CPP C preprocessor DOCBOOKSTYLE location of DocBook stylesheets Use these variables to override the choices made by `configure' or to help it to find libraries and programs with nonstandard names/locations. Report bugs to <pgsql-bugs@postgresql.org>. If you want to configure your source code to build a plain- vanilla version of PostgreSQL, you can simply run configure (without any options) and watch the blinking lights. The configure program performs a series of tests to determine what kind of operating system you are using, what kind of CPU you have, which compilers and linkers you have installed, and so forth. configure creates a new set of header files and makefiles that reflect your configuration choices. The most interesting configuration options are the --with- package options. Using the --with- package options, you can build optional features such as the PL/Tcl language and the libpq++ client interface library. Table 19.3 shows the package- related configure options. The second column lists the set of files that result from building each package. If you ever need to know what configure options you need to (for example) build the libpq++ shared library or the pgtclsh shell, consult Table 19.3. Table 19.3. configure Options and Resulting Files
I mentioned earlier that configure runs a number of tests to find a wealth of information about the build environment and runtime environment on your system. This can take quite awhile on a slow or heavily used system. If you want to experiment with different configuration options, you may want to enable configure 's cache mechanism: $ ./configure --config-cache This tells configure to record its test results in a cache file (named config.cache ) so that the next time you run configure , it won't have to repeat the tests. After you have finished compiling and installing PostgreSQL, you can run the program pg_config to find the set of options used to configure your copy of PostgreSQL: $ pg_config --configure --prefix=/usr/local/pg73b2 --enable-debug The easiest way to add a configuration to a previously installed copy of PostgreSQL is to feed the result from pg_config back into the configure script. For example, to add PL/Python support to your existing configuration, you can run the following command: $ eval ./configure `pg_config --configure` --with-python The configure program produces three files that you may be interested in examining. config.log contains a log of the entire configuration process. This file contains a list of all the configuration tests along with the result of each test. config.log also shows you the changes that the configure program made to your source code (actually, configure leaves the original source code intact and constructs a working copy of each file that it needs to modify). If you run into any configuration or build errors, you may want to examine the config.log file to see how configure arrived at its decisions. The config.status file is a shell script that you can run to reproduce your original configuration choices. Executing config.status is equivalent to running ./configure 'pg_config --configur . The advantage that config.status offers is that you can reproduce your configuration choices without having a functional copy of PostgreSQL. The advantage to the second option is that you can add configuration options to an existing copy of PostgreSQL. The src/include/pg_config.h file is modified to reflect many of the configuration options that you select. This file contains a few extra configuration options (such as database block size , default number of buffers, and so on) that you can't adjust using the configure program; to change these options you must edit the include/pg_config.h file (or the template, include/pg_config.h.in ) by hand. You will probably never need to change this file, but you may want to glance through it so that you know what your options are. Compiling the Source CodeAfter you have configured the PostgreSQL source code, compiling it is easy; just execute the make command: $ make The make program compiles only those portions of the source code requiring recompilation. If you are building PostgreSQL for the first time, make will compile everything. If you have already compiled PostgreSQL a few times, make will compile only the source files that you have changed, or that depend on changes that you have made. If you have made configuration changes, make is likely to recompile everything. If you want to be absolutely sure that make builds everything , execute the following command [3] :
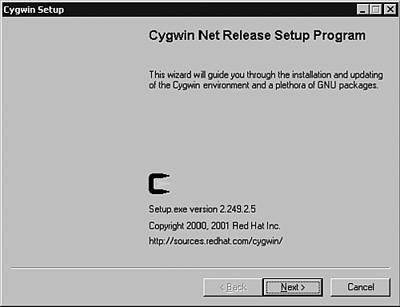
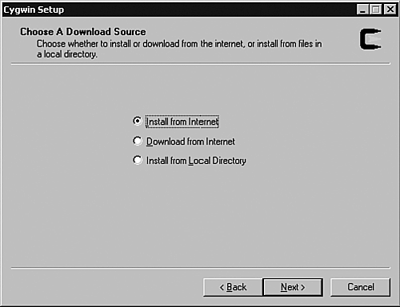
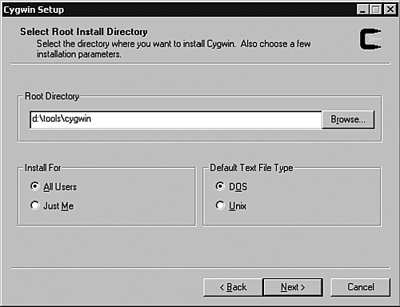
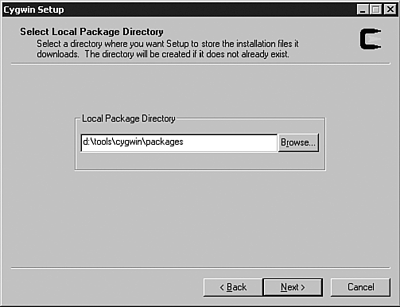
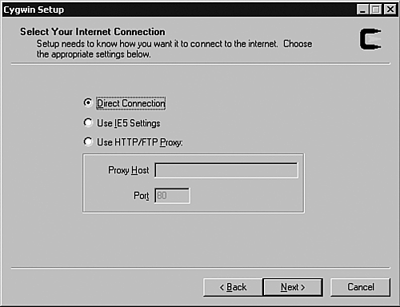
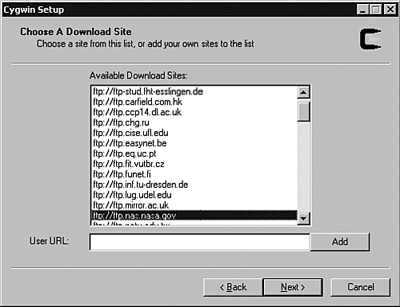
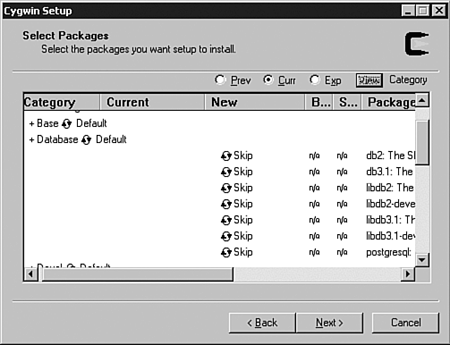
$ make clean && make After several minutes (or several hours, depending on the speed of your system), the build will complete. If an error occurs during compilation, you might be able to fix the problem yourself by examining the error message and correcting the cause of the problem. If you're not comfortable wading through the PostgreSQL source code, search for specific error messages at the PostgreSQL web site; you will usually find an answer there. Installing the Compiled CodeThe final step is installation. In most cases, you should be logged into your system with superuser privileges (that is, log in as user root ) to ensure that you can write into the installation directories. To install the compiled code, execute the following command: # make install The make utility copies the programs, shell scripts, and data files from your build directories into the install directories. Completing the Installation ProcessAt this point, you should have all PostgreSQL components installed into their respective directories. Now, it's time to complete the installation process. When you install PostgreSQL from an RPM script, RPM will create a postgres user account for you. When you build PostgreSQL from scratch, you have to do that yourself. Consult your OS documentation for more information on how to create user accounts. You'll also want to be sure that the PostgreSQL executables (particularly the client applications, such as psql ) appear in your users' search path. The easiest way to accomplish this is to modify the /etc/profile (or equivalent) shell script. Finally, you will want to create your initial set of databases and arrange for server startup and shutdown. Those topics are covered in other parts of this chapter. WindowsThe PostgreSQL server was not originally designed to run on a Windows host. You can run most client applications under Windows without trouble, but if you want to run a PostgreSQL server, you have to install a Unix compatibility library first and then install PostgreSQL. From BinariesIf you want to run a PostgreSQL server on a Windows host, you will need to install the Cygwin runtime environment first. Cygwin is a package that provides a Unix-like environment that makes it (relatively) easy to port applications originally written for Unix systems to Windows hosts. In this section, I'll show you how to download and install Cygwin, as well as the PostgreSQL binary distribution for Windows. First, point your web browser to the address http://sources.redhat.com/cygwin. You'll see a number of buttons scattered around this page that are labeled Install Cygwin Now, click on any of those buttons . When prompted, choose Run this program from its current location. You may see a security warning that tells you that the setup.exe program does not include an Authenticode signature; if you are reasonably comfortable that your net connection is secure, click on Yes to continue. The setup program leads you through a series of dialog boxes that prompt for the information needed to complete the Cygwin installation. The first dialog simply introduces the Cygwin setup program (see Figure 19.1). Figure 19.1. Cygwin SetupGreeting. On the second dialog box (see Figure 19.2), select Install from Internet to tell the setup program that you want to download the Cygwin packages from an Internet server and install them. Figure 19.2. Cygwin Setup Download Source. The third dialog box(see Figure 19.3) asks where you want to install the Cygwin package. The setup program creates a number of subdirectories in the location that you specify: /usr , /bin , /etc , and so on. The PostgreSQL package also installs in the directory tree that you specify, so be sure to choose a convenient location (for example, you may want to install Cygwin close to the root directory so you don't have to type really long pathnames to find your stuff). Figure 19.3. Cygwin SetupInstall Directory. You'll also need a place to store the package archives themselves (see Figure 19.4). Each package is downloaded into the package directory and then installed to the final location. If you have limited disk space on your destination drive, you may want the package directory to reside on a different drive. Figure 19.4. Cygwin SetupPackage Directory. The fifth dialog box prompts for connection information (see Figure 19.5). If you're not sure whether you are connected to the Internet through a proxy server, choose Use IE5 Settings. Figure 19.5. Cygwin SetupProxy Settings. Next, you need to select a download site (see Figure 19.6). Cygwin is a very popular package and is mirrored at many sites throughout the world. For best performance, choose a site that is geographically close to you. Figure 19.6. Cygwin SetupDownload Sites. Finally, you arrive at the package selection dialog box(see Figure 19.7). I've always found this dialog box to be confusing, so I'll give you a quick tour. First, notice the button labeled View. That button rotates through three different views: Category (the default), Full , and Partial . In the Category view, you see a list of package categories. In Full view mode, all packages are listed in alphabetical order. Partial view mode lists the packages that you have selected to download (again, listed in alphabetical order). Figure 19.7. Cygwin SetupPackage Selection. The Category view is arranged as a tree: On the left side of each category name, you'll see a plus sign (+)click on the plus sign, and you will see a list of packages in that category. On the right side of the category name, you'll see the installation mode for the packages in that category. If you click on the installation mode (that is, click on the word Default), you'll cycle through the installation modes: Default, Install, Reinstall, and Uninstall. The Default installation mode tells the setup program to install the default set of packages in the selected category. If you choose Install, the setup program will install all packages in that category (choosing Install on the All category tells setup to install all Cygwin packages). The Reinstall mode causes setup to reinstall all previously installed packages (in that category). Uninstall removes all the packages in that category. The three radio buttons across the top (Prev, Curr, and Exp) determine the trust-level that you want to achieve. The default selection is Curr, meaning that you want to use the currently released version of the packages that you select. Choose Prev if you want to install the previous (that is, older and theoretically more stable) version of a package. If you like to live dangerously, choose Exp to install experimental versions. If you choose the Full or Partial view (or expand a category), you will see a list of packages (see Figure 19.8). There are six columns in this view: Category, Current, New, Bin?, Src?, and Package (due to space restrictions, the Bin? and Src? columns are shown as B... and S... in Figure 19.8). The Category and Package columns are self-explanatory. The Current column displays the version string for any currently installed packages (this column will be empty if you are installing Cygwin for the first time). The format of the version string varies widely from package to package. For the PostgreSQL package, the version string contains the PostgreSQL version number (7.2.2-1 for example). The New column will display Skip or a version string. If you see the word Skip, that package will not be installed (or reinstalled or uninstalled). If you see a version string, that package will be installed (or reinstalled or uninstalled ) at the indicated version. If you click on the word Skip (or the version string), you can cycle through the choices for each package; you may be able to choose from multiple versions. If you choose to install a given package, the Bin? and Src? columns will transform from the string n/a into a pair of check boxes. If the Bin? check box is checked, you will install the binary (that is, executable) distribution of the given package. If the Src? check box is checked, you will install the source code for the given package. Figure 19.8. Cygwin SetupPackage Selection, Part 2. That covers all the controls in the setup program. If you find this a bit confusing, you're not alone. In fact, I would recommend that you choose only two configurations: Install the default set of packages, or install everything. If you have plenty of room on your disk drives , choose to install everything. If not, choose the default set of packages plus the PostgreSQL package (in the Database category). If you choose to roll your own configuration, be sure to select (at least) the following packages:
After you select the packages that you want to install and click on the Next button, the setup program will download and install your choices. There's not much you can do at this point; just watch the blinking lights and wait for everything to complete. When the Cygwin setup program completes, you still have one more package to install: cygipc . The cygipc package adds shared-memory , semaphores, and message-queue support to Cygwin. PostgreSQL currently requires cygipc it's likely that a future release will bundle the functionality provided by cygipc into the basic Cygwin package. You can find cygipc at the following location: http://www.neuro.gatech.edu/users/cwilson/cygutils/cygipc/. The archive that you want is named cygipc-1.11-1.tar.bz2 . After you have downloaded the archive, fire up the bash shell (included in the default Cygwin category) and execute the following commands: $ cd / $ tar -jxvf cygipc-1.11-1.tar.bz2 It is important to cd to Cygwin's root directory ( / ) before you unpack the cygipc archive; otherwise , the files that you extract will not be placed into the correct directories. From SourceIf you want to compile PostgreSQL from source code in a Windows environment, you still need the Cygwin and cygipc packages described in the previous section. You also need the GNU compiler chain (found in the Devel Cygwin category) and the source code for PostgreSQL. After you have installed the necessary tools, you can follow the same procedure described earlier for building PostgreSQL from source on a Unix host. Completing the Installation ProcessArriving here, you should have all necessary PostgreSQL, Cygwin, and cygipc components installed on your system. To complete the installation, you'll want to make any configuration changes that you require, install PostgreSQL and cygipc as Windows services, create your initial databases, and create PostgreSQL user accounts. These last few steps are described elsewhere in this chapter. |

EAN: 2147483647
Pages: 220