Flylib.com

Books Software


Section 13.5. Placing Custom Messages in the Status Bar


13.5. Placing Custom Messages in the Status Bar

TECHTALK

The browser's status bar displays brief messages about what the browser is currently doing or where the selected hyperlink leads .


The status bar appears along the bottom of the browser's window. The browser uses it to display brief messages of interest to humans , like what the browser is currently doing (opening the page, downloading images) or where the selected hyperlink leads.

Dreamweaver's Set Text of Status Bar behavior lets you put messages of your choosing into the status bar instead. For instance, when the visitor hovers over one of the buttons in your navigation, you might place "Go to the Theories section" into the status bar instead of the usual esoteric http://www.mysite.com/theories/ theories .html.

To place a message in the status bar when the visitor hovers over a nav button, follow these steps:

  1. In the document window, click a button in your nav bar.

  2. Go to the Tag Selector at the bottom of the document window, and click the <a> tag to select the button's link.

  3. In the Behaviors panel, click the plus button, and choose Set Text Set Text Of Status Bar from the menu that appears. Dreamweaver opens the Set Text Of Status Bar dialog box, which Figure 13-26 shows.
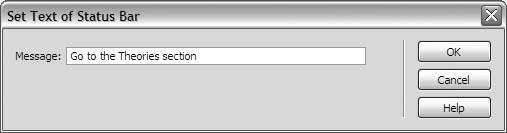
    Figure 13-26. Set custom messages in the browser's status bar

  4. In the Message field, type the text that should appear in the browser's status bar when the visitor hovers over the button.

  5. Click OK. Dreamweaver adds the necessary JavaScript to your page.

  6. Choose File Save from the main menu, and update the pages of your site.

To test your custom messages, view any page of your site in a live browser.


Chapter 14. Adding Text

Placing Text on the Page
Setting or Changing the Format
Applying Typographic Styles
Adding Lists
Aligning and Justifying Text
Adjusting Paragraph Spacing
Using Horizontal Rules

If your site is like most, then most of your content comes in textual form, so it makes good sense to get the text in there first. It's easier for you to see what's going on this way, and it gives you a reference point for placing your images and Flash movies, which helps you to work your components into a coherent whole.

This chapter shows you how to add, format, and style the text of your site in Dreamweaver.


14.1. Placing Text on the Page

One way to add text is to type it directly into your Dreamweaver page. Typing is convenient for short bursts of wordage. At the same time, Dreamweaver isn't a word processor. It doesn't have many of the features that you might want for serious copywriting. You might also find yourself in this situation: you have a stack of documents from the marketing department that your employer is forcing you to add to the site. Marketing content is never fun in the first place, and retyping marketing content is a form of torture under the Geneva Conventions.

TIP

To insert special typographical characters like dashes, curly quotes, the copyright symbol, and the registered trademark symbol, choose Insert HTML Special Characters from the main menu.


Fortunately, Dreamweaver makes it easy for you to paste blocks of text from a word-processor file. If the text is from Microsoft Word, you can even import the Word file directly into your Dreamweaver page.

BEST BET

Typing text directly into your page is fine for short sections of copy, but for longer pieces, you're better off composing in a text editor or word processor and then pasting or importing the text into Dreamweaver .


{% if main.adsdop %}{% include 'adsenceinline.tpl' %}{% endif %}

To copy from your word processor or text editor and paste into Dreamweaver, follow these steps:

  1. From your word processor or text editor, select and copy the text that you want to use on your page.

  2. In Dreamweaver, click the spot on the page where you want to insert the text, or select the placeholder text that you want to overwrite.

  3. From the main menu, choose Edit Paste Special. The Paste Special dialog box shown in Figure 14-1 appears.

    Figure 14-1. Paste Special's options for word processed text
    BEHIND THE SCENES

    The options available under Paste As in the Paste Special dialog box depend upon the application from which you copied the text. The more sophisticated the text editor or word processor, the more options you get.


  4. Under Paste As, choose Text With Structure or Text With Structure Plus Basic Formatting. You don't usually want the Text Only option, unless the source document has been poorly formatted by someone in the marketing department. You don't usually want Text With Structure Plus Full Formatting, either, because it gives license for Dreamweaver to write embedded style rules into your page. You're better off applying your own, custom-built styles after you paste the text.

  5. Click OK, and Dreamweaver pastes the text into the page.

To import a Microsoft Word document, follow these steps:

  1. In Dreamweaver, click the spot on the page where you want to insert the text, or select the placeholder text that you want to overwrite.

  2. Choose File Import Word Document. The Import Word Document dialog box opens.

  3. Navigate to the location of the Word document to import, and click this file. Then choose Text, Structure, and Basic Formatting from the Formatting menu at the bottom of the dialog box, and make sure that the Clean Up Word Paragraph Spacing option is checked.

  4. Click Open . Dreamweaver imports the document into your page, as Figure 14-2 shows.

    Figure 14-2. Import a Word document directly into your page

Once the text is in the page, you can adjust the format and presentation to suit your needs.