Why Use Multi-Track Systems?
| [ LiB ] |
Why Use Multi-Track Systems?
There are two basic things that make multi-track recording (whether done on hardware or software systems) far superior to recording live in the studio with no overdubs. They both involve the amount of control you have over the sound. One is that you can record individual instruments one at a time. This can allow one person to be the whole band or can allow a band to make sure every take on every instrument is as perfect as you want it to be. (Though usually, to ensure a good "feel," the "basics"guitar, bass, and drumsare recorded all at once.)
You can control every aspect of every instrument on a separate channel from the mixing desk . (In a recording studio, a mixer is often called a mixing desk.)
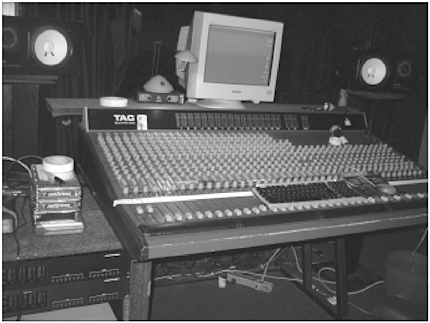
Figure 11.4. Mixing desk at a friend's big studio. Note computer monitor above and computer keyboard on the desk.
The second reason that multi-track recording is so powerful is that you can isolate sound. If you use separate microphones on every drum on the drum set, you can isolate them and tweak each one individually. This is more work than just getting a good overall sound and "going with it," but it is a huge improvement. For instance, you can add reverb to the snare only, add digital reverb to the high-hat , analog reverb to the snare drum, and use the bass drum to trigger a sample without affecting the sound of the other instruments. You can add a noise gate as an effect (rather than just as noise reduction) to the snare for a very cool compressed feel. Peter Gabriel did this with Phil Collins and Jerry Marotta's drums on "Biko."
If you record a band live without isolation on a regular stereo recorder, you end up with everything on two tracks, and affecting the drums will also affect the vocals.
This gives you very little control. So, in multi-track recording, we try to get isolation of sound.
This is achieved by two methods : microphone choice and baffling.
The microphones you use for multi-track recording are almost universally going to be unidirectional. These microphones pick up the sound right in front of them and not so much from the sides and rear. Therefore, if you point one at the snare drum from six inches away, it's not going to pick up much of the guitar amp that is six feet away.
The second thing you'll want to do is to baffle the sound. You want to put physical isolation devices between instruments to isolate them further, to avoid "leakage" of one instrument's sound into another instrument's microphone. Perhaps you've noticed that on some TV shows they have Plexiglas up around three sides of the drummer . This is to help isolate the sound of the drums from leaking into the singer 's mikes and the guitar mikes and vice versa. Isolation is important live, but more so on a recording. A studio recording does not have the intense energy and interaction with an audience that adds to the live experience.
I've been to shows that blew my mind and later heard recordings of that show that did not blow me away. A lot of what gets you off at a concert is the energy of the crowd and the interaction between band and audience, and this is almost impossible to capture to audio tape. And live bands tend to make more mistakes than in the studio, but we forgive them or don't even notice, because we are enraptured by the kick-ass moment.
This is one reason that on live records bands will still overdub some of the parts of some of the instruments. My old manager, who managed Jane's Addiction, told me that on the Jane's Addiction live record that they did a million years ago on Triple X records, the only thing the band kept was the drums. They overdubbed everything else later in the studio. And the audience applause and cheering on that recording was partially from a Los Lobos show and partially from a recording of a bullfight in Spain.
In the studio, in a professional studio, gobos are used between the amps. Gobos are little partitions that absorb sound. They are made from wood, covered with fabric, and placed on wheels so that they can be easily moved. You can make them yourself or use very thick blankets to achieve the same thing. You want the amps all isolated as much as possible. And then you just feed everything into headphones and people hear each other for cues to play together mostly through the headphones. (This takes a little getting used to if you've never done it.) It's always, as I said, a good idea to try and get good "basics" all at the same time. That way you get the feel of a live band but can perfect everything over that, for a best-of-both- worlds synthesis of live and overdubbed.
Usually the vocalist will sing a "guide vocal" to keep the players in time. You can print this to tape if it's exceptional, but usually the singer will do all the vocals over later anyway. Some singers will hold back and not give their all on this, in order to keep their vocal chords from getting burned out, especially if the vocals are being done the next or even the same day.
Since I am not just the singer but usually also the bass player or guitar player when I record with a band, I will do just enough guide vocals (usually the first few or last few words of every few lines and the beginning and end of a chorus) to keep the band and myself confidently knowing where we are in the song, but as little as possible, so I can really concentrate on playing. I'm pretty good at singing and playing at the same time, but can do either one alone better than I can do when doing them at the same time.
Figure 11.5. Outboard gear at a friend's big studio.
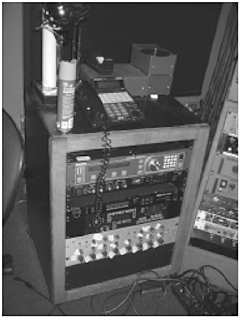
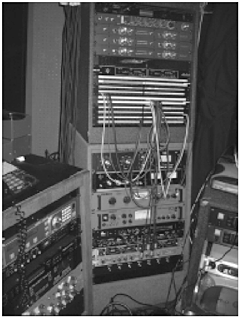
Figure 11.6. More outboard gear at a friend's big studio.
Professional recording studios take care of all this crap for you, so you only have to take care of the music. But they cost between $40 and $400 an hour , plus the cost of the engineer. For what you spend in 10 hours in a top- notch major label studio, you could set yourself up to record at home for life.
In my film, J. Mascis says, "I would stare out the window and I would be paralyzed because I was spending a thousand dollars to stare out the window and I realized I could do that at home." J. has a top-notch studio built into his home so he never has to pay to wait for the muse again.
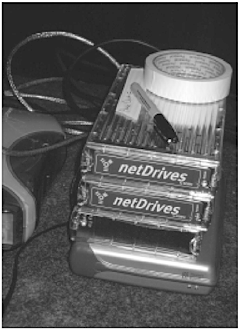
Figure 11.7. Removable FireWire drives at a friend's big studio. (Note: I really wanted to get a photo for you of their 2- inch 24-track recorder, but they actually just sold it. This studio has gone all soft ware in the past month!)
When you do spend that kind of money in a lush professional studio, a lot of it is going to making you feel like a rock star, to feeding your egos. Sure, you may not have a $5,000 leather couch at home, but is that really going to make you a better musician?
Also, if for some reason you can justify spending that kind of money (or more likely, someone is spending it on you, but keep in mind, you'll have to pay that back before you see any profit), you would be smart to go into your own studio and do "pre-production" firstmaking "demos" (demonstration recordings) to work out all the details before you go in and drop bank on the studio with the pool table, the leather couch, and the gold record by some has-been hair metal rockers on the wall.
Figure 11.8. Leather couch at a friend's big studio.
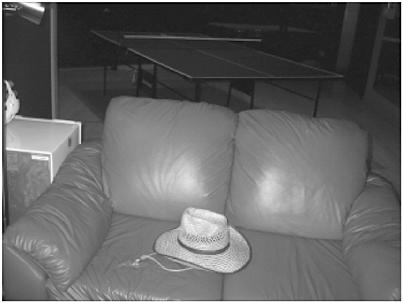
Figure 11.9. Ping-pong table at a friend's big studio.
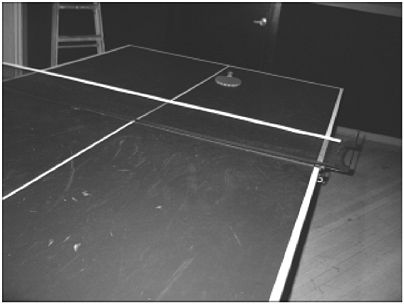
Figure 11.10. Gold records on a friend's studio wall.
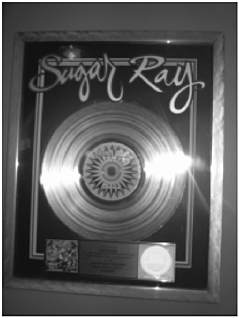
Figure 11.11. More gold records on a friend's studio wall.
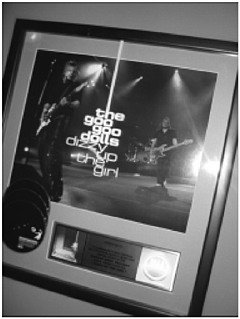
Figure 11.12. Yet more gold records on a friend's studio wall.
NOTE
I was once mastering a Bomb record with the amazing George Horn at Fantasy Studios in Berkeleythe studio and company built from what, in my opinion, was stealing the publishing from Credence Clearwater Revival. They told me I could go into the kitchen and eat anything I wanted free. I thought this was a great deal until I realized that no matter what I ate, the amount of time I spent eating it cost more in studio time than the price of the food. Smart people, those .
NOTE
Assistant engineers in big studios are sometimes paid in studio time. You can befriend them and use their studio time free (or do what I did for the first Bomb recorddate her). You will probably still have to pay an engineer (the assistant might not be ready to run everything yet), and the time will probably be in the middle of the night, available on short notice, and bumpable (bumped to another day if a paying client shows up), but this is one way to get into a good studio if you're ready.
Some studios use 48 or even 72 tracks, but I think that's overkill. Most great records were recorded on either 24 or 16 tracks, on one- or two-inch tape. (The wider the tape and the faster the tape speed, the higher the fidelity.)
NOTE
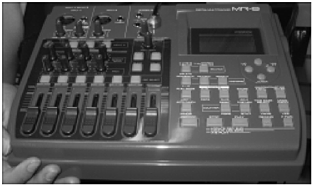
You can buy inexpensive used hard disc recorders (try eBay), which are basically dedicated computers with the software built in and hidden under hardware. They replace both the tape recorder and the mixer and require no tape.
London used one to record the D.I.Y. theme song with me. They are all different, so consult the manual if you get one.
Figure 11.13. Hard disc recorder.
Figure 11.14. Hard disc recorder close-up.
To record multi-track, first get your mike levels. Mike your instruments close (but not too closestart at six inches and see how that sounds on tape) and isolate them as much as possible with baffling: gobos, thick blankets, and such. Then plug the microphone inputs into your mixer. If you are using a four-track, use the mixer inputs built into the four-track. If you are using a 24-, 16-, or 8-track tape unit (these can be gotten relatively cheap on eBay), you will probably want to do something like this: On a 16-track unit, I allot six tracks to the drums: one mike each for bass drum, snare, high-hat, floor tom, and two overhead mikes to pick up the cymbals and the whole kit. That leaves two tracks for bass (one direct and one mikedthis gives you the deep bass of the direct sound and some warmth of the amp), four tracks for guitar, and four for vocal overdubs and harmonies. Of course, that's a lot of guitar and vocals; you could also give a couple of those tracks to keyboards, DJ, samples, noises, horns, or whatever. Sixteen tracks is a lot, and it's all I could see needing. Some of the greatest records ever were made on two-inch or one-inch tape on a 16-track recorder.
NOTE
In the studio, everyone should tune their instrument between every take. I can't stress this enough. And it's also all I got out of spending $65,000 paying Bill Laswell to record our Warner Brother's album. He taught me that. That's about it.
I would also add that you should all use the same tuner, as some are slightly differently calibrated and will put you in tune with yourself but out of tune with each other.
You may want to use a pre-amp with some microphones. If they're condenser mikes, they will probably need power. Some mixers actually supply power to the mikes, and as we saw earlier, some don't. These need an external power supply box.
You can run the mikes directly into the inputs of the multi-track tape recorder or go through the mixer first. The first way is simpler and usually pretty foolproof as far as getting a pretty good sound right away. Going through the mixer first can complicate things exponentially, but in the hands of someone with experience (you, after you've done it the other way a few times), there's a lot more room for tweaking and fine tuning everything to get it perfect.
The thing to remember though, which is basically the first rule of recording, is: It is easier to add something to a sound later than it is to take it away. Whatever you "print to tape" is what you're stuck with. This is why if you change the EQ through the mixer and print to tape, you will be limited with what you can do to it later. This is especially true with effects: You can always add reverb, but you can't take it away. That's why you want to acoustically deaden the room that you record in and go for a strong but uncolored sound and then mess with it later. This is the reason (other than soundproofing for the neighbors) that you'll want to line your recording studio walls with egg crates and foam rubber and fabric to deaden the soundto remove all acoustic reflection.
Figure 11.15. Egg crate-type material on a studio wall.

There is one exception to this; sometimes guitar amps or drums are miked with two sets of mikes: one close and one at a distance. The huge drum sample that Jimmy Page got from John Bonham's drums on the Led Zeppelin records (still the most sampled drum tone on the planet) was gotten like this: They put a mike on every drum on the kit, close up, like one would do. Then they added a couple of mikes on separate tracks like 20 and 40 feet away. One such recording was done in a stone castle. You have the channels miked up close for the individual sounds the basic power of the kit, and then a couple of ambient mikes picking up the room sound to mix in to give it some more depth.
Guitar amps are usually miked about six inches away from the amp (pointing at one of the individual speakers if there is more than one) and another mike 6 to 10 feet away. This adds a very slight delay (because sound travels at only about a thousand feet per second (check), so the sound hits the second mike a tiny bit later. It's not enough to really be perceived as an actual delay, but it thickens the guitar sound. A lot of metal bands do this, but so did Kurt Cobain. It's a cool sound.
NOTE
If you want a thick and heavy rhythm guitar sound, rather than turning up the distortion like you would live, record two identical passes of the guitar with the distortion rolled back a little from what you want. Then put one track a little to the left and the other one a little to the right. This will combine to make a less mushy but heavy-as-hell composite track.
If you only have eight tracks available, I would record a rock band something like this: two for vocals, two for guitar, one for bass guitar, and three for drums. I would keeps the bass drum on its own track because being able to set the bass drum's volume is very important to the sound of the kit. I would put a second mike between the snare and the high hat, picking up both equally on one track. I would use the last track for a sensitive omnidirectional overhead to get the rest of the kit. I would put it right above and in front of the drummer's head, pointing down.
If you are recording a rock band on a four-track, I would use a mixer to get a good sound mixing all the drums (miked as if you were recording to 16 track) and put the drums and bass guitar on one track. I would have one track for guitar, one for vocals, and one left over for additional vocal or guitar.
When recording on only four tracks, you have to get creative. People always say, "Well, the Beatles' Sargent Pepper was recorded on only four tracks ," but it was actually recorded on several four track machines synched together, and the sessions were directed by the best producer in the biz; the musicians were geniuses; and they had the BBC orchestra backing them up. You may not be a genius; or you may be, but you probably won't have all that other crap.
NOTE
The term Lo-Fi is just a marketing term for recorded really cheap. It doesn't mean much. Don't try to sound crappy. Try to sound as good as you can. Don't worry; you won't end up sounding too processed most likely.
You can bounce tracks. Basically, this means recording on three tracks, then mixing them down to one track, then freeing up the original tracks to record over. This effectively gives you more than four tracks on a four-track. Specific instruction for how to do this is different for every unit and is covered in the manual.
NOTE
If your four-track is used and didn't come with the manual, you can usually search the make, model number, and the word "manual" on Google and find either a downloadable version or someone willing to photocopy theirs for you for five bucks or so. This is true of most equipment.
The problem with bouncing tracks is twofold: First, you add tape hiss every time you bounce. Second, you are stuck with the submix of each bounced track. The sound will behave differently in the whole mix, and you must get good at predicting this. For example, the snare drum on the same track as all the drums and the bass guitar in a submix will have to be a little sharper to cut through when layered later with guitars than if it were on its own track.
You can, however, get amazing performances committed to tape in a great sounding way on a four-track unit that uses a cassette tape as the medium. It just takes a little more care and planning.
You can also record basics on a four-track to get a good tape sound and then dump it into your computer to add more instruments. Software recording, no tape hiss, and virtually unlimited tracksmost programs have at least 99 tracks available, although most programs will crap out before that; it's more limited by your memory and processor. But you can easily get a lot of tracks for sure.
Basically, multi-track recording is pretty simple. All units, from the lowliest consumer four-track to the most expensive studio machine, have very few buttons and two modes for each track: Play and Record. In record mode, you can listen to the other tracks in real time and play along with them. This is the basis for how multitrack recording works. You just have to remember to keep track of what you're doing on each track and keep it together to know if you are recording or playing that track on this particular take, and not accidentally tape over a keeper.
To aid this, engineers usually do two things. One is to put a piece of tape across the track listing on the mixer and the tape recorder and write with a pen what's being recorded on each track. The other is to use track sheets . Track sheets are used to write down what was done for a particular song. Track sheets are useful especially if you record and mix on different days (which is highly recommended most people's ears are only "fresh" for six to eight hours and then need to rest and sleep to be able to have good decision-making capacity again). The sheets are stored in the boxes with the tape. I've included some printable track sheets for different tape and software formats on the CD, in the Goodies folder.
NOTE
If you're recording one instrument at a time, start with the drums. Either play along with another instrument in the headphones to guide the drummer or, if she's able to, have her just play the whole song without accompaniment, just counting the whole thing or hearing the whole thing in her head. If you are working this way, have each person listen to what's already recorded and add their part. It's generally best to do the drums, then the bass, then the guitars, then the vocals. If you are recording with a limited number of tracks, you may want to do two instruments at a time on the same track. The disadvantage of this, of course, is that you have to play each one nearly perfectly , starting over if either makes a mistake, even though the other one is fine. You have to get a good sound going to tape, and you're stuck with it. If you raise one or lower one later, it affects both of them.
Mike Levels
You want to test each instrument or each thing going to a separate track to get good levels. Good mike levels are basically the highest levels you can get without going into distortion. Too low and you'll hear a lot of hiss from the tape. Too high and you'll get distortion. Go for a high happy medium.
Most recorders and all mixers have meters for this. They usually have a red line over on the far right or at the top that indicates the distortion zone. This is a good indicator, but the real test is to listen back on headphones and speakers to a little test recording. Have the drummer play each drum and record them. Then have her play the whole kit. And listen to the recording carefully . Do the same for every other instrument, and then do it for the whole band together. Raise or lower the input levels (or move the mikes closer together or farther apart) to get it just right.
The band should not noodle or play when not asked to during this process. The engineer (you) is listening for very subtle things. This is often a good test of the professionalism of musiciansnewbies will hit the drums and play wanky solos on the guitar all the time; pros will be able to sit quietly while things that require quiet get done.
I generally start with all the knobs set at seven (on a scale of one to ten) and go up and down from there. For some reason, seven seems to be the good place to start.
Don't rush the band. You are doing this yourself, so you don't have to rush. Make them feel comfortable, but try to stay focused and professional.
You are contributing art to the Universe. It's a beautiful thing. It should be fun. Feel the love, baby. Feel the love.
Pantyhose
In $30 Film School , we used pantyhose over the lens. This time we're gonna use them between the singer and the microphone to remove plosives, the P, B , and D sounds, and the sibilants, the S sounds. All of these produce short bursts of extra energy that can result in spikes of distortion on the tape. It is generally to be avoided but can actually be left or even exaggerated in some music to retain a rough edge. This is what the Beastie Boys meant when they rapped, "I rock the mike without the pantyhose."
You can also buy a professional thing to cut plosives and sibilants.
Figure 11.16. Professional thing to cut plosives and sibilants.
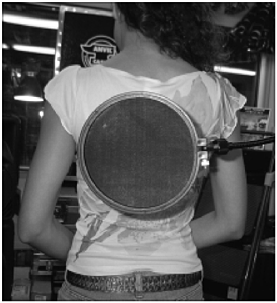
Figure 11.17. Professional thing to cut plosives and sibilants in use.
You can also get (or make) a shock mount, which uses strong rubber bands to isolate the microphone from vibrations of people walking.
Figure 11.18. Shock mount.
Let's Do This Thing
Make all your mike and level checks, first just through the headphones and then, when that sounds good, actually record a bit. Have the band (or single performer, if that's what you're doing) play a bit.
NOTE
One aspect of big studios that is worth replicating is having an isolation booth with glass between you and the people making noise, to make it so you hear only the sound that's printing to the tape, not the roar of the guitars and drums in the room. This gives you yet more control over the recorded sound.
Record a test. Have the players play about 30 seconds of music, and then have them (or him) stop and play it back. It should sound good and strong but not distorted .
NOTE
Have two pairs of speakers to listen to playback on. One should be the best you can afford, but you should also have a crappy set, maybe small computer speakers or even a portable radio speaker. Les Paul used to drive his car up to the studio window and run a wire out to check his final mixes on the little tinny speakers in his car. The theory is that if something sounds good on a crappy little speaker, it will sound good anywhere . So check your final mix on both.
Figure 11.19. An array of studio monitor speakers to choose from.
Figure 11.20. Small monitor speaker.
Once you get a good sounding recording printed to tape, try a whole song.
Go for the best take you can, but don't overdo it to the point of sapping perfection from the performance. You will quickly find out where this particular band or person's strength lies. Most people, if they are well rehearsed, will get their best take after two or three tries . Keep the first and second one, unless there are horrible mistakes in the basic tracks (drums/bass and maybe guitar). Rewind and go over it if you want, but keep good takes. Tape isn't that expensive.
NOTE
If you end up getting a hum sound recorded to tape, stop everything and use the troubleshooting techniques described in Chapter 5, "Microphones, P.A. Systems, and Troubleshooting" (replacing every link in the signal chain with working devices until it is gone) to find it and get rid of it. Hum and buzz have no place on a quality recording.
Don't push a band too hard and make them play past when they sound good. There's no reason in a home studio to hurry. You have all the time in the world. That's the point of doing it at home.
When listening to the playbacks, use a critical ear. Go for a good feel, but you also want technically good takes. Mistakes will not fix themselves , you can't really cover them up, and you can't really overdub the drums. Make sure at least that the drums are good. They should have a good "groove," that is, they feel good and make you want to move your feet. They should also not speed up or slow down. A lot of drummers have a problem with this. Sometimes you can get them to fix it by having them play to a click track (quarter notes on a drum machine will work) in headphones, and indeed this may be required for some types of recording, especially if MIDI interfaces are involved. But some rock drummers, who are good, just cannot ever play to a click. Suss out the situation, don't push musicians to be something they aren't. Work to their strengths, not their weaknesses.
NOTE
Hand percussion (egg shakers, tambourines, maracas, and so forth) can make a song totally more danceable. Usually they are used only on the chorus, or alternately, only under the guitar solo to make it shine a little more. But make sure that the person playing it is totally in the pocket. If they aren't as tight or tighter with the rhythm than the drummer, they will make the song sound worse , not better.
Figure 11.21. Bongos.
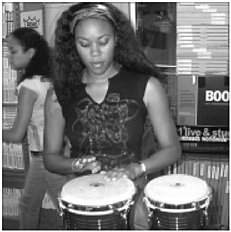
Figure 11.22. Egg-shaped shaker.
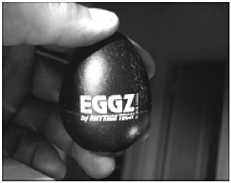
Figure 11.23. Maracas.
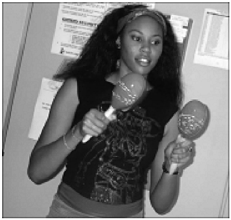
Figure 11.24. Tambourine.

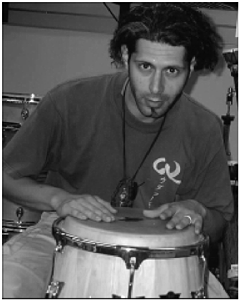
Figure 11.25. Conga drum.
NOTE
Don't let your singer play hand percussion on stage if he can't keep a beat, no matter how cool he thinks it looks.
Once you have a good sounding take of the basic tracks, try some overdubs. Add the guitar, vocals, and whatnot until the song is built up to where you like. Keep in mind to take the track off Record and put it on Play; you don't want to tape over a good take. Multi-track recording requires a good bit of left-brained geek think to keep track of all this crap, which is why, historically, one person only did this and someone else actually played the musicthat is, someone else did the right-brained stuff. But the $30 Way is to develop the whole brain so you don't have to depend on others.
NOTE
You can use background sounds if you like. These are quiet things, not quite subliminal , but almostnoises, sound effects, voicesthat will not be heard the first time someone listens, but will be revealed upon subsequent spins , especially with headphones. It gives your music more depth and perhaps a longer shelf life.
You can "punch in" a part of a take if the take is mostly good except for one part. Punching in means taping over part of one take on one channel and leaving the part of the take that was good. But you'll need a place before and after where there is nothing (like space between vocal lines if you're doing a punch on the vocal track) to punch in and punch out.
Once you've got all the stuff recorded for the song, it's time to mix . Mixing is the process of taking all the stuff that you did in the recording process and assembling it into a coherent and polished song.
Actually, it's already a lot more ready than you think. In filmmaking , the analogous process would be editing , where you wouldn't be nearly as done as you are now. In filmmaking, you'd have a bunch of tapes you've shot of raw scenes that wouldn't even resemble a movie.
NOTE
With some systems, you can use the mixer to assign submixes , so you can have different mixes for each person's headphones; that is, the singer can have more of herself, the drummer can have more of the bass player, and so forth. With very basic systems, such as a four-track, however, you only have one mix. You can use a splitter box (cheap at Radio Shack) to send this signal to four or more headphones.
Make a rough mix of your song. This basically means getting everything about the same volume and making a cassette or CD of it to listen to for a day or two so that you can start making notes. Don't worry about the details; don't worry about EQ or reverb or anything like that. Just make a quick mix, put the tape back in the box, store it in a cool dry dark place, and go do something else for a day.
Listen to the rough mix a bit, but keep an open mind. Don't get too attached to or critical of it. Look for any places that you need to overdub to fix any minor mistakes, but if all that stuff 's fine, just listen to what it needs in order to get it perfect, as far as levels, EQ, and reverb are concerned .
I have actually heard rough mixes of records that sounded better than the record ended up sounding. Sometimes in the mixing, people overdo it. This can be part of what is commonly called "overproducing" a bandthat which takes away too much of the "edge" that makes them perfect.
If you're doing a record, you can either record all the basics for the whole record or record and mix one song at a time. It's generally best to do all the basics at once because:
-
You only have to get the sound once.
-
The band may not want to leave their equipment set up if they have other gigs.
-
Once a band starts cranking out the tunes, they often get in a zone and can lay down basics for a whole album, or at least half an album, in one day.
You might not want to do all the vocal overdubs the same day, as people tend to strain their voices and will need a day to sound as good as new after.
NOTE
The old-fashioned headphones that completely cover the ear and seal out a lot of the room sound are generally better for the band members , especially the drummer, when recording the band all at once. They seal out the sound better and allow you to just concentrate on the recorder sound. I have even seen people wrap duct tape around them and their head to form a tighter seal with the ears!
Other people prefer Walkman-type lighter open-sound models. If you have money for both, keep both on hand, so people will have a choice.
| [ LiB ] |
EAN: 2147483647
Pages: 138