16.1. Building a Blog A blog is short for weblog. It's an improvement on the simple guestbook/forums that started appearing on web sites years ago. They're now advanced enough to create mini-communities of people with similar interests or simply a place to post your rants about daily living. Blogs have been in the media as well. As Jeff Jarvis said in Buzz Machine, "...just as the raw voice of blogs makes newspeople uncomfortable. It's the sound of the future." Some blog examples are: http://www.americablog.org/ http://mark-watson.blogspot.com/2005/02/pushing-java-back-into-background-for.html http://www.doctorpundit.com
As you can see from these three blog examples, one is political, one is about Mark Watson's life, and the third is a hodgepodge of RSS news feeds and personal podcasts. Of course, we've been given permission to use these blogs as examples, but go ahead and type in blogs in Google, and a million hits display. Weblogs are a huge trend; there are sites such as http://www.blogclicker.com/ where you can register your blog and drive more traffic to it, or http://www.blogarama.com/, which is a blog search engine. The market is hot for these online diaries, or diatribes! There are several things you need to do when you establish a blog: All of these pages should be fairly configurable. If you decide to change the name of your blog, it won't be difficult to do. 16.1.1. Configuration File We'll create a common configuration file called config.php to define where files are located, the name of the blog, and other basic configuration parameters. This is similar to the way you store your database connection information in the db_login.php file. Example 16-1 shows what it looks like. Example 16-1. The config.php script defines settings that are used throughout the site <?php // put full path to Smarty.class.php require('/usr/share/php/Smarty/Smarty.class.php'); $smarty = new Smarty(); $smarty->template_dir = '/home/www/htmlkb/smarty/templates'; $smarty->compile_dir = '/home/www/htmlkb/smarty/templates_c'; $smarty->cache_dir = '/home/www/htmlkb/smarty/cache'; $smarty->config_dir = '/home/www/htmlkb/smarty/configs'; $blog_title="Coffee Talk Blog"; ?>
|
We use /home/www/htmlkb/smarty as our path to the template engine files, but your path will be different based on where you installed Smarty. Note that all the template files go into the directory that $smart->template_dir points to. We also set the name of the blog to "Coffee Talk Blog." 16.1.2. Page Framework We're going to use templates, which you learned about earlier, to help us build pages consistent in their appearance that are easy to modify. Let's start by setting up header and footer templates to include at the top and bottom of our pages using Smarty. Again, these files must go into the directory defined in config.php, which isn't the same directory that the PHP files reside in. In our case, it's /home/www/htmlkb/smarty/templates, shown in Example 16-2. Example 16-2. The header.tpl file <html> <head> <title>{$blog_title}</title> </head> <body> <h1>Welcome to the {$blog_title}</h1>
|
Example 16-2 uses the $blog_title variable that was set up in the config.php script. This way, the blog name appears on every page automatically. The footer shown in Example 16-3 is very basic, providing a couple of navigation links, but we can add more to it later. Example 16-3. The footer.tpl file <hr> <a href='posts.php'>Home</a> || <a href='logout.php'>Logout</a> </head> </body> </html>
|
We'll add the code to include the header and footer shortly. Our starting page provides the user with a way to log in. We'll use the PEAR Auth_HTTP package to authenticate users. This package is configured to work directly with the users table. Don't worry if you don't have the users table in your database now; we'll go through the code to create it and the other tables that we'll use in the examples. Example 16-4 shows you how to use Smarty and Auth_HTTP to build a flexible login page. Example 16-4. The login script, called login.php 1 <?php 2 // Example of Auth_HTTP the also returns additional information about the user 3 require_once('config.php'); 4 require_once('db_login.php'); 5 require_once("Auth/HTTP.php"); 6 // We use the same connection string as the pear DB functions 7 $AuthOptions = array( 8 'dsn'=>"mysql://$db_username:$db_password@$db_host/$db_database", 9 'table'=>"users", // your table name 10 'usernamecol'=>"username", // the table username column 11 'passwordcol'=>"password", // the table password column 12 'cryptType'=>"md5", // password encryption type in your db 13 'db_fields'=>"*" // enabling fetch for other db columns 14 ); 15 $authenticate = new Auth_HTTP("DB", $AuthOptions); 16 // set the realm name 17 $authenticate->setRealm('Member Area'); 18 // authentication failed error message 19 $authenticate->setCancelText('<h2>Access Denied</h2>'); 20 // request authentication 21 $authenticate->start(); 22 // compare username and password to stored values 23 if ($authenticate->getAuth()) { 24 session_start(); 25 $smarty->assign('blog_title',$blog_title); 26 $smarty->display('header.tpl'); 27 //setup session variable 28 $SESSION['username'] = $authenticate->username; 29 $SESSION['first_name'] = $authenticate->getAuthData('first_name'); 30 $SESSION['last_name'] = $authenticate->getAuthData('last_name'); 31 $SESSION['user_id'] = $authenticate->getAuthData('user_id'); 32 echo "Login successful. Great to see you back "; 33 echo $authenticate->getAuthData('first_name'); 34 echo " "; 35 echo $authenticate->getAuthData('last_name').".<br />"; 36 $smarty->display('footer.tpl'); 37 } 38 ?>
|
Since there are quite a few lines of code in this example, we'll discuss major points in the code by referencing their line numbers. There are several lines devoted to including code and configuration details. Line 3 includes our blog configuration file. Line 4 includes the information required to log into the database. Line 5 includes the PEAR Auth_HTTP code. To authenticate, we set up an array of options to tell Auth_HTTP how our database table stores the login information. Lines 7 through 14 set up that array. Lines 15 through 21 launch the authentication process. If it's successful, we start a session and store everything we know from the users table in the session so that it's available for easy access if we need it. Finally, we print out a message to welcome back the user with the user's full name. If the user isn't logged in, she'll see a login prompt like the one in Figure 16-1. Figure 16-1. The login dialog 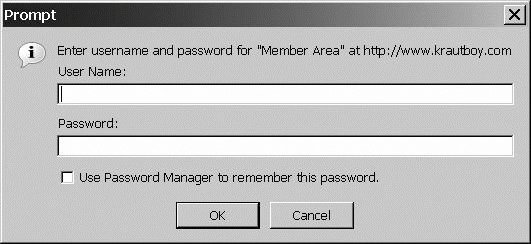
After entering valid login credentials, the user will see Figure 16-2. Figure 16-2. We're logged in now 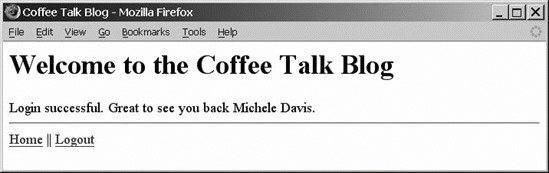
If the user cancels the authentication dialog, she'll get a page displaying "Access Denied." All subsequent pages in the examples check the $username from the session to make sure that a user is logged in. If the user isn't logged in, a message displays pointing her back to the login page defined in Example 16-4. That redirection page looks like Figure 16-3. Figure 16-3. The login link directs the user back to the login.php script 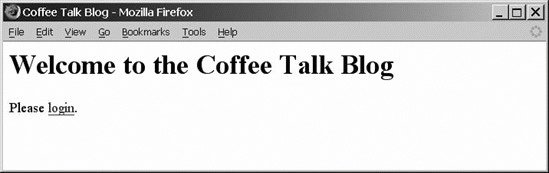
Now that we've taken care of logging in users, let's take another look at the database that supports our application. 16.1.3. Database We already created a users table for our bookstore examples. We'll add another user to that table to help us demonstrate ownership of postings and commentsspecifically, how we can modify them. We'll then have three new tables for our blog: a table to store the categories, a table to store the posts, and a table to store the comments. We'll be using natural joins in our SELECT statements, since the key fields share the same names between related tables.  | You should be careful that you do your natural joins in the right order, since changing the order can cause unexpected results; most notably, there will be result sets that have extra sets of rows. |
|
You can create these through the GUI web client, phpMyAdmin. We're including the scripts to create them from the mysql command-line tool in Example 16-5. Example 16-5. SQL to create the posts table CREATE TABLE `posts` ( `post_id` int(11) NOT NULL auto_increment, `category_id` int(11) NOT NULL, `user_id` int(11) NOT NULL, `title` varchar(150) NOT NULL, `body` text NOT NULL, `posted` timestamp, PRIMARY KEY (`post_id`) );
|
This returns the following information: Query OK, 0 rows affected (0.02 sec)
This table holds the contents of the post in the body field. The other fields link to attributes such as the poster and category. Use the code in Example 16-6 to create the categories table. Example 16-6. SQL to create the categories table CREATE TABLE `categories` ( `category_id` int(11) NOT NULL auto_increment, `category` varchar(150) NOT NULL, PRIMARY KEY (`category_id`) );
|
Example 16-6 returns: Query OK, 0 rows affected (0.01 sec)
The table created in Example 16-7 holds the categories that postings are posted to. Example 16-7. SQL to create the comments table CREATE TABLE `comments` ( `comment_id` int(11) NOT NULL auto_increment, `user_id` int(11) NOT NULL, `post_id` int(11) NOT NULL, `title` varchar(150) NOT NULL, `body` text NOT NULL, `posted` timestamp, PRIMARY KEY (`comment_id`) );
|
This code returns the value that the query was OK: Query OK, 0 rows affected (0.02 sec)
The users table was created for our bookstore examples earlier, but we'll include it here, as Example 16-8, just in case you're starting fresh. Example 16-8. SQL to create the users table (may have already been created) CREATE TABLE `users` ( `user_id` int(11) NOT NULL auto_increment, `first_name` varchar(100) NOT NULL, `last_name` varchar(100) NOT NULL, `username` varchar(45) NOT NULL, `password` varchar(32) NOT NULL, PRIMARY KEY (`user_id`));
|
SQL code returns, again, that the query value was OK: Query OK, 0 rows affected (0.02 sec)
16.1.3.1. Sample data To keep thing simple, we're going to insert some test data, using Example 16-9. The test data lets us build pages to display posts and immediately see them displayed without having to build pages that add entries for them. Once we display posts, we'll code the pages to add posts and modify them. This same process is used for comments. Example 16-9. Inserting sample data for the tables INSERT INTO categories VALUES (1,'Press Releases'); INSERT INTO categories VALUES (2,'Feature Requests'); INSERT INTO posts VALUES (NULL,1,1,'PHP Version 12','PHP Version 12, to be released third quarter 2006. Featuring the artificial inteligence engine that writes the code for you.',NULL); INSERT INTO posts VALUES (NULL,1,1,'MySQL Version 8','Returns winning lotto number.',NULL); INSERT INTO posts VALUES (NULL,2,2,'Money Conversion',' Please add functions for converting between foreign currentcies. ',NULL); INSERT INTO comments VALUES (NULL,1,1,'Correction','Release delayed till the year 2099',NULL); INSERT INTO users VALUES (NULL,'Michele','Davis','mdavis',md5('secret')); INSERT INTO users VALUES (NULL,'Jon','Phillips','jphillips',md5('password'));
|
You should see a result similar to the one below for each of the INSERT SQL commands. Query OK, 1 row affected, 1 warning (0.03 sec)
We now have some sample data loaded; therefore, we can start writing some pages that display data. 16.1.4. Displaying a Postings Summary If you're not sure how to do something in the template beyond the objects we created, visit the online documentation for Smarty templates at http://smarty.php.net. The templates separate the look and feel of the pages from the code that populates their data. While using the templates requires a little more work to set up and figure out the syntax, it reduces the overall amount of code you need to write. Smarty knows how to automate mundane tasks such as generating drop-down lists when building forms. We're going to go right ahead and jump into building the main display page that works in tandem with its template, shown in Example 16-10. Be sure to place the template files in the same directory that's established in your config.php file; the PHP files can go anywhere you like as long as they're web accessible. Example 16-10. The posts.php script displays a listing of posts and their subjects 1 <?php 2 session_start(); 3 require_once('config.php'); 4 require_once('db_login.php'); 5 require_once("DB.php"); 6 // Display the page header 7 $smarty->assign('blog_title',$blog_title); 8 $smarty->display('header.tpl'); 9 // Check for valid login 10 if (!isset($_SESSION['username'])) { 11 echo 'Please <a href="login.php">login</a>.'; 12 exit; 13 } 14 // Connect to the database 15 $connection = DB::connect("mysql://$db_username:$db_password@$db_host/$db_database"); 16 17 if (DB::isError($connection)){ 18 die ("Could not connect to the database: <br />". DB::errorMessage($connection)); 19 } 20 // Query the posts with catagories and user information 21 $query = "SELECT * FROM `users` NATURAL JOIN `posts` NATURAL JOIN `categories` 22 ORDER BY `posted` DESC"; 23 // Execute the database query 24 $result = $connection->query($query); 25 if (DB::isError($result)){ 26 die("Could not query the database: <br />".$query." ".DB::errorMessage($result)); 27 } 28 // Place the query results into an array 29 while ($result_row = $result->fetchRow(DB_FETCHMODE_ASSOC)) { 30 $test[] = $result_row; 31 } 32 // Send the data to the template 33 $smarty->assign('posts', $test); 34 // Display the template with the data plugged in 35 $smarty->display('posts.tpl'); 36 // Close the database connection 37 $connection->disconnect(); 38 // Display the page footer 39 $smarty->display('footer.tpl'); 40 ?>
|
Since Example 16-10 is a longer example, we'll break down what's happening line by line. Line 2 starts the session so we can check whether the user is logged in. Lines 7 and 8 display the header. Lines 10 through 13 check the $username_id session variable and display a login link if a user is not logged in. The rest of the page doesn't display because we use the exit command. We're now ready to interact with the database. Lines 15 through 19 connect to the database and check for connection errors. Line 21 defines the query that we'll use to get all of the information about the postings. We have to be very careful with the order of the natural joins or we'll end up getting results that aren't properly linked together. The users table is referenced first. We also define an ORDER BY statement because we want the most recent postings displayed first. Lines 29 through 31 assign the query results to an array that we'll assign to the smarty template in line 33. Now that we have all of the information from the database, we display the template in line 35. The template is defined below in Example 16-11. The last line of the template provides a link for users to add postings. Line 39 displays the footer. Example 16-11. The posts.tpl template file defines how the postings appear on the page {section name=mysec loop=$posts} <a href="view_post.php?post_id={$posts[mysec].post_id}">{$posts[mysec].title}</a> by <b>{$posts[mysec].first_name} {$posts[mysec].last_name}</b> from the <b>{$posts[mysec].category}</b> category at <b>{$posts[mysec].posted}</b>. <br /> {/section} <br /> Click to <a href="modify_post.php?action=add">add</a> a posting.<br />
|
Because there may be numerous postings to display using the same format, we define a section in the template that'll go through the $posts array and substitute the values for the chunk of HTML enclosed in the section tags. To do the same thing outside of Smarty, we'd have to use a for or a while loop to iterate through the posts in the array and display them one by one. | Notice that the links that display the posting with its body on a separate page are generated with an embedded link in the template. |
|
The view_post.php script uses the post_id value in the link to determine which posting to display. All of the pieces must work together for our pages to function correctly. The sample data we loaded causes a page that looks like Figure 16-4 to display when we request the posts.php page, and then the template populates. Figure 16-4. The summary of postings 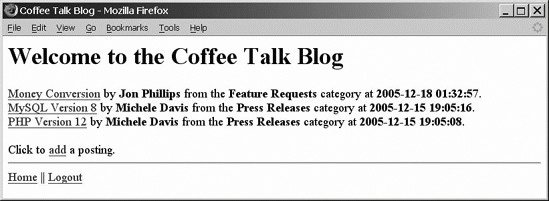
As you can see in Figure 16-4, we've got a list of postings. We've also provided a couple of links. The link that is the title of a posting sends us to a posting detail and comments page. The link that displays after the list of postings points us to a page for adding posts. These two links are actually processed by the same script, since the process for adding a posting is similar to the process for updating a posting. 16.1.5. Displaying a Posting and Its Comments To create the view_post.php script, we'll reuse some of the code and add a bit in Example 16-12. The script takes a post_id as a GET parameter and displays the posting, including its body. Comments for the posting are also listed. The user who creates the posting can delete or modify it. Likewise, users can delete or modify any comment entries they have made. Example 16-12. The view_post.php script displays a summary of its comments <?php session_start(); require_once('config.php'); require_once('db_login.php'); require_once("DB.php"); // Display the header $smarty->assign('blog_title',$blog_title); $smarty->display('header.tpl'); // Check for valid login if (!isset($_SESSION["username"])) { echo 'Please <a href="login.php">login</a>.'; exit; } // Connect to the database $connection = DB::connect("mysql://$db_username:$db_password@$db_host/$db_database"); if (DB::isError($connection)){ die ("Could not connect to the database: <br />". DB::errorMessage($connection)); } $post_id = $_GET["post_id"]; $query = "SELECT * FROM `users` NATURAL JOIN `posts` NATURAL JOIN `categories` WHERE `post_id`=$post_id"; $result = $connection->query($query); if (DB::isError($result)){ die("Could not query the database: <br />".$query." ".DB::errorMessage($result)); } while ($result_row = $result->fetchRow(DB_FETCHMODE_ASSOC)) { $test[]=$result_row; } $smarty->assign('posts',$test); $smarty->assign('owner_id',$_SESSION["user_id"]); $query = "SELECT * FROM `users` NATURAL JOIN `comments` WHERE `post_id`=$post_id"; $result = $connection->query($query); if (DB::isError($result)){ die("Could not query the database: <br />".$query." ".DB::errorMessage($result)); } $comment_count = $result->numRows(); while ($result_row = $result->fetchRow(DB_FETCHMODE_ASSOC)) { $comments[] = $result_row; } $smarty->assign('posts',$test); $smarty->assign('comments',$comments); $smarty->assign('comment_count',$comment_count); $smarty->display('view_post.tpl'); $connection->disconnect(); // Display the footer $smarty->display('footer.tpl'); ?>
|
The code in Example 16-12 starts out like the code in Example 16-10, since they both query and display postings. The difference is that the query string uses the post_id parameter in the WHERE clause to only retrieve information for one posting. The second half of the code queries the comments table, also using the post_id in the WHERE clause to retrieve only comments for the posting that we're displaying. We run into two complications though. Any given posting may or may not have any comments associated with it, and we'd like to display a heading before we list the comments. However, if there are no comments, we don't want to display that heading. To assign the variable $comment_count, we use: $comment_count=$result->numRows();
The template will then be able to tell if there are any comments. The other problem is that we want to provide links for editing and deleting posts as well as comments, only if the logged-in user created the posting or comment. This means we need to send in the current user's ID to the template before calling it. We send in the user_id form to the session template like this: $smarty->assign('owner_id',$_SESSION[user_id]);
When the template displays, it has the data from the posting, the comments, how many comments, and the currently logged-in user's ID. Example 16-13 lists the contents of the view_post.tpl template used in the view_posts.php file. Example 16-13. view_post.tpl {section name=mysec loop=$posts} <h2>{$posts[mysec].title}</h2> {$posts[mysec].body} <br /> Posted by <b>{$posts[mysec].first_name} {$posts[mysec].last_name}</b> from the <b>{$posts[mysec].category}</b> category at <b>{$posts[mysec].posted}</b>.<br /> {if $posts[mysec].user_id == $owner_id} <a href="modify_post.php?post_id={$posts[mysec].post_id}&action=edit">Edit</a> || <a href="modify_post.php?post_id={$posts[mysec].post_id}&action=delete">Delete</a> || <a href="modify_comment.php?post_id={$posts[mysec].post_id}&action=add" >Add a comment</a> <br /> {/if} {/section} {if $comment_count != "0"} <h3>Comments</h3> {section name=mysec2 loop=$comments} <hr /> <b>{$comments[mysec2].title}</b> <br /> {$comments[mysec2].body} <br /> Posted by <b>{$comments[mysec2].first_name} {$comments[mysec2].last_name}</b> at <b>{$comments[mysec2].posted}</b>.<br /> {if $comments[mysec2].user_id == $owner_id} <a href="modify_comment.php?comment_id={$comments[mysec2].comment_id}&action=edit" >Edit</a> || <a href="modify_comment.php?comment_id={$comments[mysec2].comment_id}&action=delete" >Delete</a> <br /> {/if} {/section} {/if}
|
This template builds on the template from Example 16-11 by forming another repeatable section for comments. We use the Smarty {if } evaluation to test for the presence of comments and to see whether the current user is also the creator of posts and comments. If the number of comments is 0, we don't display a heading for the comments. If the user's ID and the user_id from the posting or comment match, then we display the links for editing or modifying them, as shown in Figure 16-5. Figure 16-5. Our posting is displayed with its comments 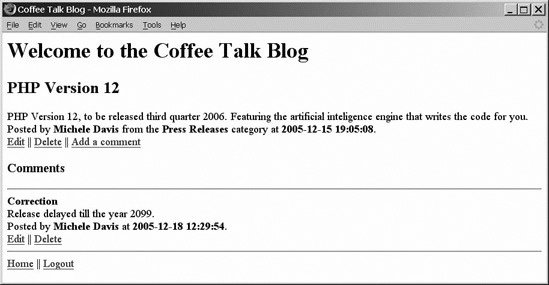
Adding and deleting posts are handled, so we'll move on to doing the most advanced script yet, which can handle adding and changing posts. 16.1.6. Adding and Changing Posts The adding and changing functionalities are grouped together, because they both build the same HTML form to add or modify the posting, as well as the validation steps before saving to the database. Again, we're building on the concept of using the same script to generate an HTML form and process its submission. There are quite a few things going on in this script: In lines 26 through 31, we connect to the database, since most of the operations require interaction with the database. In lines 18 through 23, we grab variables from the environment, since the script might be taking a post_id to tell which posting we're editing, and we get other variables from the POST from submissions that must be processed. Lines 32 through 45 process a deletion if the $action variable is set to delete. The WHERE clause of the delete query includes both the $post_id, which was sent to the script and therefore may be forged. The $user_id validates that the logged-in user created the script. If someone sends in a post_id of a posting he doesn't own, he can't delete it. The $stop variable is set to stop any further processing, as this is an end point. Only the page footer is added. Lines 47 through 67 use the $post_id from the URL to grab post information from the database and prepopulate the form in the template with the existing data for the post. The $action variable is set to edit so modify_posts.php knows to process the data when the user submits the form after editing. The $stop variable is set to stop any further processing, as this is an end point. Only the page footer is added. Line 70 checks whether the script ran from a form submission. If it did, then we're processing data for an add operation or an update. Then this data must be validated. Lines 71 through 82 validate the data. If there's a problem, we tell the user exactly what the error is, and then redisplay the form using the code in lines 128 through 136 with the data the user sent in so that she don't have to start over. When the user resubmits her form, it checks again for correctness. Although the checks done here are just to make sure the fields aren't empty, they could be as complex as you desire and would go in the same place in the script. Lines 84 through 96 process an add operation after there is successful validation. The query is built using the data from the form submission, and then it is executed. The $stop variable is set to stop any further processing, as this is an end point. Only the page footer is added. Lines 97 through 112 process an update operation after successful validation. The query is built, and then executed. The $stop variable is set to stop any further processing, as this is an end point. Only the page footer will be added. Lines 114 through 126 display an empty form. This is the first step when adding a new posting.
Throughout the processing, we check that the value of the $stop variable skips processing remaining steps if an error is encountered or we simply have accomplished what needs to happen. All of the steps rely on the template to display the HTML form. Example 16-14 lists the script. Example 16-14. modify_posts.php 1 <?php 2 include('db_login.php'); 3 require_once( 'DB.php' ); 4 require_once( 'config.php' ); 5 6 //check for valid login 7 session_start(); 8 9 //display the header 10 $smarty->assign('blog_title',$blog_title); 11 $smarty->display('header.tpl'); 12 13 if (!isset($_SESSION['username'])) { 14 echo ("Please <a href='login.php'>login</a>."); 15 exit(); 16 } 17 //grab submission variables 18 $post_id=$_POST[post_id]; 19 $title=htmlentities($_POST['title']); 20 $body=htmlentities($_POST['body']); 21 $action=htmlentities($_POST['action']); 22 $category_id=htmlentities($_POST['category_id']); 23 $user_id=$_SESSION["user_id"]; 24 25 //conected to database 26 $connection = DB::connect( "mysql://$db_username:$db_password@$db_ 27 host/$db_database" ); 28 if (!$connection) 29 { 30 die ("Could not connect to the database: <br>". DB::errorMessage()); 31 }; 32 if ($_GET['action']=="delete" and !$stop) 33 { 34 $post_id=$_GET[post_id]; 35 $query = "delete from posts where post_id='".$post_id."' and 36 user_id='".$user_id."'"; 37 $result = $connection->query($query); 38 if (DB::isError($result)) 39 { 40 die ("Could not query the database: <br>". $query. " ". 41 DB::errorMessage($result)); 42 }; 43 echo ("Deleted successfully.<br>"); 44 $stop="TRUE"; 45 } 46 47 //we're editing an entry, explicitly grab the id from the URL 48 if ($_GET[post_id] AND !$stop) { 49 $query = "SELECT * FROM users NATURAL JOIN posts NATURAL JOIN categories 50 where post_id = $_GET[post_id]"; 51 $result = $connection->query($query); 52 if (DB::isError($result)) 53 { 54 die ("Could not query the database: <br>". $query. " ". 55 DB::errorMessage($result)); 56 }; 57 while ($result_row = $result->fetchRow(DB_FETCHMODE_ASSOC)) { 58 $posts[]=$result_row; 59 } 60 $smarty->assign('action','edit'); 61 $smarty->assign('posts',$posts); 62 //get those categories 63 $query = "SELECT category_id, category FROM categories"; 64 $smarty->assign('categories',$connection->getAssoc($query)); 65 $smarty->display('post_form.tpl'); 66 $stop="TRUE"; 67 } 68 69 //The form was submitted, was it an add or an edit? 70 if ($_POST['submit'] AND !$stop) 71 { 72 //validate fields 73 if ($title == ""){ 74 echo ("Title must not be null.<br>"); 75 $found_error=TRUE; 76 $stop="TRUE"; 77 } 78 if ($body == ""){ 79 echo ("Body must not be null.<br>"); 80 $found_error=TRUE; 81 $stop="TRUE"; 82 } 83 //validated OK lets hit the databae 84 if ( $_POST['action']=="add" AND !$stop) 85{ 86 $query = "insert into posts values (NULL, 87 "."'".$category_id."','".$user_id."','".$title."','".$body."', NULL)"; 88 $result = $connection->query($query); 89 if (DB::isError($result)) 90 { 91 die ("Could not query the database: <br>". $query. " ". 92 DB::errorMessage($result)); 93 }; 94 echo ("Posted successfully.<br>"); 95 $stop="TRUE"; 96 } 97 if ($_POST['action']=="edit" and !$stop) 98 { 99 //do nothing 100 $query = "update posts set category_id ='".$category_id."', 101 title ='".$title."',body='".$body."' where post_id='".$post_id."' 102 and user_id='".$user_id."'"; 103 //echo $query; 104 $result = $connection->query($query); 105 if (DB::isError($result)) 106 { 107 die ("Could not query the database: <br>". $query. " ". 108 DB::errorMessage($result)); 109 }; 110 echo ("Updated successfully.<br>"); 111 $stop="TRUE"; 112 } 113 } 114 if (!$stop) 115 { 116 //display blank form 117 //create an empty entry 118 $result_row=array('title'=>NULL,'body'=>NULL); 119 $posts[]=$result_row; 120 //get the categories 121 $query = "SELECT category_id, category FROM categories"; 122 $smarty->assign('categories',$connection->getAssoc($query)); 123 $smarty->assign('posts',$posts); 124 $smarty->assign('action','add'); 125 $smarty->display('post_form.tpl'); 126 } 127 128 if ($found_error) { 129 //assign old vals 130 //redisplay form 131 $result_row=array('title'=>"$title",'body'=>"$body",'post_id'=>"$post_id"); 132 $posts[]=$result_row; 133 $smarty->assign('action',$action); 134 $smarty->assign('posts',$posts); 135 $smarty->display('post_form.tpl'); 136 } 137 //display the footer 138 $smarty->display('footer.tpl'); 139 140 ?>
|
The good news is that the template isn't very complicated! Its job is simply to take information from the user and hang onto a couple of hidden fields, action and post_id. They help the post_form.php script keep track of whether we're adding, updating, or deleting. If we're editing, then the post_id tells the script which article is being edited. This example highlights the advantage of using a template. If you want to make simple changes to the wording or layout of the form, then modifying the template is done by a user that just knows HTML. | The Smarty tags shouldn't be altered. |
|
If the HTML code is peppered into the PHP code, as in Example 16-14, users would probably break something when making modifications. You'll need the code for the templates, as shown in Example 16-15. Example 16-15. post_form.tpl <form action="modify_post.php" method="POST"> <label> Title: <input type="text" name="title" value="{$posts[mysec].title}"> </label> <br /><br /> <label> Body: <textarea name="body" cols="40" rows="4">{$posts[mysec].body}</textarea> </label> <input type="hidden" name="action" value="{$action}"> <input type="hidden" name="post_id" value="{$posts[mysec].post_id}"><br> <label> Category: {html_options name="category_id" options=$categories selected=$posts[mysec].category_id} </label> <br /> <input type="submit" name="submit" value="Post" /> </form> {/section}
|
The only thing new here is the {html_options} Smarty tag. This automates the generation of a drop-down selection list in the HTML form for the categories. Without Smarty, displaying a select element in a form requires using a for or while loop to display the elements; this can be very tedious, especially if you have a lot of selection lists. Clicking on the Edit link for the first posting in Figure 16-5 causes a dialog to display, as in Figure 16-6. Figure 16-6. Editing the posting title PHP Version 12 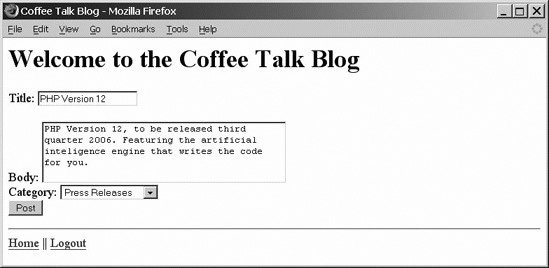
Notice that the drop-down list defaults to the value we sent from the script. You can modify the entry, as shown in Figure 16-7. Figure 16-7. Adding text to a posting 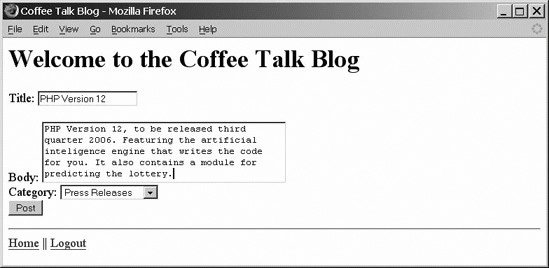
After adding the text "It also contains a module for predicting the lottery," we click the Post button. Figure 16-8 indicates that the posting updated successfully. Figure 16-8. The update was successful 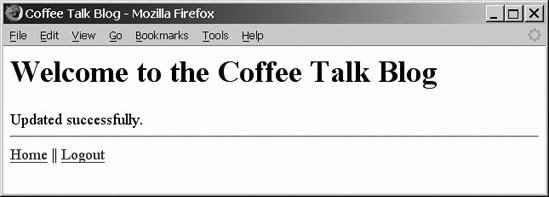
Now we can navigate back to the article, shown in Figure 16-9, by clicking on the Home link and selecting the PHP Version 12 posting. Figure 16-9. The new text appears in the post 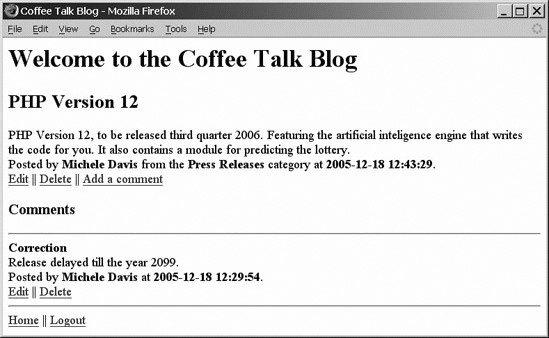
You can go ahead and try sending in an empty field. The code alerts you that you can't do that and sends you back to the HTML form to fix the problem. 16.1.7. Adding and Changing Comments The code for working with comments is nearly identical to the PHP code for modifying posts. The changes are emphasized in Example 16-16. Example 16-16. modify_comment.php <?php session_start(); require_once('config.php'); require_once('db_login.php'); require_once("DB.php"); // Display the header $smarty->assign('blog_title',$blog_title); $smarty->display('header.tpl'); // Check for valid login if (!isset($_SESSION["username"])) { echo 'Please <a href="login.php">login</a>.'; exit; } // Connect to the database $connection = DB::connect("mysql://$db_username:$db_password@$db_host/$db_database"); if (DB::isError($connection)){ die ("Could not connect to the database: <br />". DB::errorMessage($connection)); } $stop = false; $post_id = $_REQUEST["post_id"]; $title = htmlentities($_POST['title']); $body = htmlentities($_POST['body']); $action = htmlentities($_POST['action']); $category_id = htmlentities($_POST['category_id']); $user_id = $_SESSION["user_id"]; $comment_id = htmlentities($_POST['comment_id']); if ($_GET['action'] == "delete" and !$stop) { $comment_id = $_GET["comment_id"]; $query = "DELETE FROM `comments` WHERE `comment_id`='".$comment_id."' AND `user_id`='".$user_id."'"; $result = $connection->query($query); if (DB::isError($result)){ die("Could not query the database: <br />".$query." ".DB::errorMessage($result)); } echo "Deleted successfully.<br />"; $stop = true; } // We're editing an entry, explicitly grab the id from the URL if ($_GET["comment_id"] and !$stop) { $query = "SELECT * FROM `comments` NATURAL JOIN `users` WHERE `comment_id`=".$_GET["comment_id"]; $result = $connection->query($query); if (DB::isError($result)){ die("Could not query the database: <br />".$query." ".DB::errorMessage($result)); } while ($result_row = $result->fetchRow(DB_FETCHMODE_ASSOC)) { $comments[] = $result_row; } $post_id = $_GET["post_id"]; $smarty->assign('action','edit'); $smarty->assign('comments',$comments); $smarty->assign('post_id',$post_id); $smarty->display('comment_form.tpl'); // Display the footer $smarty->display('footer.tpl'); exit; } //The form was submitted, was it an add or an update? if ($_POST['submit'] and !$stop) { // Validate fields if ($title == ""){ echo 'Title must not be null.<br />'; $found_error = true; $stop = true; } if ($body == ""){ echo "Body must not be null.<br />"; $found_error = true; $stop = true; } // Validated OK lets hit the database if ($_POST['action'] == "add" AND !$stop) { $query = "INSERT INTO `comments` VALUES (NULL, '".$user_id."','".$post_id."','".$title."','".$body."', NULL)"; $result = $connection->query($query); if (DB::isError($result)){ die("Could not query the database: <br />".$query." ".DB::errorMessage($result)); } echo "Posted successfully.<br />"; $stop = true; } if ($_POST['action']=="edit" and !$stop){ $query = "UPDATE `comments` SET `title`='".$title."', `body`='".$body."' WHERE `comment_id`='".$comment_id."' AND `user_id`='".$user_id."'"; $result = $connection->query($query); if (DB::isError($result)){ die("Could not query the database: <br />".$query." ".DB::errorMessage($result)); } echo 'Updated successfully.<br />'; $stop = true; } } if (!$stop){ // Display blank form // Create an empty entry $post_id = $_GET["post_id"]; $result_row = array('title'=>NULL,'body'=>NULL,'comment_id'=>NULL); $comments[] = $result_row; // Get the categories $smarty->assign('post_id',$post_id); $smarty->assign('comments',$comments); $smarty->assign('action','add'); $smarty->display('comment_form.tpl'); } if ($found_error) { // Assign old vals // Redisplay form $post_id = $_POST["post_id"]; $result_row = array('title'=>"$title",'body'=>"$body",'comment_id'=>"$comment_id"); $comments[] = $result_row; $smarty->assign('action',$action); $smarty->assign('post_id',$post_id); $smarty->assign('comments',$comments); $smarty->display('comment_form.tpl'); } // Display the footer $smarty->display('footer.tpl'); ?>
|
The changes revolved around working with a comment_id instead of a post_id as the key value, although you still track the posting_id for new comments. The name of the template is comment_form.tpl instead of post_form.tpl. The template for building the comments form, shown in Example 16-17, is the same as the template for posts, except you no longer need the category selection drop-down list, and you've replaced posts with comments everywhere it appears in the templateexcept for the hidden form parameter post_id that is used for tracking, which is what posting a new comment is for. Example 16-17. comment_form.tpl {section name=mysec loop=$comments} <form action="modify_comment.php" method="post"> <label> Title: <input type="text" name="title" value="{$comments[mysec].title}" /> </label> <br /> <br /> <label> Body: <textarea name="body" cols="40" rows="4">{$comments[mysec].body}</textarea> </label> <input type="hidden" name="action" value="{$action}" /> <input type="hidden" name="post_id" value="{$post_id}" /> <input type="hidden" name="comment_id" value="{$comments[mysec].comment_id}" /> <br /><br /> <input type="submit" name="submit" value="Post" /> </form> {/section}
|
Clicking on the edit link for the Correction comment displays Figure 16-10. Figure 16-10. Updating the comment and adding some text 
We add the text "Don't hold your breath!" and click Post, bringing us to the screen shown in Figure 16-11. Figure 16-11. Confirmation of the comment update 
Finally, we navigate back to the post, in Figure 16-12. Figure 16-12. The comment has been updated 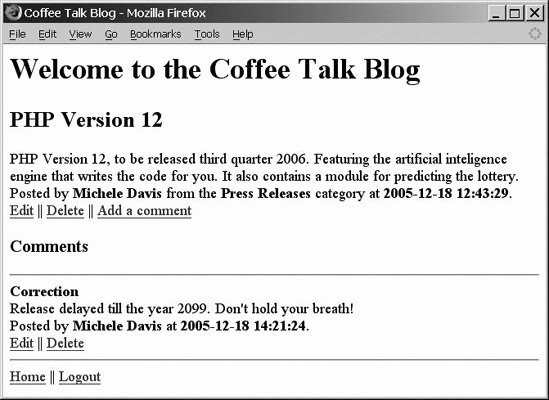
We can see the comment has been updated in Figure 16-12. We can use the same format of PHP and template files to modify other entities in our database, such as categories or users. The possibilities are endless. You can embark on creating numerous dynamic web sites armed with your learning from this book. The next (and last) chapter discusses resources for PHP and MySQL questions. There is a plethora of information out there, and it's available right at your fingertips! |