The Preset Shape Tool
| [ LiB ] |
The Preset Shape Tool 
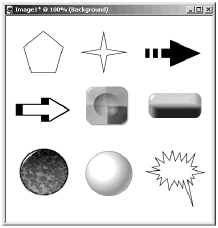
With the Preset Shape tool, you can draw simple and complex shapes precisely. The available shapes, which you choose from the tool's Tool Options palette, can be as simple as basic geometric shapeslike Rectangle, Ellipse, Pentagon, Hexagon, Octagon, and several types of starsbut more complex shapes are also available. As you'll see in Chapter 11, anything that you can draw with the vector tools can be saved as a preset shape. Figure 1.7 shows some of the preset shapes that come with Paint Shop Pro, and Figure 1.8 shows the Tool Options palette for the Preset Shape tool.
Figure 1.7. Some of the shapes available with the Preset Shape tool.

Figure 1.8. The Tool Options palette for the Preset Shape tool.
![]()
To define a vector shape, check Create as vector in the Tool Options palette for the Preset Shapes tool. To define a raster shape, uncheck Create as vector .
If you uncheck Retain style , the Foreground/Stroke material set in the Materials palette is used for the outline of the shape and the Background/Fill material is used for the inside of the shape. (Set Stroke to Transparent if you don't want an outline, or set Fill to Transparent if you want only an outline.) If you check Retain style, then the stroke and fill match those of the original shape, as shown in the thumbnail displayed in the Shapes drop-down list.
Another option that you can set for the Preset Shape tool is whether or not the shape is antialiased. Aliasing is the stepped effect produced when a line is drawn on a computer screen. Antialiasing is a method of smoothing this jagged effect by adding pixels along the edge of the line, in colors that are intermediate between the color of the line and the Background color . To use antialiasing, check the Anti-alias check box.
NOTE
 NOTE
NOTE
Antialiasing is available only with greyscale images and 16-million color images.
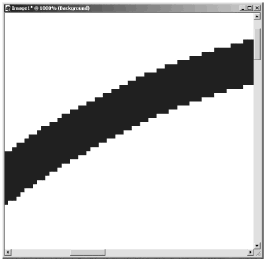
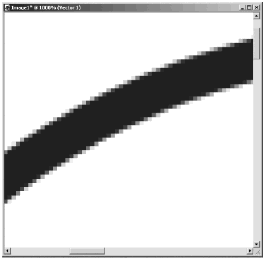
Figure 1.9 shows a zoomed-in view of a portion of a circle created without antialiasing in effect. Figure 1.10 shows a zoomed-in view of a portion of a circle created with antialiasing. As you can see, the jagged edges of the circle appear to be much smoother in the antialiased version.
Figure 1.9. A circle without antialiasing.

Figure 1.10. A circle with antialiasing.

NOTE
 CAUTION
Antialiasing does a great job smoothing lines, but you have to be careful when you manipulate antialiased elements. If you paste an antialiased figure into an image or Flood Fill around an antialiased figure, an edge of the original surrounding color will appear around the figure along the area where the blended pixels are located.
The remaining controls Line Style , Width , Join , and Miter limit all affect the stroke. If you want the stroke to be something other than an unbroken line with no variation, leave Line Style set to +Solid . If you want a fancier line, choose one from the drop-down list. To set the width of your stroke, supply a nonzero value for Width . (If you want no stroke, even if Stroke in the Materials palette is set to something other than Transparent, set Width to 0.)
Join and Miter limit control how the corners of a shape look. You can set Join to one of three types: Miter, for mitered corners; Round, for rounded corners; or Bevel, for beveled corners. When Join is set to Miter, corners are mitered when lines meeting at a corner are within the miter limit and are beveled otherwise .
You define the shape in any of the following ways:
-
Click the left mouse button and drag to draw the shape corner to corner.
-
Hold down the Shift key as you drag to draw the shape from the center out.
-
Click the right mouse button and drag to maintain the aspect ratio of the original shape.
-
Hold down the Shift key as you drag with the right mouse button down to maintain the original aspect ratio and rotate the image at the same time.
The controls for Line Style , Width , Join , and Miter Limit are available only when Retain Style is unchecked.
If you drag from the top down, the shape is drawn as it appears in the Shapes drop-down list. If you drag from the bottom up, the shape is flipped from top to bottom.
NOTE
 TIP
TIP
As you draw a shape, look on the right of the Status bar. You'll see several sets of numbers in the following form:
(x: n1 y: n2) n3 °
where n1, n2, and n3 are all numbers. The pair of numbers enclosed in the parentheses indicate the x- and y-coordinates of the cursor position, while the third number indicates the number of degrees the shape is rotated .
| [ LiB ] |