Sharing Projects
| As with all workflow-related solutions, consider your sharing methods from the outset. Communicate with everyone involved on your project to determine how they will retrieve and send project information to ensure a successful approach. Sharing in Final Cut ProIt's a good idea to set up a clear method for exchanging sequences and projects between Final Cut Pro workstations. During the course of a project, you may exchange your project, sequences, and bins with other members of your production team, so you need to keep track of current versions and perhaps even who created them. During the course of The Magic Hour project, there were a number of editors involved in the post-production who exchanged sequences, bins, and even filters. Since they worked as a team, it was important to determine an elegant system of exchange. A variety of editors contributed the following techniques, which you can use to design your own method of organization:
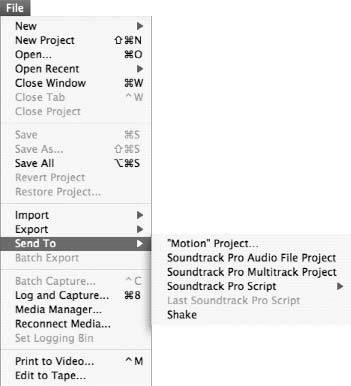
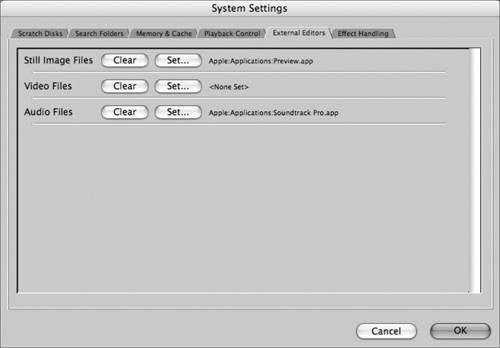
Note If you are sharing projects that are using different resolutions, for example if you are sharing sequences between an OfflineRT and DVCPRO HD project, remember that you will need to reset the sequence settings. Note When sharing Final Cut Pro projects, bins, and sequences, unless you're working with an identical media file structure, you may need to reconnect your media. Exchanging with Pro Video ApplicationsPerhaps the most flexible and time-saving task you can accomplish with Final Cut Pro is the seamless exchange of information among the Apple Pro video applications. For instance, let's say you want to remove a city skyline in the background of a clip; you can send the clip directly to Shake from Final Cut Pro. You can easily exchange information with LiveType, Cinema Tools, Compressor, Soundtrack Pro, Logic, Motion, DVD Studio Pro, and Shake. In Final Cut Pro, the Send To command lets you exchange information with Motion, Soundtrack Pro, and Shake. You can also use the External Editor feature in Final Cut Pro to open the media file of a clip in another application. When you assign an application to a media file type, you can open a clip's media file through Final Cut Pro and automatically launch the assigned application. So for example, if you assigned Adobe Photoshop as your still-image external editor, you could open the still clip in Photoshop using External Editor, alter the file, save, return to Final Cut Pro, and the still image would be updated automatically.
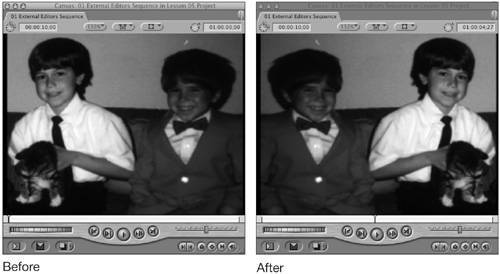
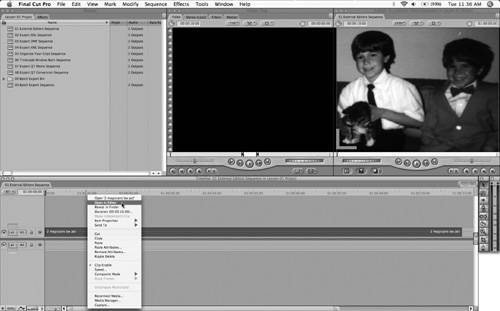
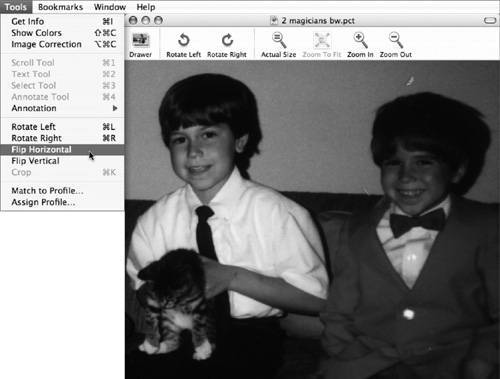
Note LiveType and Motion assign their own Creator property. A clip's Creator property determines what application will open it. Here, you'll open the PICT file directly from the Final Cut Pro sequence. Preview will launch automatically since you assigned it to open still images in the External Editors tab of the User Preferences.
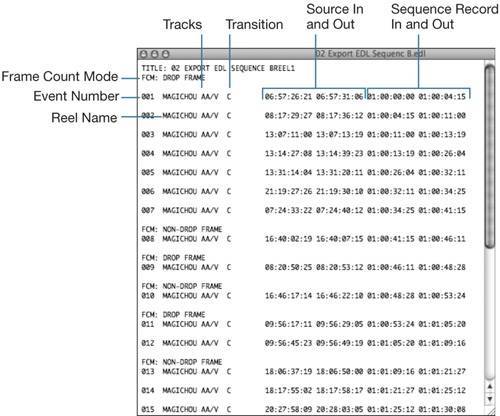
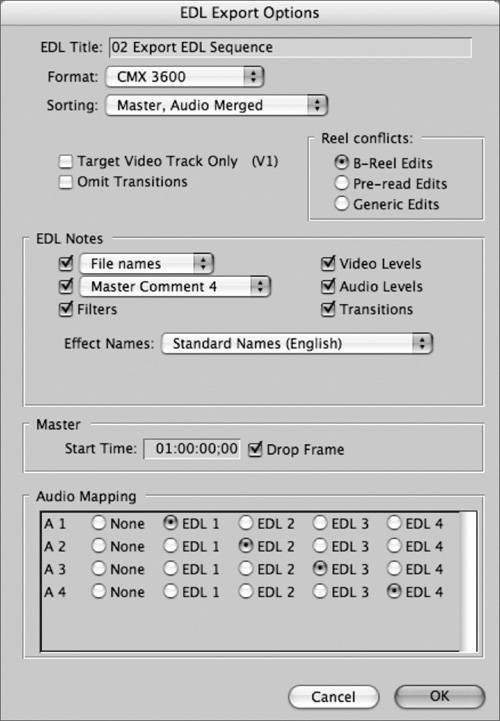
 You can assign any application, and it will work in the same manner. If you are working on titles or lower thirds created in Adobe Illustrator, assign Illustrator as the still image files external editor. It might be useful to assign Adobe After Effects as your video files external editor if you are time remapping your video. There are endless possibilities, and since any application can be set as an external editor, you can easily share, open, and edit your media files while you work from within Final Cut Pro. For more information on assigning external editors, see the section on preferences in Lesson 11. For more information on other Apple Pro video and audio applications, refer to the Apple Pro Training Series books. Exporting an EDLThe most basic interchange format you can use for sharing projects is an edit decision list (EDL). An EDL represents edits from a single sequence, and you can use it to exchange information with older editing systems that don't recognize other formats like XML. An EDL contains a description of your sequence as text, which describes each clip and its placement in your sequence, but EDLs include only basic transitions. In order to export a successful EDL, you must avoid nested sequences, clips on tracks above video track 2, and non-SMPTE standard transitions. Video and audio filters, motion parameters and keyframes, although not applied, are listed in the EDL for your reference.
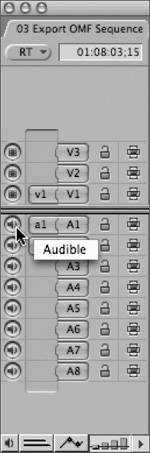
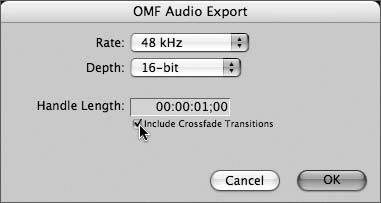
More Info For more information see "Importing and Exporting EDLs" in the Final Cut Pro 5 user's manual. Exporting an OMFTraditionally, you would expect to export an OMF for your audio mixer. This is because an Open Media Framework (OMF) can store more information than a traditional EDL. An OMF export contains your audio clips, their placement within a sequence, and the media files themselves. There are no track limitations, you can maintain linear cross-fade information, and you can add handles if desired. Before you export an OMF, keep in mind that if you have applied a speed effect, those clips will be permanently changed. If your sequence contains any nested sequences, the nests will become a single media file. Any levels, pan, or filters you applied will not be exported. The Final Cut Pro OMF export has a two-gigabyte limit. (Automatic Duck's new Pro Export resolves the two-gigabit limitation.) If you see a two-gigabit error message, simply duplicate your sequence, creating a part 1 and part 2. Export each part separately; this way you can split your OMF export in half. Un-nest nested sequences and include original media clips with their speed-affected counterparts. Keep a written log of filters, levels, and pans if you want to communicate those to your audio mixer.
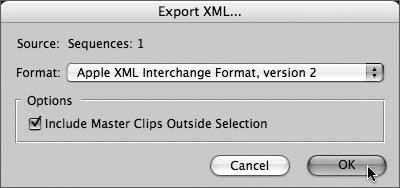
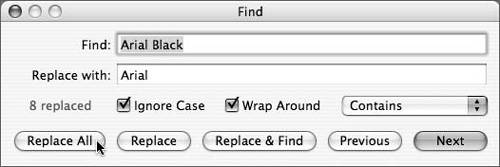
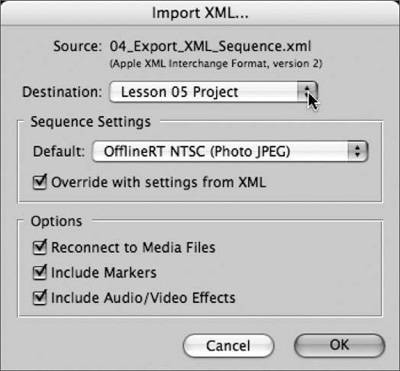
Exporting an XML FileXML, eXtensible Markup Language, is a unique language that allows you to create, translate, exchange, and read any single element or an entire Final Cut Pro project file in a text editor. Using XML allows you to export all your project information into a database, such as FileMaker, or translate your entire final sequence along with your filters to another nonlinear editor. Since you can view an XML file in a text editor, you can also learn to read, construct, and edit a Final Cut Pro project directly in a text editor. The most basic example of how you can leverage XML is the ability to change multiple clips at once. For example, if your project contains hundreds of titles and graphics that have been positioned for a 4:3 aspect ratio, but you need to deliver a 16:9 project, you could export the sequence using XML and modify all the position parameters of each clip simultaneously. This is a very basic example of how you can leverage a Final Cut Pro XML interchange. To learn more, read Chapter 12 of the Final Cut Pro user's manual. Here, you'll export a sequence as an XML file, modify the font of the lower thirds, and import the XML file back to Final Cut Pro.
The XML file stores the attributes of each sequence, the name and location of the all clips, and all other information such as timecode, frame rate, and media source location. Here's how to take a look at the XML file in TextEdit:
Changing a font is just one example of the Apple XML Interchange Format capabilities. To learn more, see the "Importing and Exporting Final Cut Pro XML" chapter in the Final Cut Pro user's manual. XML DevelopersAutomatic Duck (www.automaticduck.com) uses XML to translate project and sequence information between Final Cut Pro and other professional applications. Automatic Duck allows you to exchange project and sequence information between Final Cut Pro, Motion, Avid, Pro Tools, Adobe After Effects, Premiere Pro, and Discreet Combustion. They also offer a free XML Exporter plug-in for Final Cut Pro designed to make exporting XML faster and easier. Using an Automatic Duck plug-in, you can start a project on one platform and finish on another. During post-production at a broadcast facility, I frequently sent OMFs to the audio department; they mixed the audio and sent it back for me to include in my final output and archive. Automatic Duck's Pro Import FCP allowed me to import the OMF composition directly into Final Cut Pro. This plug-in also allowed me to share projects with Avid editing systems. Final Cut Pro Timeline 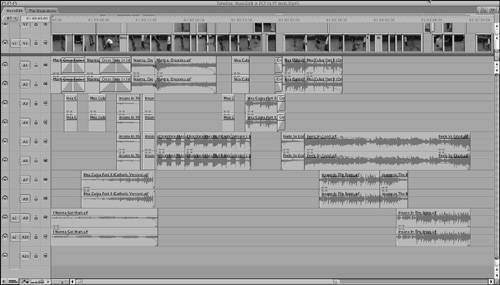 Audio from the Final Cut Pro Timeline exported to a Pro Tools session; all the levels are retained, as is the pan information. 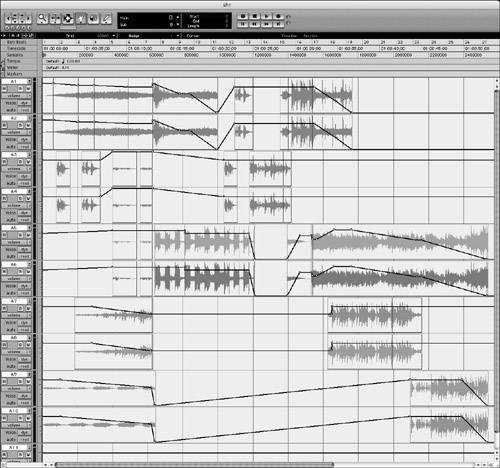 Other companies, such as Spherico (www.spherico.com) and Digital Heaven (www.digital-heaven.co.uk), also make some elegant XML solutions for Final Cut Pro. |

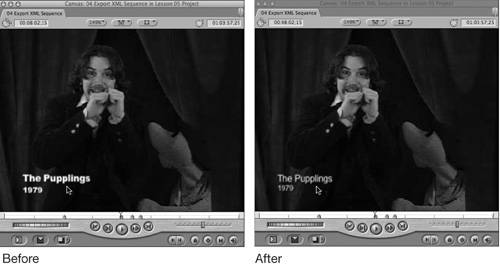 Click between the original sequence and your modified sequence to see the changes.
EAN: N/A
Pages: 205