Section 62. Adding a Stroke to Objects
#62. Adding a Stroke to ObjectsAdding a stroke to an object can mean the difference between a mere graphic element and a graphic element that stands out on a page. For example, a stroke around a sidebar can set it apart from the surrounding elements and draw the reader's attention. Similarly, a stroke around a graphic can both contain the image within and isolate it from other elements.
The Stroke box is paired with the Fill box in the Swatches palette, Color palette, and toolbox, and the two work similarly. To add a stroke to a selected object, first click any Stroke box. (Note: By default, the Rectangle, Ellipse, and Polygon tools create objects with a one-point stroke.) When you apply a stroke to an object, you may not be able to see it if it has no width or no color. The easiest way to specify a stroke's width is to choose a weight from the Weight menu in the Control palette or enter a weight value in the accompanying field (Figure 62a). The Stroke Type menu in the Control palette lets you choose a stroke style. (See the next how-to for information about adding custom stroke styles.) Figure 62a. The Weight field in the Control palette specifies a 10-point-wide stroke. Below the Weight field, the Solid style is selected in the (Stroke) Type menu.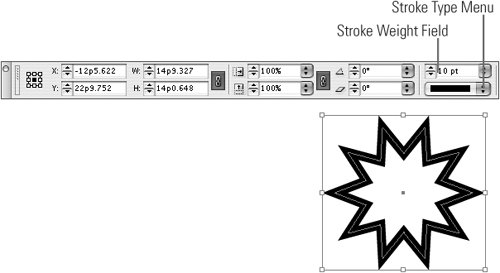 Use the Swatches palette or the Color palette to assign a color to the stroke. (See the previous how-to for information about the Swatches and Color palettes.)
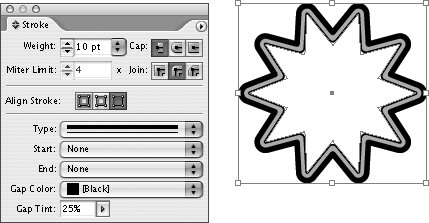
In addition to specifying a stroke's weight, type, and color, you can use the Stroke palette (Window > Stroke) to modify several other stroke characteristics (Figure 62b). The Stroke palette includes controls for specifying how segments connect and where the stroke is placed relative to the edge of the object (Align Stroke to Center, Align Stroke to Inside, or Align Stroke to Outside). You can also specify a Gap Color and Gap Tint for dashed, striped, and dotted stroke styles. The Start and End menus are available only for open paths and let you choose among several graphic endpoints, including arrowheads, squares, and circles. Figure 62b. The Stroke palette includes several controls for modifying the appearance of a stroke. In this example, the stroke is 10 points wide and aligned with the outside of the object frame. A Thick-Thin (Stroke) Type is also applied, and the gap between the two strokes is 25% Black.
To remove a stroke from an object, select the object, and then set the stroke weight to 0. You can do this using the Weight field in the Control palette or the Stroke palette. You can also set the stroke color to None to remove a stroke from an object. |
EAN: 2147483647
Pages: 142