Section 37. Anchoring Objects in Text
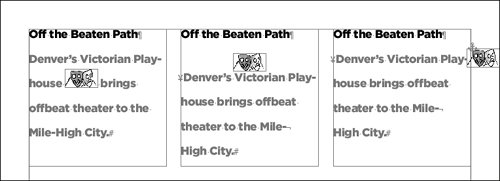
#37. Anchoring Objects in TextIf you have pictures or other graphic elements that need to flow with related text, you can anchor the objects in the text. This prevents you from having to manually reposition objects such as charts, sidebars, or graphics every time text reflows. Any type of object can be anchored in text, including text frames, picture frames, paths, and tables. When you anchor objects, you can position them inline with text, above text, or in a custom position such as out in the margin (Figure 37a). You have precise control over object position, including the ability to fine-tune placement with the mouse. Figure 37a. Anchored objects flow with text. An Inline object (left) is positioned at the baseline of text at the text insertion point; an Above Line object is positioned above the line containing the text insertion point; a Custom object can be positioned outside the text frame, relative to the spine, margins, and more.
Anchoring Existing ObjectsYou have two choices for anchoring objects: You can anchor existing objects or you can anchor placeholder objects. To anchor an existing object in text:
By default, the object is anchored inline, but you can reposition it using the Anchored Object Options dialog box. If the object is larger than surrounding text, it may overlap the text; in that case, you may need to adjust the leading or insert line breaks.
Anchoring Placeholder ObjectsIf you haven't created the object that will be anchoredor if its content is not readyyou can create a rectangular placeholder and anchor it in text. To do this:
Positioning Anchored ObjectsTo change the positioning of an anchored object, click it using a selection tool and choose Object > Anchored Object > Options. The controls in the Anchored Object Options dialog box are the same as those for positioning in the Insert Anchored Object dialog box. Choose an option from the Position menu at the top:
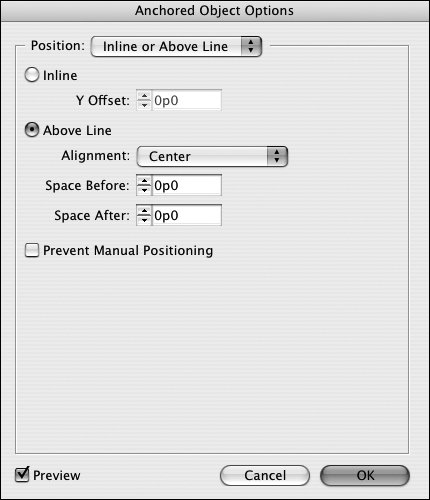
If you choose Inline or Above Line from the Position menu, the Anchored Object Options dialog box (Figure 37b) lets you specify which type of anchoring you want and then further fine-tune the positioning.
Figure 37b. When Inline or Above Line is selected from the Position menu, the Anchored Object Options dialog box lets you specify the position of anchored objects that are flowing with or above lines of text.
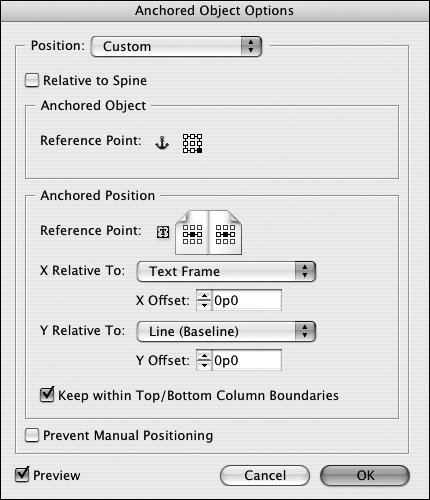
If you choose Custom from the Position menu, the Anchored Object Options dialog box (Figure 37c) lets you specify precisely where the object should be placed.
Figure 37c. For an anchored object with Custom alignment, the Anchored Object Options dialog box lets you position it in relation to the columns of text, the page, and more.
The interplay of these settings is fairly complex, so be sure to check the Preview box so you can see any changes you make as you make them. Tip In addition to all the positioning settings in the Anchored Object Options dialog box, you can drag anchored objects using the selection tools. If you're creating a template and don't want users to be able to move anchored items, check Prevent Manual Positioning. Releasing Anchored ObjectsIf you no longer want an object to be anchored, select it with a selection tool. Then choose Object > Anchored Object > Release. (The Release command is available only for anchored objects with Custom alignment.) You can also copy and paste any selected anchored object to create an unanchored copy of it. |
EAN: 2147483647
Pages: 142