Your Illustrator Logo Built Into Photoshop
| If you would like your one-color logo to be a built-in part of Photoshop, accessible to every document, it's pretty simple to do. Keep in mind that this works best with basic compound shapes; so if you want to add effects, alter opacity, etc., you can simply do that in Photoshop. In Illustrator, select the logo with the Selection tool (V) (if the logo contains text, convert it to outlines by selecting the text with the Selection tool and choosing Type>Create Outlines) and then go to Edit>Copy (Command-C [PC: Control-C]). Switch to Photoshop, and from the Edit menu choose Paste (Command-V [PC: Control-V]). When the Paste dialog appears, choose Shape Layer (to access the Paste dialog, see the tip on page 263). When your logo appears in Photoshop, it will change to whatever fill or stroke color is active in Photoshop's Toolbox, but you can always change this later. So, with the logo still selected, go to the Edit menu and choose Define Custom Shape. Name it, click OK, and from then on your logo will appear in the Shape Picker when you have the Custom Shape tool (U) selected. Just choose a color in Photoshop's Toolbox, get the Custom Shape tool, choose your logo from the Shape Picker in the Options Bar, and click-and-drag with the Shift key held down to add your logo proportionately in any size you want! 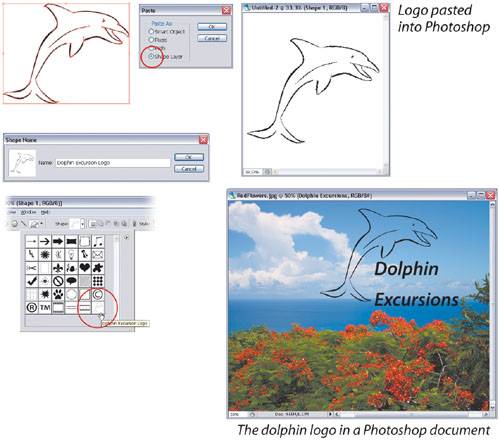 |
EAN: 2147483647
Pages: 473