POWER SUPPLIES
The power supply connects to an AC outlet and provides power to the components of the computer through a gaggle of DC connectors. AC is connected through a standard CEE three-pronged power cord (see Figure 4.5), which is used with almost all PCs, including Macs, some laptop power supplies, and many other devices, computer-related and otherwise. New cases come with power supplies, but power supplies often wear out and need to be replaced.
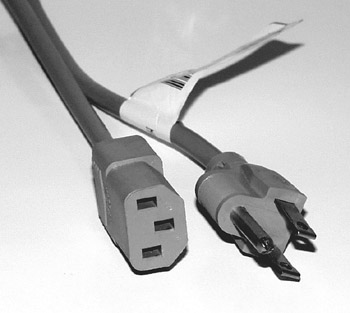
Figure 4.5: The ubiquitous CEE AC power cord.
DC Power Output Connectors
The DC power connectors vary somewhat between AT, ATX, and proprietary form factors. While the disk drive connectors are all the same, the motherboard connectors are different and incompatible between major form factors, although sub-versions of ATX have the same connectors. Figure 4.6 shows different ATX DC power connectors.
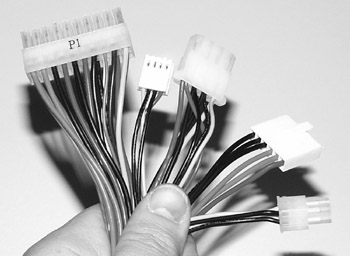
Figure 4.6: ATX DC power connectors.
In addition to the power connector variants, different cases require power supplies of different shapes and sizes, or they won’t fit in the case.
Determining Power Supply Power Requirements
Common power supplies come in a range of about 80 watts to 600 watts. How do you determine how much you need? First, determine the number of drives, the processor, number of expansion cards, and so forth. Know that it never hurts to have more capacity than you need. Check the motherboard and processor documentation. Some power supplies are overrated. For example, if you find a 300-watt power supply at a very low price, and you notice that it is physically light in weight, it is likely to fail under load.
Proprietary Power Supplies
Many brand-name computers require special power supplies in order to fit in the case or properly power the computer. These power supplies might or might not be more expensive than generic supplies. For example, certain Dell power supplies have an extra connector that fits into a connector on a proprietary Dell motherboard. Unfortunately, this connector matches a connector found on standard ATX power supplies, but the wiring differs. Therefore, don’t try to plug in a generic power supply in a Dell motherboard unless you want to fry the board. The good news is that Dell sells replacement power supplies on its Web site for a very reasonable price. However, a particular Hewlett-Packard computer takes a power supply available only from Hewlett-Packard at a rather high price. Sometimes you can get proprietary power supplies from generic manufacturers. Just make sure to do all your homework before connecting a power supply to a motherboard on a brand name computer. Figure 4.7 shows an assortment of power supplies.

Figure 4.7: Power supply assortment.
Diagnosing Power Supply Problems
The most obvious symptoms of a failed power supply occur when you turn your computer on and hear a loud noise, smell something burning, and/or see smoke, and the computer won’t power on. Disconnect the power immediately; you likely have a blown power supply. If there is smoke, you’ll want to ventilate the room—it is toxic. Usually, however, the symptoms of a blown power supply aren’t nearly so dramatic; you turn on the computer and nothing happens.
Always Check the Voltage Switch!
We’ve said it before and we’ll say it again: Make sure the power supply is set for the correct voltage.
Unusual Noises
If you hear a grinding noise, or there is excessive vibration, the power supply fan might be going bad. Visually check the rotation of the fan. Don’t try to replace the fan, replace the power supply. A loud hum that changes pitch while you’re doing different things usually indicates a bad power supply.
Testing the Power Supply
Testing a power supply is straightforward. Antec (Antec-inc.com) offers a simple, inexpensive ATX power supply tester, although it is helpful to have a voltmeter or multitester to use with it. Simply connect the tester to the power connector and view the LED. If it lights, the power supply is working. For a better reading, while the tester is in place, touch a voltmeter’s or multimeter’s probes to the tester’s leads to read the voltage. Voltage should be 12v, 5v, or 3.3v, depending on the connector. Tested voltage should be very close to the rated number.
Removal and Replacement
This is usually straightforward. Make sure the power cord is disconnected. With most tower or desktop cases, you’ll have to open the case and remove the screws from the back around the power supply. Because some manufacturers have special connectors attached to the motherboard and other devices inside the system, you should draw a diagram of the colors of the wires and positions of the connectors as you are disconnecting them so you can match the power supply and connect it, or a new one, properly. Then, remove all of the power connectors. The power supply should come right out. In some computers, the power supply is mounted to a bracket. You’ll have to remove the power supply from the bracket. Replacing the power supply, or installing a new one, is done the same way, in reverse.
| Note | For a useful discussion on PC power supplies, go to http://computer.howstuffworks.com/power-supply.htm. |
EAN: 2147483647
Pages: 390