Reorganizing a Document Outline
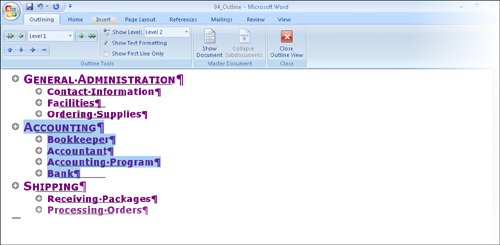
| If you are creating a document that contains headings, you can format it with built-in heading styles that include outline levels. Then it is easy to view and organize the document in Outline view. In this view, you can hide all the body text and display only the headings at and above a particular level. You can then rearrange the sections of a document by moving their headings. See Also For more information about formatting with styles, see "Working with Templates" in Chapter 4, "Changing the Look of a Document." To view a document in Outline view, click the Outline button in the Document Views group on the View tab, or click the Outline button on the View toolbar. The document is then displayed with a hierarchical structure, and the Outlining tab appears on the Ribbon.  The Outline Tools group on this tab includes buttons you can click to display only the headings at a specific level and above, to promote or demote headings or body text by changing their level, and to move headings and their text up or down in the document. The indentations and symbols used in Outline view to indicate the level of a heading or paragraph in the document's structure do not appear in the document in other views or when you print it. Tip You can click the buttons in the Master Document group to create a master document with subdocuments that you can then display and hide. The topic of master documents and subdocuments is beyond the scope of this book. For information, see Word Help. In this exercise, you'll switch to Outline view, promote and demote headings, move headings, and expand and collapse the outline.
USE the 04_Outline document. This practice file is located in the Chapter02 subfolder under SBS_Word2007. OPEN the 04_Outline document.
CLOSE the 04_Outline document without saving your changes. |
EAN: 2147483647
Pages: 129
- Chapter II Information Search on the Internet: A Causal Model
- Chapter VIII Personalization Systems and Their Deployment as Web Site Interface Design Decisions
- Chapter X Converting Browsers to Buyers: Key Considerations in Designing Business-to-Consumer Web Sites
- Chapter XIII Shopping Agent Web Sites: A Comparative Shopping Environment
- Chapter XVII Internet Markets and E-Loyalty


