Infrared File Transfers
| Most portable computers include an infrared data transmission device similar to that used on TV remote controls. Using a data transmission standard called IrDA (after the Infrared Data Association), computers, printers, and handheld organizers can communicate with each other without LAN wiring. Just point them at each other. LAN connections are much faster, so I recommend using them over IrDA any day, but if you don't have a LAN connection, IrDA can give "point and shoot" a whole new meaning. IrDA comes in two flavors: SIR (Serial InfraRed), which tops out at 112Kbps, and FIR (Fast Infrared), which runs up to 4Mbps. Most new portables support both protocols. The advantage of using SIR is that you can attach an (expensive) adapter to a standard serial port on a desktop computer and give it infrared capability. NOTE An FIR adapter connects to an SIR adapter by automatically lowering its transfer rate. The two standards interoperate quite nicely. Windows XP includes support for IRDA file transfers between two capable devices such as laptops, digital cameras, and so on. Because most laptop computers have IrDA hardware, you can transfer files between two Windows XP/2000 laptops just by bringing them near each other. Setting Up an Infrared DeviceIf your computer has IrDA-compatible hardware installed, Windows detected it and installed support for it during installation. You can tell by checking for a Wireless Link applet in the Control Panel under Printers and Other Hardware. NOTE The use of the word "wireless" in Wireless Link is unfortunate because it could be confused with 802.11x wireless networking. The Wireless Link feature we're discussing here refers to infrared file transfers only. If you've added an external serial port IrDA adapter, choose Add/Remove Hardware in the Control Panel, select Add Hardware, choose the device manually, and select Infrared Devices. Finally, choose the proper IrDA device type and serial port information.
Open the applet, and view the Hardware tab to confirm that Windows thinks the device is operating properly (see Figure 18.28). If it's not, select Troubleshoot to diagnose and fix the problem. Figure 18.28. Using the Wireless Link Control Panel applet, you can configure file transfer directories and the transfer speed.
The applet has three tabs. On the first two, you can enable transfers of files and images, and select the destination folder for files and images received from other computers and digital cameras. The default folder for received files is your desktop. The default folder for received images is the My Pictures folder inside your My Documents folder. You can change these defaults by clicking Properties and selecting a different folder. On the Hardware tab, you can set the maximum speed for wireless transfers. If you experience a high error rate, click Properties and try changing the speed from the default 115200bps to 57600 or lower. Infrared File TransferWhen another infrared-capable computer is in range of your computer's beam, your computer makes an interesting sound, a Send Files to Another Computer icon appears on the desktop, and a small control icon appears in the notification area (see Figure 18.29). You can instantly send files to the other computer by dragging files to the Send Files icon. Pretty neat! Figure 18.29. When another infrared file transfer device is in range, the Send Files icon (left) appears on the desktop, and the Wireless control icon (right) appears in the notification area.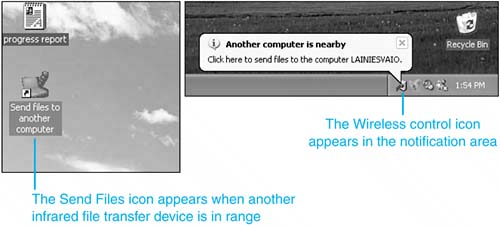
To send files to another computer, you can use any of these three methods:
NOTE The Wireless Link dialog box is a standard Open File dialog box; it's really a little Explorer window. If you drag a file into this dialog, you're moving it to the displayed folder on your own computer. To transfer a file via drag and drop, you must drag it to the Send Files icon. After you've selected files to transfer via drag and drop, Send To, or the dialog, progress dialogs appear on both computers, indicating that a file transfer is taking place. NOTE When infrared file transfers are enabled, anyone with an IrDA-equipped Windows XP or 2000 computer can zap files onto your computer's desktop. Don't worry, though, because files are never overwritten. If someone sends you a file with the same name as an existing file on your desktop, it's named something like Copy 1 of XXXXXX. Digital Camera Image TransferWhen you bring a digital camera with a compatible IrDA interface near your computer, the image transfer utility appears. Follow your camera manufacturer's instructions to copy images from the camera to your computer. You can specify the directory for image transfers in the Wireless Link properties, from the Control Panel, or from the Wireless Link task tray icon. The default is the My Pictures folder inside your My Documents folder. Infrared PrintingWhen your computer has an IrDA interface, you can print to infrared-connected printers. To make a connection to an infrared printer, follow these steps:
Now you can use the printer whenever it's in visible range of your computer. |
EAN: 2147483647
Pages: 450