Joining a Windows Domain Network
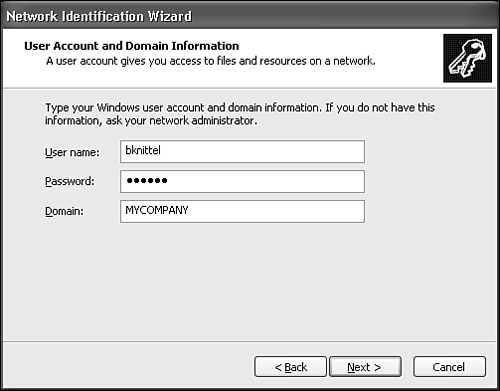
| This section describes how to add your computer to a domain network run by Windows NT Server, Windows 2000 Server, or Windows Server 2003. If you're lucky, your network administrator will take care of this for you. Alternately, she or he may give you custom-tailored instructions for your network. By all means, use those instructions rather than the generic plan in this section. Most Windows XP Professional installations will work "out of the box" without the need to install or configure any network components. If your network uses Novell servers, though, you'll need to add either the Microsoft Client for Novell Networks, or the Novell Networks Client softwareand unfortunately, only your network administrator can tell you which is appropriate for your organization. Installing additional network components is described earlier in this chapter under "Adding Network Clients, Services, and Protocols." At the very least, your network administrator will give you three pieces of information:
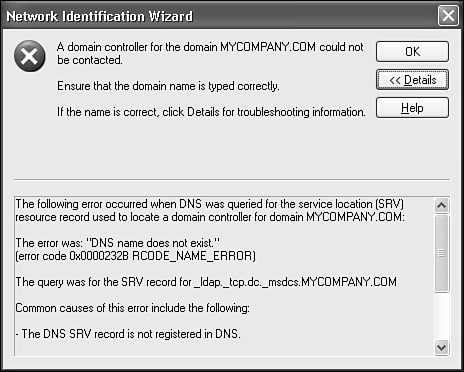
If your computer was connected to the network when you installed Windows XP, and you entered this information then, your network setup is already complete and you can skip ahead to Chapter 17, "Using a Windows XP Network." If you need to make adjustments to the Internet Protocol settings, at this point you should follow the instructions in under "Manually Configuring Your Network" earlier in this chapter before proceeding. When you know that the network configuration is correct, use the following procedure to make your computer a member of your network domain:
When your computer has been joined to the domain and restarted, the Windows XP Welcome screen will no longer appear, and you'll need to use the old-style logon system to sign on. To log on, type Ctrl+Alt+Del, and then enter your account name, password, and domain name. You can specify an alternate domain name by entering your user name and account together this way: "myaccount@domain". NOTE If your computer is disconnected from the network or you want to install new hardware, you can log on using a local account. Select the computer's name rather than your network domain name, and log on using the Administrator account or a Computer Administrator account. For more information about local accounts, see Chapter 28, "Managing Users." |
EAN: 2147483647
Pages: 450
- Challenging the Unpredictable: Changeable Order Management Systems
- Context Management of ERP Processes in Virtual Communities
- A Hybrid Clustering Technique to Improve Patient Data Quality
- Relevance and Micro-Relevance for the Professional as Determinants of IT-Diffusion and IT-Use in Healthcare
- Development of Interactive Web Sites to Enhance Police/Community Relations

