Section 4.3. Dialogues
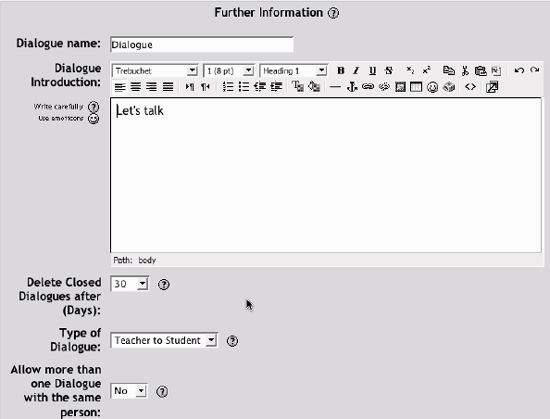
4.3. DialoguesThe dialogue tool is a private communication channel between two people in your class. You can set up dialogues to allow student-to-teacher communication or student-to-student communication. Each dialogue you create can host a number of different conversations. You may only need to create one dialogue for the entire class, depending on how you want to use them. 4.3.1. Creating DialoguesTo create a dialogue:
Once you've set up the dialogue, you and your students can begin communicating using the dialogue. 4.3.2. Using DialoguesOnce you've set up your dialogue, you can begin conversing with a student. You can set up dialogues with multiple students within a single dialogue tool. To start a dialogue:
If you've set email default to Yes, the student will receive an email telling her she has a dialogue message. Moodle won't send her the text of the message but instead will tell her she has a message waiting for her and give her a link to the dialogue tool. Students use the same interface to send a message back to you. The main dialogue interface has four tabs that help you keep track of the current dialogues. The leftmost tab allows you to open a new dialogue with a student. The next two tabs track messages awaiting replies from you and messages awaiting replies from the student. The final tab lists the closed dialogues. Once a student has replied to your initial message, the message will appear in the list of messages awaiting replies from you. Click on the tab and then click on the name of the student to whom you want to reply. The next screen will list the messages sent so far and give you a text area to type your reply. In the upper left of the screen is a link to close the dialogue. Once a dialogue has been closed, it cannot be reopened. Both you and the student can see the transcript of the dialogue until it is deleted at the end of the time frame you set in the dialogue options. Figure 4-13. Main dialogue screen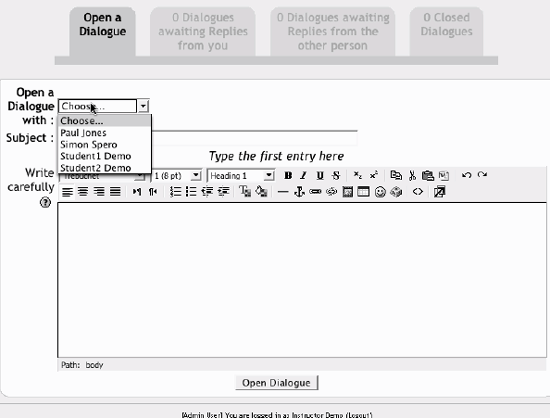 4.3.3. Effective Dialogue PracticesThe dialogue tool is designed to aid in communicating privately with your students. If you need such a communication channel, dialogues are a useful alternative to email because you can track all of your correspondence in once place without clogging your inbox. |
EAN: 2147483647
Pages: 113