| Another type of nested element is called an inline object. An inline object is a frame that is pasted as a character into the actual text. Tip An inline object can also be used to add images to a table (see Chapter 13, "Tabs and Tables").
To create an inline object: 1. | Select the element that you want positioned.
| 2. | Cut or copy the element to the clipboard.
| 3. | Click to place an insertion point where you want the inline object to be positioned.
| 4. | Choose Edit > Paste. The element is pasted into the text and flows along with any changes to the text  . .
An inline object flows along with the text.  Tip Use the Direct Selection tool to move the graphic within its inline frame. Tip Use the Selection tool to select and move inline objects up or down inside the text. Tip Use any of the Text Wrap commands to force text around the inline object (see page 232). |
You can also place an image directly into the text as an inline object. To import an image directly as an inline object: 1. | Place your insertion point where you would like the graphic to appear.
| 2. | Choose File > Place and select the image you want to import. The image appears inside an inline frame.
|
Uses for Inline Objects The biggest problem with inline objects is that most people forget they are available. Have you ever wanted to use a little picture instead of a plain bullet? Inline graphics make it easy to add the picture so it flows along with the text. You can also use an inline object to keep a picture of an author along with her biography. Inline objects don't have to be graphic elements. You can insert an inline text frame to create two columns of text within a single column story. Finally, you can paste a horizontal line as an inline graphic to make the fill-in-the-blank lines in a coupon. |
In addition to inline objects, InDesign also allows you to insert anchored objects into text flow. Anchored objects require a little more preparation but are much more powerful than inline objects. To create an anchored object: 1. | Place the insertion point in the text where you want to anchor the object.
Tip This does not have to be the exact position where you want the anchored object to appear. | 2. | Choose Object > Anchored Object > Insert. The Anchored Object dialog box appears  . .
The Insert Anchored Object dialog box lets you control the options for an anchored object. 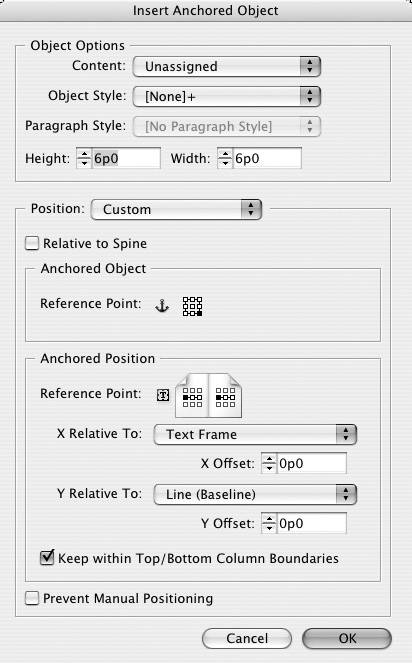 | 3. | Set each of the options for the Anchored Object as described in the following exercises.
| 4. | Click OK to insert the anchored object into the story. An anchored object hidden character symbol appears in the text.
|
To set the Object Options for an anchored object: 1. | Use the Content list to choose the type of object to be anchored. These are the same as the Object > Content options.
| 2. | Use the Object Style list to choose a graphic style for the object  . (See Chapter 15, "Text and Object Styles," for more information on graphic styles.) . (See Chapter 15, "Text and Object Styles," for more information on graphic styles.)
The Content list lets you choose the type of anchored object. 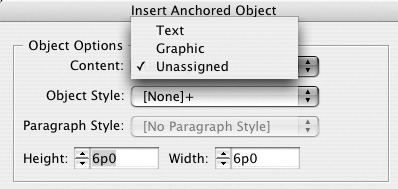 | 3. | If you select Text as the content, use the Paragraph Style list to choose the style for the text. (See Chapter 15, "Text and Object Styles," for more information on text styles).
| 4. | Use the Height and Width controls to set the size of the anchored object.
Tip Anchored objects are always defined as rectangles. You can use any of the drawing tools or the Convert Shape commands to change the rectangle to other shapes. |
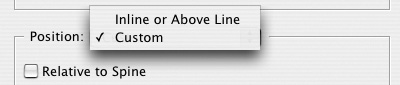
I divide anchored objects into two different types based on their position on the page. To set the Position for the anchored object: Once you have chosen the positioning for the anchored object, you can set the options for the location of the anchored object  . .
The Position options for Inline or Above Line anchored objects. 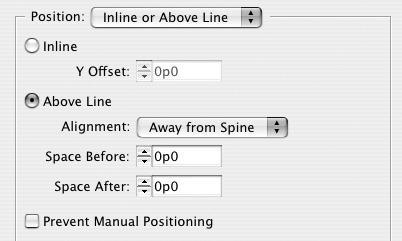 To set the options for inline objects: 1. | Click the Inline radio button to specify that option for the object. This removes all the options except the Y Offset.
| 2. | Use the Y Offset controls to move the object above or below the baseline of the text.
Tip Positive numbers move the object above the baseline. Negative numbers move the object below the baseline. |
To set the options for Above Line objects: 1. | Click the Above Line radio button to position the object above the line that contains the anchor insertion point  . .
An Above Line anchored object inside a text frame. 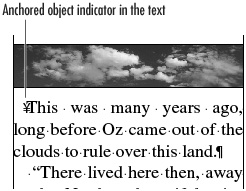 | 2. | Use the Alignment list to position the object in the text frame as follows  : :
The Alignment list for Above Line anchored objects. 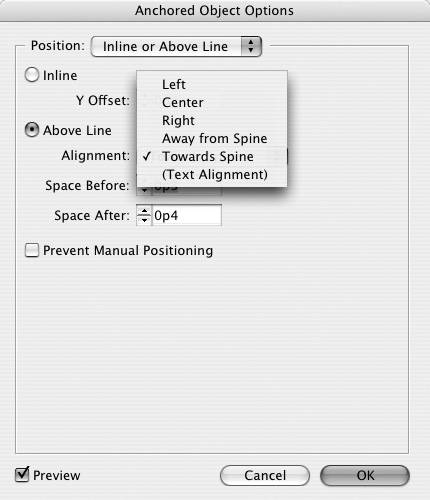 Right aligns the object on the right. Left aligns the object on the left. Center aligns the object in the center. Text Alignment uses whatever alignment was set for the paragraph that contains the anchored object. If you have a facing-page document, you have two additional options. These options flip the anchored object if it is a left- or right-hand page. Away From Spine positions the object so that it is furthest away from the spine. Towards Spine positions the object so that it is closest to the spine.
| 3. | Use the Space Before or Space After control to add space above or below the object.
| 4. | Check the Prevent Manual Positioning option to stop the object from being moved with any of the selection tools.
|
The other type of anchored object is the custom object. This option offers the most choices for positioning the anchored object. Tip Honestly, I find the Custom Anchored Objects dialog box baffling  . The only way I can apply the settings is to first insert the anchored object and then close the dialog box. Next, with the anchored object still selected, I choose Object > Anchored Object > Options. This opens the Options dialog box that has a Preview that lets me see what the settings are doing. . The only way I can apply the settings is to first insert the anchored object and then close the dialog box. Next, with the anchored object still selected, I choose Object > Anchored Object > Options. This opens the Options dialog box that has a Preview that lets me see what the settings are doing.
The Custom Anchored Objects dialog box.  To set the options for custom objects: 1. | Use the Anchored Object Reference Point proxy box to choose which point on the anchored object should be used as the orientation of the anchored object.
| 2. | If the document has facing pages, you can choose Relative to Spine to allow the settings to flip depending if they are left-or right-hand pages.
| 3. | Click the Anchored Position Reference Point to choose the position on the page where the object should align.
| 4. | Use the X Relative To list to set the point from which the horizontal axis should start  . .
The X Relative list for custom anchored objects. 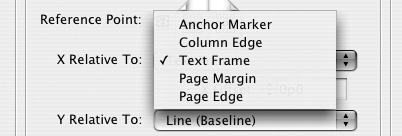 | 5. | Use the Y Relative To list to set the point from which the vertical axis should start  . .
The Y Relative list for custom anchored objects. 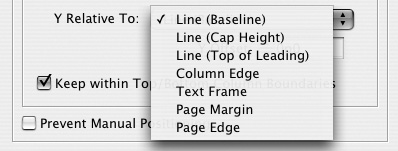 | 6. | Use the X Offset and Y Offset controls to move the anchored object from the X and Y reference points.
| 7. | Select Keep With Top/Bottom Column Boundaries to insure that the anchored object does not move above or below the frame that contains the text.
| 8. | Select Prevent Manual Positioning to prevent the object from being moved.
Tip Custom anchored objects are indicated on the page by a little anchor (cute)  . .
The indicator for custom anchored objects.  |
Tips for Using for Anchored Objects Although the settings for custom anchored objects may take a while to master, you should not give up learning to use them. There are quite a few ways to use custom anchored objects. It is important to remember that custom anchored objects can be positioned well outside the frame of text that contains the anchor position. This lets you use the custom anchored object for marginalia notes or images. Many textbooks, for example, require notes for teacher editions. Custom anchored objects make it easy to insert those notes. Anchored objects have to start off as rectangles, but once you insert the object, you can apply any of the Convert Shape commands to change their shape. My favorite is to use the Orthogonal Line command to change the anchored object into a stroked line that I can extend down the side of the text frame. This makes it easy to highlight important paragraphs. Also, you may feel limited that you can insert only one anchored object in the text flow. For example, the illustrations in this book consist of both a graphic frame and a text frame. Fortunately, both of those elements can be made into an anchored object by grouping them and then pasting them into the anchored object. |
As I said on the previous page, it's a lot easier to set the options for a custom anchored object if you edit the settings for an existing anchored object. To edit the settings for an anchored object: 1. | Use the Selection tool to select the anchored object.
| 2. | Choose Object > Anchored Object > Options. This opens the Anchored Object Options dialog box, which gives you a Preview option in addition to all the settings to control the anchored object.
|
So what if you want to convert the anchored object into a regular object but position it in the same spot as when it was anchored? I thought I could cut and paste the object to get it out of the text flow. Nope; instead you need to release the anchored object. To release an anchored object: 1. | Use the Selection tool to select the anchored object.
| 2. | Choose Object > Anchored Object > Release. This converts the anchored object into an ordinary object.
|
|