Quick Web Pages from Photoshop
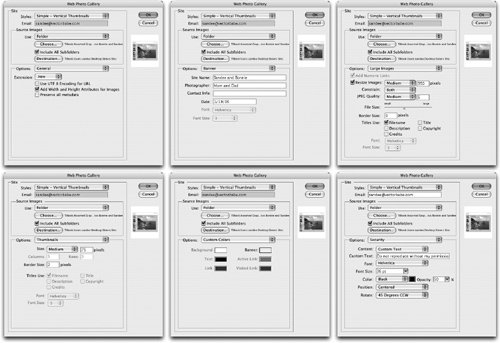
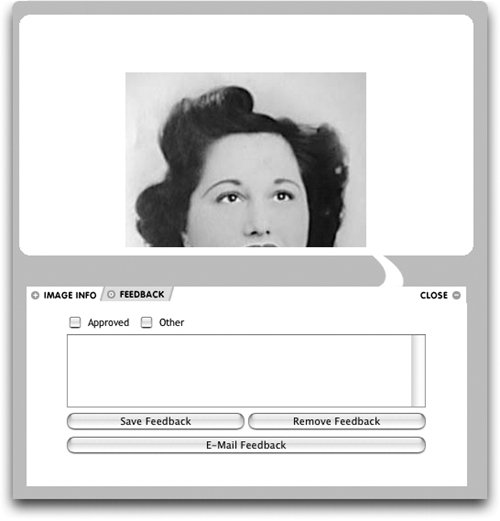
| You may have gotten the idea by now that we're keen on automation and letting the software do the grunt work for us. The Web Photo Gallery (WPG) feature is one of the best-hidden secrets in Photoshop, and also one of our nominees for "most helpful automation tool for busy (or is that lazy?) professionals." With just a few clicks in a series of dialog boxes, you can create sophisticated, interactive web pages complete with navigational elements and feedback forms. It's the perfect solution for times when we need to get a whole mess of images up on the web quickly. Sandee uses it to quickly process a memory card's worth of images from her camera into a series of web pages that can be reviewed by her clients. Even better, she can get feedback on the pages from people viewing the pages all without her learning a single line of code! Web Photo GalleryTo process a folder of images in Photoshop, choose File > Automate > Web Photo Gallery. To select specific images, go to Bridge and select the files you want to process. Then, from the Bridge menu, choose Tools > Photoshop > Web Photo Gallery. The Web Photo Gallery dialog box opens (Figure 17-22). Set the following options for the entire gallery:
And then go into the following six panels and customize your settings there as well:
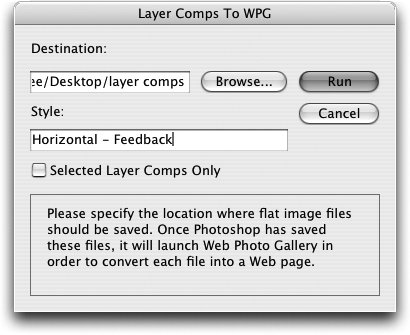
Publishing the Web Photo GalleryThe final step in creating your web photo gallery is publishing the files to your web server. We often use FTP (file transfer protocol) applications such as Fetch on the Macintosh when we exchange files with each other. But for publishing files for a web site that needs to be updated, you may find Adobe GoLive is a better choice. You can publish web files directly from Adobe GoLive using the Publish Server tab in the site window or the file browser. Simply upload the web photo gallery folder to your server. All the necessary files are contained within that folder. The major advantage of using GoLive for web publishing is that GoLive keeps track of any files you have added or modified, and takes care of the synchronization accordingly. Layer Comps to WPGAs simple as it is to publish a web photo gallery from a folder of images, it is just as simple to create a web photo gallery from the layer comps in a Photoshop file. (See "Layer Comps" in Chapter 12, "The Flexibility of Layers," for more information on working with layer comps.) The web photo gallery templates with the feedback forms are exceptionally useful if you want to have clients review your layer comps and send you their comments. Open the file that has the layer comps, and then choose File > Automate > Layer Comps To WPG (Figure 17-25). Use the Browse button to choose the folder where the finished web pages should be placed. Use the Style field to type the name of the style of the web photo gallery that you want to use. (Yes, you have to manually write down the exact name of the style from the Web Photo Gallery dialog box, and then type it into the field. It's horribly primitive, but we think you can handle it.) Finally, choose Selected Layer Comps Only if you want to publish only certain layer comps. Figure 17-25. Layer Comps To WPG dialog box in Photoshop. When you've set all your options, click Run. The script runs and creates the web photo gallery. Once you have created the folder, you can publish it using GoLive, as described in the previous section. |
EAN: 2147483647
Pages: 192
- Chapter II Information Search on the Internet: A Causal Model
- Chapter VII Objective and Perceived Complexity and Their Impacts on Internet Communication
- Chapter XV Customer Trust in Online Commerce
- Chapter XVII Internet Markets and E-Loyalty
- Chapter XVIII Web Systems Design, Litigation, and Online Consumer Behavior