| In this section, we assume that you are familiar with basic database commands in SQL (the Structured Query Language), as well as the JDBC (Java Database Connectivity) API. A good introduction to these topics can be found in Horstmann & Cornell, Core Java, Vol. 2, ch. 4, Sun Microsystems Press, 2002. For your convenience, here is a brief refresher of the basics. Issuing SQL Statements To issue SQL statements to a database, you need a connection object. There are various methods of obtaining a connection. The most elegant one is to make a directory lookup, using the Java Naming and Directory Interface (JNDI).
Context ctx = new InitialContext(); DataSource source = (DataSource) ctx.lookup("java:comp/env/jdbc/mydb"); Connection conn = source.getConnection();
Later in this chapter we show you how to configure the data source in the Tomcat container. For now, let's assume that the data source is properly configured to connect to your favorite database. Once you have the Connection object, you create a Statement object that you use to send SQL statements to the database. You use the executeUpdate method for SQL statements that update the database, and the executeQuery method for queries that return a result set.
Statement stat = conn.createStatement(); stat.executeUpdate("INSERT INTO Users VALUES ('troosevelt', 'jabberwock')"); ResultSet result = stat.executeQuery("SELECT * FROM Users");
The ResultSet class has an unusual iteration protocol. You first call the next method to advance the cursor to the first row. (The next method returns false if no further rows are avai lable.) Then you call the getString method to get a field value as a string. For example,
while (result.next()) { username = result.getString("username"); password = result.getString("password"); . . . }
When you are done using the database, be certain that you close the connection. To ensure that the connection is closed under all circumstances, even when an exception occurs, wrap the query code inside a try/finally block, like this:
Connection conn = source.getConnection(); try { . . . } finally { conn.close(); }
Of course, there is much more to the JDBC API, but these simple concepts are sufficient to get you started. Connection Management One of the more vexing issues for the web developer is the management of database connections. There are two conflicting concerns. First, opening a connection to a database can be time consuming. Several seconds may elapse for the processes of connecting, authenticating, and acquiring resources to be completed. Thus, you cannot simply open a new connection for every page request. On the flip side, you cannot keep open a huge number of connections to the database. Connections consume resources, both in the client program and in the database server. Commonly, a database puts a limit on the maximum number of concurrent connections that it allows. Thus, your application cannot simply open a connection whenever a user logs in and leave it open until the user logs off. After all, your user might walk away and never log off. One common mechanism for solving these concerns is to pool the database connections. A connection pool holds database connections that are already opened. Application programs obtain connections from the pool. When the connections are no longer needed, they are returned to the pool, but they are not closed. Thus, the pool minimizes the time lag of establishing database connections. Implementing a database connection pool is not easy, and it certainly should not be the responsibility of the application programmer. As of version 2.0, JDBC supports pooling in a pleasantly transparent way. When you receive a pooled Connection object, it is actually instrumented so that its close method merely returns it to the pool. It is up to the application server to set up the pool and to give you a data source whose getConnection method yields pooled connections. Each application server has its own way of configuring the database connection pool. The details are not part of any Java standard the JDBC specification is completely silent on this issue. In the next section, we describe how to configure Tomcat for connection pooling. The basic principle is the same with other application servers, but of course the details may differ considerably. To maintain the pool, it is still essential that you close every connection object when you are done using it. Otherwise the pool will run dry, and new physical connections to the database will need to be opened. Properly closing connections is the topic of the next section. Plugging Connection Leaks Consider this simple sequence of statements:
DataSource source = ... Connection conn = source.getConnection(); Statement stat = conn.createStatement(); String command = "INSERT INTO Users VALUES ('troosevelt', 'jabberwock')"; stat.executeUpdate(command); conn.close();
The code looks clean we open a connection, issue a command, and immediately close the connection. But there is a fatal flaw. If one of the method calls throws an exception, the call to the close method never happens! In that case, an irate user may resubmit the request many times in frustration, leaking another connection object with every click. To overcome this issue, always place the call to close inside a finally block:
DataSource source = ... Connection conn = source.getConnection(); try { Statement stat = conn.createStatement(); String command = "INSERT INTO Users VALUES ('troosevelt', 'jabberwock')"; stat.executeUpdate(command); } finally { conn.close(); }
This simple rule completely solves the problem of leaking connections. The rule is most effective if you do not combine this try/finally construct with any other exception handling code. In particular, do not attempt to catch a SQLException in the same try block:
// we recommend that you do NOT do this Connection conn = null; try { conn = source.getConnection(); Statement stat = conn.createStatement(); String command = "INSERT INTO Users VALUES ('troosevelt', 'jabberwock')"; stat.executeUpdate(command); } catch (SQLException) { // log error } finally { conn.close(); // ERROR }
That code has two subtle mistakes. First, if the call to getConnection throws an exception, then conn is still null, and you can't call close. Moreover, the call to close can also throw a SQLException. You could clutter up the finally clause with more code, but the result is a mess. Instead, use two separate try blocks:
// we recommend that you use separate try blocks try { Connection conn = source.getConnection(); try { Statement stat = conn.createStatement(); String command = "INSERT INTO Users VALUES ('troosevelt', 'jabberwock')"; stat.executeUpdate(command); } finally { conn.close(); } } catch (SQLException) { // log error }
The inner try block ensures that the connection is closed. The outer try block ensures that the exception is logged. NOTE  | Of course, you can also tag your method with throws SQLException and leave the outer try block to the caller. That is often the best solution. |
Using Prepared Statements A common optimization technique for JDBC programs is the use of the PreparedStatement class. You use a prepared statement to speed up database operations if your code issues the same type of query multiple times. Consider the lookup of user passwords. You will repeatedly need to issue a query of the form
SELECT password FROM Users WHERE username=...
A prepared statement asks the database to precompile a query, that is, parse the SQL statement and compute a query strategy. That information is kept with the prepared statement and reused whenever the query is reissued. You create a prepared statement with the prepareStatement method of the Connection class. Use a ? character for each parameter.
PreparedStatement stat = conn.prepareStatement( "SELECT password FROM Users WHERE username=?");
When you are ready to issue a prepared statement, first set the parameter values.
stat.setString(1, name);
(Note that the index value 1 denotes the first parameter.) Then issue the statement in the usual way:
ResultSet result = stat.executeQuery();
At first glance, it appears as if prepared statements would not be of much benefit in a web application. After all, you close the connection whenever you complete a user request. A prepared statement is tied to a database connection, and all the work of establishing it is lost when the physical connection to the database is terminated. However, if the physical database connections are kept in a pool, then there is a good chance that the prepared statement is still usable when you retrieve a connection. Many connection pool implementations will cache prepared statements. When you call prepareStatement, the pool will first look inside the statement cache, using the query string as a key. If the prepared statement is found, then it is reused. Otherwise, a new prepared statement is created and added to the cache. All this activity is transparent to the application programmer. You simply request PreparedStatement objects and hope that, at least some of the time, the pool can retrieve an existing object for the given query. You will see in the next section how to configure the connection pool in the Tomcat container to cache prepared statements. CAUTION  | You cannot keep a PreparedStatement object and reuse it beyond a single request scope. Once you close a pooled connection, all associated PreparedStatement objects also revert to the pool. Thus, you should not hang on to PreparedStatement objects beyond the current request. Instead, keep calling the prepareStatement method with the same query string, and chances are good that you'll get a cached statement object. |
Configuring a Database Resource in Tomcat In this section, we walk you through the steps of configuring a database resource pool in the Tomcat 5 container. Locate the conf/server.xml file and look for the element that describes the host that will contain your web application, such as
<!-- Define the default virtual host --> <Host name="localhost" debug="0" appBase="webapps" unpackWARs="false" autoDeploy="true"> ... </Host>
Inside this element, place a DefaultContext element that specifies both the database details (driver, URL, username, and password) and the desired characteristics of the pool. Here is a typical example, specifying a connection pool to a PostgreSQL database. The values that you need to customize are highlighted.
<DefaultContext> <Resource name="jdbc/mydb" auth="Container" type="javax.sql.DataSource"/> <ResourceParams name="jdbc/mydb"> <parameter> <name>factory</name> <value>org.apache.commons.dbcp.BasicDataSourceFactory</value> </parameter> <parameter> <name>driverClassName</name> <value>org.postgresql.Driver</value> </parameter> <parameter> <name>url</name> <value>jdbc:postgresql://127.0.0.1:5432/postgres</value> </parameter> <parameter> <name>username</name> <value>dbuser</value> </parameter> <parameter> <name>password</name> <value>dbpassword</value> </parameter> <parameter> <name>maxActive</name> <value>20</value> </parameter> <parameter> <name>maxIdle</name> <value>10</value> </parameter> <parameter> <name>poolPreparedStatements</name> <value>true</value> </parameter> </ResourceParams> </DefaultContext>
NOTE | You can also add the Resource and ResourceParams elements into the context of a specific web application. Then the data source is available only to that application. |
Note the name of the resource: jdbc/mydb. That name is used to obtain the data source from the JNDI directory service:
DataSource source = (DataSource) ctx.lookup("java:comp/env/jdbc/mydb");
The java:comp/env prefix is the standard JNDI directory lookup path to the component environment in a J2EE container. By convention, you place JDBC resources in the jdbc subpath. It is up to you how to name the individual resources. To configure the pool, you specify a sequence of parameters see Table 10-1 for the most common ones. A complete description of all valid parameters can be found at http://jakarta.apache.org/commons/dbcp/configuration.html. Table 10-1. Common Tomcat Database Pool ParametersParameter Name | Description |
|---|
driverClassName | The name of the JDBC driver, such as org.postgresql.Driver | url | The database URL, such as jdbc:postgresql:mydb | username | The database user name | password | The password of the database user | maxActive | The maximum number of simultaneous active connections, or zero for no limit. | maxIdle | The maximum number of active connections that can remain idle in the pool without extra ones being released, or zero for no limit. | poolPreparedStatements | true if prepared statements are pooled (default: false) | removeAbandoned | true if the pool should remove connections that appear to be abandoned (default: false) | RemoveAbandonedTimeout | The number of seconds after which an unused connection is considered abandoned (default: 300) | logAbandoned | true to log a stack trace of the code that abandoned the connection (default: false) |
To activate the pooling of prepared statements, be sure to set poolPreparedStatements to true. The last three parameters in Table 10-1 refer to a useful feature of the Tomcat pool. The pool can be instructed to monitor and remove connections that appear to be abandoned. If a connection has not been used for some time, then it is likely that an application forgot to close it. After all, a web application should always close its database connections after rendering the response to a user request. The pool can recycle unused connections and optionally log these events. The logging is useful for debugging since it allows the application programmer to plug connection leaks. The J2EE specification requires that resources are declared in the web.xml file of your web application. Add the following entry to your web.xml file:
<resource-ref> <res-ref-name>jdbc/mydb</res-ref-name> <res-type>javax.sql.DataSource</res-type> <res-auth>Container</res-auth> </resource-ref>
Finally, you need to place the database driver file (such as pg73jdbc3.jar for the PostgreSQL database) into Tomcat's common/lib directory. If the database driver file has a .zip extension, you need to rename it to .jar, such as classes12.jar for the Oracle database. TIP  | You can find detailed configuration instructions for a number of popular databases at http://jakarta.apache.org/tomcat/tomcat-5.0-doc/jndi-datasource-examples-howto.html. |
A Complete Database Example In this example, we show how to verify a username/password combination. As with the example program in Chapter 1, we start with a simple login screen (Figure 10-1). If the username/password combination is correct, we show a welcome screen (Figure 10-2). Otherwise, we prompt the user to try again (Figure 10-3). Finally, if a JNDI or database error occurred, we show an error screen (Figure 10-4). Figure 10-1. Login Screen 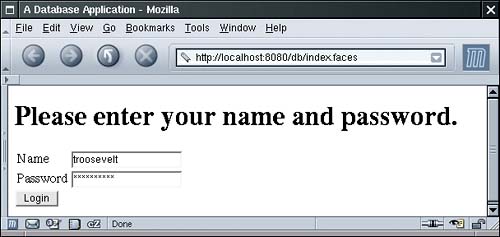
Figure 10-2. Welcome Screen 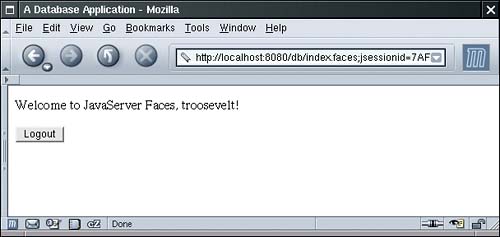
Figure 10-3. Authentication Error Screen 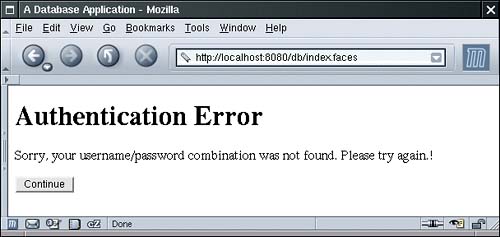
Figure 10-4. Internal Error Screen 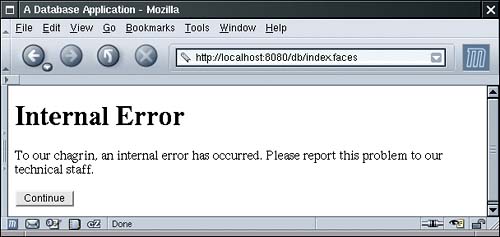
Thus, we have four JSF pages, shown in Listings 10-1 through 10-4. Listing 10-5 shows the faces-config.xml file with the navigation rules. The navigation rules use the loginAction and logoutAction properties of the UserBean class. Listing 10-6 gives the code for the UserBean. In our simple example, we add the database code directly into the UserBean class. It would also be possible to have two layers of objects: beans for communication with the JSF pages, and data access objects that represent entities in the database. We place the code for database access into the separate method
public void doLogin() throws SQLException, NamingException
That method queries the database for the username/password combination and sets the loggedIn field to true if the username and password match. The button on the index.jsp page references the login method of the user bean. That method calls the doLogin method and returns a result string for the navigation handler. The login method also deals with exceptions that the doLogin method reports. We assume that the doLogin method is focused on the database, not the user interface. If an exception occurs, doLogin should simply report it and take no further action. The login method, on the other hand, logs exceptions and returns a result string "internalError" to the navigation handler.
public String login() { try { doLogin(); } catch (SQLException ex) { logger.log(Level.SEVERE, "loginAction", ex); return "internalError"; } catch (NamingException ex) { logger.log(Level.SEVERE, "loginAction", ex); return "internalError"; } if (loggedIn) return "loginSuccess"; else return "loginFailure"; }
Before running this example, you need to carry out several housekeeping chores. Start your database. Create a table named Users and add one or more username/password entries:
CREATE TABLE Users (username CHAR(20), password CHAR(20)) INSERT INTO Users VALUES ('troosevelt', 'jabberwock')
Place the database driver file into Tomcat's common/lib directory. Modify conf/server.xml and add the database resource. Restart Tomcat.
You can then deploy and test your application. Figure 10-5 shows the directory structure for this application, and Figure 10-6 shows the navigation map. Figure 10-5. Directory Structure of the Database Application 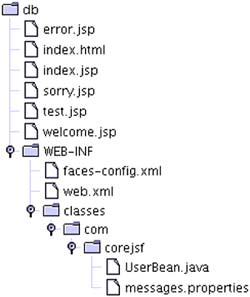
Figure 10-6. Navigation Map of the Database Application 
NOTE | Lots of things can go wrong with database configurations. If the application has an internal error, look at the Tomcat logs (by default, in Tomcat's logs/catalina.out). |
Listing 10-1. db/index.jsp 1. <html> 2. <%@ taglib uri="http://java.sun.com/jsf/core" prefix="f" %> 3. <%@ taglib uri="http://java.sun.com/jsf/html" prefix="h" %> 4. <f:view> 5. <head> 6. <f:loadBundle basename="com.corejsf.messages" var="msgs"/> 7. <title><h:outputText value="#{msgs.title}"/></title> 8. </head> 9. <body> 10. <h:form> 11. <h1><h:outputText value="#{msgs.enterNameAndPassword}"/></h1> 12. <h:panelGrid columns="2"> 13. <h:outputText value="#{msgs.name}"/> 14. <h:inputText value="#{user.name}"/> 15. 16. <h:outputText value="#{msgs.password}"/> 17. <h:inputSecret value="#{user.password}"/> 18. </h:panelGrid> 19. <h:commandButton value="#{msgs.login}" action="#{user.login}"/> 20. </h:form> 21. </body> 22. </f:view> 23. </html>
Listing 10-2. db/welcome.jsp 1. <html> 2. <%@ taglib uri="http://java.sun.com/jsf/core" prefix="f" %> 3. <%@ taglib uri="http://java.sun.com/jsf/html" prefix="h" %> 4. <f:view> 5. <head> 6. <f:loadBundle basename="com.corejsf.messages" var="msgs"/> 7. <title><h:outputText value="#{msgs.title}"/></title> 8. </head> 9. <body> 10. <h:form> 11. <p> 12. <h:outputText value="#{msgs.welcome}"/> 13. <h:outputText value="#{user.name}"/>! 14. </p> 15. <p> 16. <h:commandButton value="#{msgs.logout}" action="#{user.logout}"/> 17. </p> 18. </h:form> 19. </body> 20. </f:view> 21. </html>
Listing 10-3. db/sorry.jsp 1. <html> 2. <%@ taglib uri="http://java.sun.com/jsf/core" prefix="f" %> 3. <%@ taglib uri="http://java.sun.com/jsf/html" prefix="h" %> 4. <f:view> 5. <head> 6. <f:loadBundle basename="com.corejsf.messages" var="msgs"/> 7. <title><h:outputText value="#{msgs.title}"/></title> 8. </head> 9. <body> 10. <h:form> 11. <h1><h:outputText value="#{msgs.authError}"/></h1> 12. <p> 13. <h:outputText value="#{msgs.authError_detail}"/>! 14. </p> 15. <p> 16. <h:commandButton value="#{msgs.continue}" action="login"/> 17. </p> 18. </h:form> 19. </body> 20. </f:view> 21. </html>
Listing 10-4. db/error.jsp 1.<html> 2. <%@ taglib uri="http://java.sun.com/jsf/core" prefix="f" %> 3. <%@ taglib uri="http://java.sun.com/jsf/html" prefix="h" %> 4. <f:view> 5. <head> 6. <f:loadBundle basename="com.corejsf.messages" var="msgs"/> 7. <title><h:outputText value="#{msgs.title}"/></title> 8. </head> 9. <body> 10. <h:form> 11. <h1><h:outputText value="#{msgs.internalError}"/></h1> 12. <p><h:outputText value="#{msgs.internalError_detail}"/></p> 13. <p> 14. <h:commandButton value="#{msgs.continue}" action="login"/> 15. </p> 16. </h:form> 17. </body> 18. </f:view> 19. </html>
Listing 10-5. db/WEB-INF/faces-config.xml 1. <?xml version="1.0"?> 2. <!DOCTYPE faces-config PUBLIC 3. "-//Sun Microsystems, Inc.//DTD JavaServer Faces Config 1.0//EN" 4. "http://java.sun.com/dtd/web-facesconfig_1_0.dtd"> 5. <faces-config> 6. <navigation-rule> 7. <from-view-id>/index.jsp</from-view-id> 8. <navigation-case> 9. <from-outcome>loginSuccess</from-outcome> 10. <to-view-id>/welcome.jsp</to-view-id> 11. </navigation-case> 12. <navigation-case> 13. <from-outcome>loginFailure</from-outcome> 14. <to-view-id>/sorry.jsp</to-view-id> 15. </navigation-case> 16. <navigation-case> 17. <from-outcome>internalError</from-outcome> 18. <to-view-id>/error.jsp</to-view-id> 19. </navigation-case> 20. </navigation-rule> 21. <navigation-rule> 22. <from-view-id>/welcome.jsp</from-view-id> 23. <navigation-case> 24. <from-outcome>login</from-outcome> 25. <to-view-id>/index.jsp</to-view-id> 26. </navigation-case> 27. </navigation-rule> 28. <navigation-rule> 29. <from-view-id>/sorry.jsp</from-view-id> 30. <navigation-case> 31. <from-outcome>login</from-outcome> 32. <to-view-id>/index.jsp</to-view-id> 33. </navigation-case> 34. </navigation-rule> 35. <navigation-rule> 36. <from-view-id>/error.jsp</from-view-id> 37. <navigation-case> 38. <from-outcome>login</from-outcome> 39. <to-view-id>/index.jsp</to-view-id> 40. </navigation-case> 41. </navigation-rule> 42. 43. <managed-bean> 44. <managed-bean-name>user</managed-bean-name> 45. <managed-bean-class>com.corejsf.UserBean</managed-bean-class> 46. <managed-bean-scope>session</managed-bean-scope> 47. </managed-bean> 48. </faces-config>
Listing 10-6. db/WEB-INF/classes/com/corejsf/UserBean.java 1. package com.corejsf; 2. 3. import java.sql.Connection; 4. import java.sql.PreparedStatement; 5. import java.sql.ResultSet; 6. import java.sql.SQLException; 7. import java.util.logging.Level; 8. import java.util.logging.Logger; 9. import javax.naming.Context; 10. import javax.naming.InitialContext; 11. import javax.naming.NamingException; 12. import javax.sql.DataSource; 13. 14. public class UserBean { 15. private String name; 16. private String password; 17. private boolean loggedIn; 18. private Logger logger = Logger.getLogger("com.corejsf"); 19. 20. public String getName() { return name; } 21. public void setName(String newValue) { name = newValue; } 22. 23. public String getPassword() { return password; } 24. public void setPassword(String newValue) { password = newValue; } 25. 26. public String login() { 27. try { 28. doLogin(); 29. } 30. catch (SQLException ex) { 31. logger.log(Level.SEVERE, "loginAction", ex); 32. return "internalError"; 33. } 34. catch (NamingException ex) { 35. logger.log(Level.SEVERE, "loginAction", ex); 36. return "internalError"; 37. } 38. if (loggedIn) 39. return "loginSuccess"; 40. else 41. return "loginFailure"; 42. } 43. 44. public String logout() { 45. loggedIn = false; 46. return "login"; 47. } 48. 49. public void doLogin() throws SQLException, NamingException { 50. Context ctx = new InitialContext(); 51. if (ctx == null) throw new NamingException("No initial context"); 52. 53. DataSource ds = (DataSource) ctx.lookup("java:comp/env/jdbc/mydb"); 54. if (ds == null) throw new NamingException("No data source"); 55. 56. Connection conn = ds.getConnection(); 57. if (conn == null) throw new SQLException("No connection"); 58. 59. try { 60. PreparedStatement passwordQuery = conn.prepareStatement( 61. "SELECT password from Users WHERE username = ?"); 62. 63. passwordQuery.setString(1, name); 64. 65. ResultSet result = passwordQuery.executeQuery(); 66. 67. if (!result.next()) return; 68. String storedPassword = result.getString("password"); 69. loggedIn = password.equals(storedPassword.trim()); 70. } 71. finally { 72. conn.close(); 73. } 74. } 75. }
|