| If you want to make it easy for the reader of a large document to find specific sections or parts of the document, you must include a table of contents. Creating a table of contents in Word relies heavily on using specific text styles to format and organize your document. As long as you do this, creating a table of contents is actually very straightforward. For example, you can use either Word's built-in heading styles (Heading 1, Heading 2, Heading 3, and so forth) to format the different levels of headings in the document, or you can create your own styles to do so. Using these headings requires you to use some methodology to break down the contents of your document, such as using section levels or chapter levels. The important thing is that you use them consistently to format the various headings that you use in the document. A good example is a document that is divided into parts and then further subdivided into chapters (each part contains several chapters). If you use Word's heading styles to format the different division levels in the document, you would use Heading 1 for the parts (Part I, Part II, and so forth) and Heading 2 for the chapter titles. By assigning these built-in styles (or your own) to your different headings, you can generate a table of contents that shows two levels: parts and chapters. This process works because Word can pinpoint a particular heading level by the style that you've assigned to it (for more about working with and creating styles, see Lesson 10, "Working with Styles"). After you've placed your various headings for parts, chapters, or other divisions into your document and have assigned a particular style to each group of headings, you are ready to use the Word Table of Contents feature to generate the actual table of contents. To create a table of contents using the Word heading stylesor unique styles that you have createdfollow these steps: -
Create a blank page at the beginning of your document for your table of contents (or create a new section in which to place your table of contents) and place your insertion point in it. -
On the Insert menu, choose Reference , then Index and Tables . -
When the Index and Tables dialog box appears, select the Table of Contents tab (see Figure 20.3). Figure 20.3. The Table of Contents tab on the Index and Tables dialog box is where you specify the options for your new table of contents. You see both a Print Preview and a Web Preview.  -
The Table of Contents tab provides you with a preview of the table of contents (TOC) hierarchy for Word's built-in heading styles. If you used the Word heading styles to format and specify the various division levels in your document, you can skip down to step 7. If you made your own unique heading or section styles, click the Options button. -
The Table of Contents Options dialog box appears. This is where you specify the styles you used to format the various TOC levels in your document. Scroll down through the Available Styles list. To specify a style as a TOC hierarchical level, type the level number (1, 2, 3, and so on) into the appropriate style's TOC level box. -
When you have selected the styles that serve as your various TOC levels, click OK to return to the Table of Contents tab. -
To select a style for the TOC, click the Formats drop-down list. You can choose from several styles, such as Classic, Distinctive, and Fancy. After you select a format, a preview is provided in the Print Preview and Web Preview areas of the dialog box.  | Open the Outlining Toolbar for Quick Access to TOC Features If you will be editing headings in the document that will affect the TOC after you generate it, you might want to click the Show Outlining Toolbar button on the Table of Contents tab. This opens the Outlining toolbar. After generating the TOC and doing any editing in the document, you can use the Update TOC button on the Outlining toolbar to quickly regenerate the TOC. The toolbar also provides a Go to TOC button that can be used to quickly move from anywhere in the document back to the TOC. |
-
Use the various check boxes on the tab to select or deselect options for formatting the table of contents. After you've specified options such as right align, page numbers , and the tab leader style, you are ready to generate the table of contents; click OK . Your new table of contents appears in the document (see Figure 20.4). You can add a title to the table of contents (such as Table of Contents) and format the text as needed. If you want to remove the table of contents from the document, place the mouse pointer in the selection area to the left of the table of contents. Click to select the TOC. Press the Delete key to remove it from the document. Figure 20.4. The table of contents is generated at the insertion point in your document. You can add your own title. 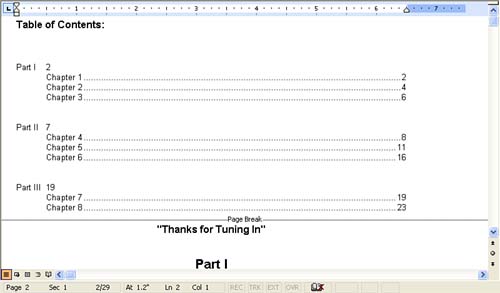 | | Use the TOC to Quickly Move to a Particular Chapter A slick feature associated with a table of contents in your document is that you can use it to quickly jump to a particular part of your document. For example, if you wanted to move to the beginning of Chapter 3 in the document, from the TOC, press Ctrl+click on the Chapter 3 notation in the table of contents. You are taken directly to the beginning of Chapter 3. |
 |