| No matter what your business, it is useful to be able to create a form letter and then create individual letters for a list of people. Writer walks you through the process of creating a form letter and merging the letter with a data source that provides the names and addresses of the individuals you want to receive the letter. You can also do mail merges to other document types such as envelopes. The easiest data source to prepare for your mail merges is the Contact list in Evolution (the NLD personal information manager and email client).  Before You Begin Before You Begin
154 About the Evolution Address Book 155 Create a New Contact |
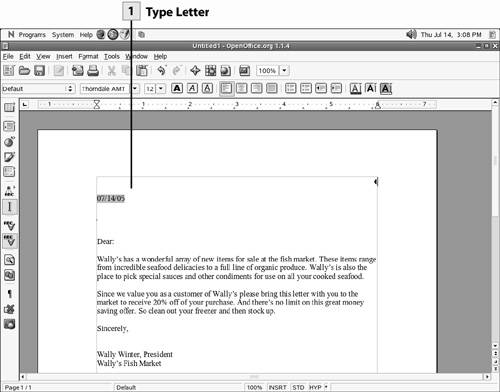
 Type Letter Type Letter
The best first step in preparing for the mail merge is to start a new document and create your form letter. You can type the body text and add fields to the document such as the date field (select Insert, Fields, Date).
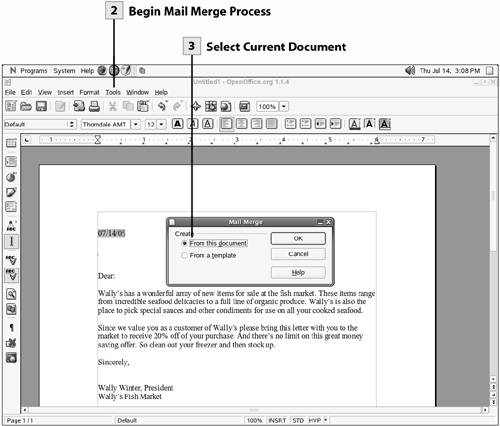
 Begin Mail Merge Process Begin Mail Merge Process
To begin the mail merge process, select Tools, Mail Merge. The Mail Merge dialog box opens.
 Select Current Document Select Current Document
Select From This Document in the Mail Merge dialog box and then click OK.
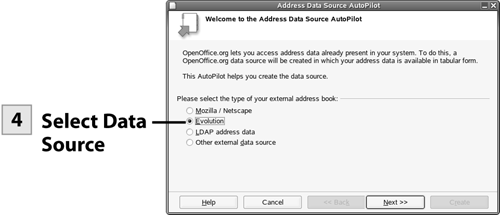
 Select Data Source Select Data Source
A warning box opens telling you that a data source has not been set up for the merge. Click OK to close the box. The Address Data Source AutoPilot opens. Select Evolution as the data source. Then click Next.
Tip You need to set up your data source, meaning enter your contacts in Evolution before performing the mail merge. You can then specify the contacts that should be included in the merge.
Note You can use other databases as your data source. This depends on the access that you have to internal databases (on your computer) or external database sources on the network. For example, programs such as Novell GroupWise, which can hold contact information, can be accessed as the data source.
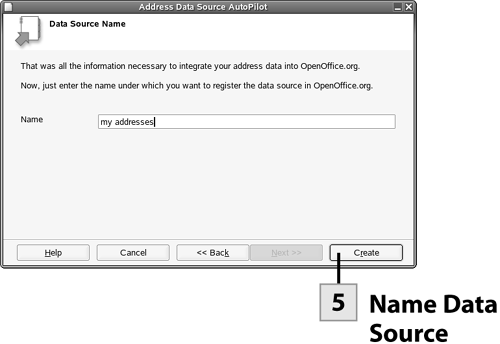
 Name Data Source Name Data Source
On the next AutoPilot screen you are asked to enter a name for the data source. This is a "friendly" name, so type the name you want to use and then click Create. A message box opens letting you know that the data source is now available to the OpenOffice.org application. You can access the data source anytime from OpenOffice.org by pressing F4. Click OK to close the message box. The Fields dialog box opens.
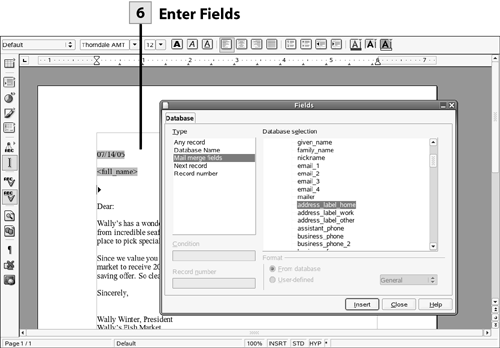
 Enter Fields Enter Fields
You must enter merge fields into the form letter. The fields are placeholders for items such as name, address, and so on. The Fields dialog box allows you to access the fields in your data source and then insert them into the appropriate places in the form letter (or other merge document). Expand the data source to view the available fields. (It will be named with the name you provided in step 5.) Click in the letter to place the cursor where you want to place a field. Then click in the Fields dialog box, select the field, and then select Insert. The field placeholder is placed in the letter. After you have finished inserting the fields, click Close.
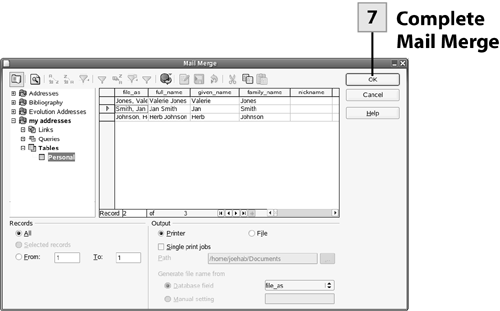
 Complete Mail Merge Complete Mail Merge
The Mail Merge window opens. Select the Output for the merge: Printer or File. If you select File, you can specify a filename; select the Manual Setting option and then enter a filename. A number is placed after the filename you provide for each letter that you save as a file, meaning each letter exists as a separate file. All the records in the data source are used by default. If you want to use only some of the records, select the records. Click a record with the mouse and then hold down the Ctrl key to select other records. Or you can specify a range of records using the From option. When you are ready to complete the merge, click OK. The merged letters are printed or saved as individual files, depending on the output option you chose.
|