Chapter 9. Building Tables
| CONTENTS |
| |
|

- HTML Tables: Only for Tabular Data?
- Working with Tables in Dreamweaver
- Tables and Page Layout: If You Can't Beat 'Em, Join 'Em
- Summary
When web designers dream, they imagine themselves placing page elements wherever they please on an HTML page, and their layout being displayed with pixel-perfection in every browser on the market.
In the morning light, however, reality hits home: Although there are a number ways to position page elements, none is simple, and none is even close to browser-foolproof. This chapter covers the original purpose of tables and their use as layout tools, the basics of table code, how to insert a table with Dreamweaver, how to modify and format a table with Dreamweaver, and some different approaches to using tables for page layout.
HTML Tables: Only for Tabular Data?
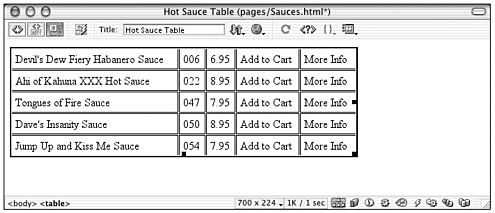
Tables were originally conceived as containers for "tabular data" pieces of information that are best arranged in rows and columns, as in a spreadsheet. They are ideal for it, and are still widely used this way, as shown in Figure 9.1.
Figure 9.1. Data arranged in rows and columns with an HTML table.
Very soon after the advent of HTML tables, however, web designers began using them as a tool for arranging and separating elements on a page; the rows and columns designed for lining up pieces of data are very useful for placing an image here and a block of text there. Positioning of page elements is now possible using Cascading Style Sheets (CSS), and this method will eventually supercede positioning with tables as the browsers offer better support for CSS. But for the time being, tables are the main tool designers use to create page layouts.
How Table Code Works
Dreamweaver makes using HTML tables easy, and this chapter focuses on building tables with Dreamweaver. However, an understanding of the way table code works is useful. Sooner or later, you will probably find it necessary to edit your table code directly, and familiarity with the HTML tags that make up a table will make that much easier. As emphasized throughout this book, the Dreamweaver user who can use its visual design tools, as well as be aware of the underlying code, is in a position to create truly professional web sites.
Simple Tables
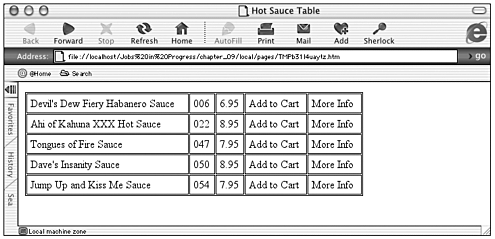
A table places information inside cells by dividing a rectangle into rows and columns. HTML represents a basic table using three elements. A table, defined by its surrounding <table></table> tags, contains one or more rows, <tr> </tr>. Each row, in turn, con-tains one or more table data cells, <td></td>. A very basic table would be built with code like this:
<table border="1"> <tr> <td>Chapel Hill</td> <td>Durham</td> </tr> <tr> <td>Raleigh</td> <td>Cary</td> </tr> <tr> <td>Hillsborough</td> <td>Apex</td> </tr> </table>
This code is rendered in Internet Explorer 5.5 as shown in Figure 9.2. To create more complex structures, table cells can be made to span several rows or columns by using rowspan and colspan attributes. The table shown in Figure 9.1 uses a colspan attribute to create its top row, where one large cell spans the entire table.
Figure 9.2. A browser rendering of a very basic table.
Other Table Elements
In addition to these commonly used table elements, various other tags can be placed within a table. Most of them extend the table's accessibility describing and structuring the table's content areas logically for interpretation by a wide variety of devices, including nongraphical browsers. Table 9.1 lists several of these elements. The <table> tag itself can also use the summary attribute to present a longer text summation of the table's contents.
| Tag | Purpose |
|---|---|
| <th> | An alternative to <td>, used to create header cells. (Most browsers display content in these cells as bold and centered.) |
| <caption> | Brief descriptive text about the table. Most browsers display this above or below the table. |
| <thead> [*] | Specifies a table header. |
| <tfoot>[*] | Specifies a table footer. |
| <tbody>[*] | Specifies a table body. |
| <colgroup>[*] | Defines a group of one or more columns. |
| <col>[*] | Indicates an individual column within a <colgroup>. |
[*] Indicates items that are part of the HTML 4 standard.
Working with Tables in Dreamweaver
Because tables are a ubiquitous part of web development, Dreamweaver offers several methods to create and work with them. The best method for most web designers is to work in Design view, using the Table object, Property inspector, and the various commands in the Modify > Table submenu.
Note
| | This chapter focuses on using Dreamweaver in Design view. Layout view is covered in Chapter 10, "Using Dreamweaver's Page Layout Aids." The new Dreamweaver Table objects for working in Code view are covered in Chapter 32, "Technical Issues." |
Creating Tables
To create a table in Design view, position the insertion point where you want the table inserted, and do one of the following:
-
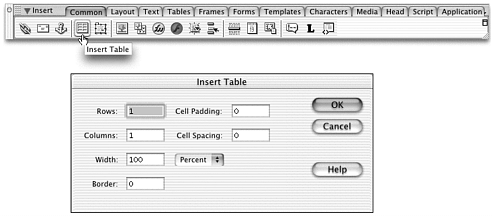
From the Common tab in the Insert bar, click the Table object (Figure 9.3).
Figure 9.3. The Table object and Insert Table dialog box.
-
Go to Insert > Table.
-
Use the shortcut key, Ctrl+Alt+T (Windows), or Cmd+Opt+T (Mac).
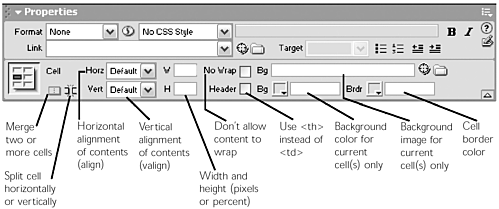
The Insert Table dialog box will appear (see Figure 9.3), giving you a chance to set some of your table's basic properties. After the table is inserted, you can use the Table Property inspector to change these and other properties (see Figure 9.4). You can also set the properties of individual cells by using the table cell Property inspector (see Figure 9.5). Note that table cell properties will only show if the inspector is in its expanded state.
Figure 9.4. The Table Property inspector.
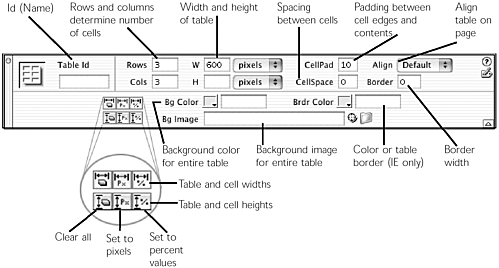
Figure 9.5. The expanded Property inspector showing table cell properties.
Note
| |
|
Note
| | After the table is inserted, if you look at it in Code view, you'll see that each cell contains a nonbreaking space ( ). This is present because most browsers won't correctly display completely empty table cells and Dreamweaver assumes you want your cells to display. As soon as you enter content into a cell, Dreamweaver will remove the nonbreaking space. |
Selecting Tables and Table Parts
One of the trickiest aspects of working with tables is selecting the portion of the table you want to work with.
Selecting the Entire Table
The Property inspector will only show table formatting options if the entire table the <table></table> tag pair and all they contain is selected. You can select the entire table from within the Document window, by clicking on the outermost edge of the table. But this requires really good hand-eye coordination, and you might accidentally move the mouse and adjust the table's dimensions as you're doing it.
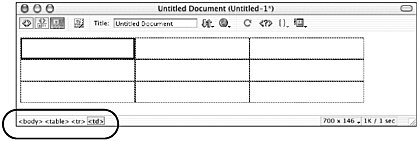
A better way to select an entire table is to use the tag selector. Place the cursor anywhere within the table, and in the tag selector at the bottom of the Document window, click the <table> tag. The table will display with a black line around it in the Document window, and can then be modified. Figure 9.6 shows the tag selector being used with table code.
Figure 9.6. The tag selector showing a selected table cell.
Selecting Rows and Cells
Selecting the individual parts of a table is easier than selecting the whole.
To access an individual cell's properties, just click the cursor inside the cell. The bottom half of the Property inspector will show the table cell attributes for the cell you're in.
To select multiple, contiguous cells, do one of the following:
-
Starting with the cursor inside one of the cells, drag across as many cells as you want to select. (Just don't accidentally start with your cursor on the border between two cells, or you'll resize them!)
-
Click inside one cell. Then hold down the Shift key and click inside other cells to select them. If the cells you click in aren't next to each other, all intervening cells will also be selected. Shift-clicking again in a selected cell will deselect it.
If you select an entire row of cells using one of these methods, you have effectively selected the <tr> tag. Any formatting options you choose will be added to the <tr> tag, not to the individual <td> tags. You can accomplish the same thing by clicking inside a cell, and then using the tag selector to select the <tr> tag.
To select multiple cells that aren't contiguous, start by clicking inside one cell. Then hold down Ctrl/Cmd and click inside other cells to select them. Ctrl/Cmd-clicking inside a selected cell will deselect it.
Selecting Outside the Table
Especially if your table is large, selecting outside it can be the hardest thing of all! To position your cursor outside a table, select the table and press the right- or left-arrow key on your keyboard. The cursor will appear as a flashing line, the same height as the table it is adjacent to, even if the table is very long.
Working with Table Contents
In an effort to make tables as user-friendly as possible, Dreamweaver has adapted various features you might be familiar with from working with tables in word processing and spreadsheet programs.
Using Tab to Navigate
With the cursor inside a table cell, pressing the Tab key will move the cursor into the next table cell, moving in a left-to-right direction across each row, and a top-to-bottom direction through the rows. It can be difficult to place the cursor into some very small table cells, and this technique can be useful.
Pressing the Tab key when you're in the very last cell of the table (bottom right) will add a new row to the bottom of the table. A few things to note about this feature:
-
The new row will take on various characteristics of the row above it. Background colors, horizontal and vertical alignment, colspan values, widths, and heights will all be copied down to the newly added row.
-
If you have set a height for your table, the new row will need to fit into that height. If your cells don't have heights assigned, they'll all shrink to make room for the new row. If your cells do have heights, the combined cell heights might be larger than the table height, which will make your table unstable in the browser.
Using the Arrow Keys to Navigate
You can also use the up, down, left, and right arrow keys to navigate through your table's contents and cells, though this works a little differently than using tab. The arrow keys will first of all move you within the cell's contents if your cell contains three lines of text, for instance, pressing the down arrow will move the cursor from one line of text to another. But when the cursor reaches the end of the cell's contents, pressing the arrow key again will move to the next cell up, down, left, or right.
Tip
| | Sometimes when a cell contains an image or other media element, it can be difficult to select the cell and not its contents, especially if the cell is no larger than the item it contains. One way out of this problem is to select the content item, then use the tag selector to select the parent <td> tag. Another way is to select the content item, then click the left or right arrow key once (this puts the cursor after the contents but still inside the cell). |
Deferred Table Update
Have you ever noticed that, when you have edited a table or its contents, the Design view display doesn't always update immediately? Usually, this happens when you have deleted table contents or changed a dimension value, and the table doesn't resize itself right away. This isn't a bug; it's a feature called deferred update. Dreamweaver can work faster if it doesn't need to worry about recalculating table dimensions, and redrawing the Document window, every time you edit your table.
Because of deferred updating, you need to refresh the Document window's display before the view will update. Clicking outside of the table will usually redraw the table; however, sometimes it is also necessary to click the tag for each table that has been affected in the tag selector. With a little practice, this will become second nature.
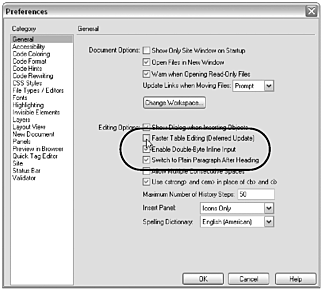
If deferred updating is a nuisance you'd rather not deal with, you can turn it off. Go to Edit > Preferences, and choose the General category. Find the check box for Faster Table Editing, and deselect it (see Figure 9.7).
Figure 9.7. De-activating the deferred table update in Preferences.
Modifying Table Structure
How big is your table? How many cells does it contain? Do you want cells to span multiple rows or columns? All these structural aspects can be adjusted by manipulating the table in Design view, using the Property inspector, and using the Modify > Table submenu commands.
Tip
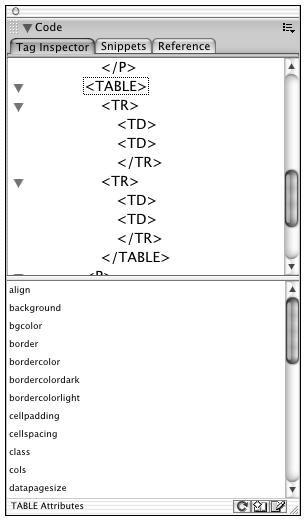
| | Inspect your table structure! If you want to keep on top of your table's code structure, but find looking at Code view overwhelming, check out the new Tag Inspector, as shown in Figure 9.8. The top portion of this panel shows your table's code as an expandable outline that clarifies the structure visually. The bottom portion lists all the attributes that can be applied to the various table elements. Read all about the Tag Inspector in Chapter 33. Figure 9.8. The Tag Inspector diagramming the structure of a simple table and listing possible attributes for the table elements. |
Adding and Removing Rows and Columns
After the table is created, you can change the number of cells it contains by changing its rows and columns. You can do this in any of the following ways:
-
Select the table, and change the numbers in the Rows and Columns fields in the Property inspector. Note that, if you add rows here, they'll be added to the bottom of the table; if you add columns, they'll be added to the right. Similarly, if you remove rows or columns by entering smaller numbers in the Property inspector fields, they'll be deleted from the bottom and right of the table (contents and all).
-
To delete a row or column, drag across all its cells to select them (as described in the previous section), and press the Delete or Backspace key.
-
You can also delete a row or column by clicking to put the insertion point inside a cell in that row or column and go to Modify > Table > Delete Row or Modify > Table > Delete Column.
-
To add a single row or column, click to put the insertion point inside the table and go to Modify > Table > Insert Row or Modify > Table > Insert Column. A new row will be added immediately above the row containing the insertion point; a new column will be added immediately to the left of the insertion point.
-
For ultimate control and flexibility, click to put the insertion point inside the table and go to Modify > Table > Insert Rows or Columns. This command opens a dialog box that lets you specify exactly how many rows or columns to add, and where they should be added in relation to the insertion point.
Tip
| | All of the commands in the Modify > Table submenu are also available in the contextual menu that appears if you right-click (Windows) or Ctrl-click (Mac) inside a table. |
Setting Dimensions
As noted above, neither a table nor its cells needs any dimensions. Tables without dimensions will shrink to fit their content. You can change a table's dimensions using the following methods.
Setting Width and Height with the Property Inspector
You can resize a table or its cells by changing the width and height values in the relevant Property inspector (refer to Figure 9.5). To set the table to a percent-based width or height, use the percent/pixels pop-up menu. To set a cell to a percent-based dimension, type a percent sign after the number in the width or height field. To remove a dimension attribute, delete the contents of the relevant field.
Note
| | The height attribute of the <table> tag is not part of the HTML specification. Although some browsers might attempt to honor a value set for the height attribute, it is better left unused so that the browser can calculate table height based on the contents. |
The Property inspector is an invaluable ally in sizing your table. But you must be careful when using it, because you can turn your dimensions into a mathematical mess that won't display reliably across browsers. All table cells in a row, for instance, logically must have no height value or the same height value. A table with two columns shouldn't have both columns set to 25% wide. A table set to 200 pixels wide shouldn't contain one column set to 150 pixels and another column set to 100 pixels. Dreamweaver will allow you to create all of these mathematical impossibilities, if you enter your values through the Property inspector. But your table will not behave properly in the browser, if you do.
Tip
| | Usually, an empty width or height field in the Property inspector indicates that the property has not been assigned. If multiple table cells are selected, however, an empty field could indicate that different cells have different dimensions. To make sure a particular cell has no width or height, select that cell only and then examine the Property inspector. |
Resizing in the Document Window
You can also resize a table and its components in the Document window by dragging the outer or inner edges. This seems like an intuitive way to proceed. Rest assured that Dreamweaver won't create any mathematical anomalies if you resize this way; but it's very difficult to get accurate results by drag-resizing. Also note that when you resize this way, Dreamweaver might add more dimensions than you want. You might have wanted to add width or height to the cells but not the table, for instance; or only to certain cells; or only to the table itself. When you drag-resize, you have to carefully check the resulting code to see if Dreamweaver gave you only the dimensions you asked for.
Setting All Widths and Heights at One Time
The table Property inspector includes four buttons for setting all the dimensions of a table at once (see Figure 9.4). As their names indicate (Convert Table Widths to Pixels, Convert Table Widths to Percents, and so forth), these buttons allow you to set width and height attributes for all cells within the table to pixels or percent. They can be real time-savers, if you really do want to add dimensions to everything in your table at the same time. But you will probably discover that, as you're working on real jobs, you generally don't want all those dimensions set at once.
Clearing Widths and Heights
A handier set of buttons in the table Property inspector is the Clear Row Heights and Clear Column Widths buttons (see Figure 9.4). Because it's so easy to accidentally set dimensions where you don't want them (usually by drag-resizing), these buttons can quickly get you back to nice, clean table code.
Merging and Splitting Cells
If you're used to working with spreadsheets and word processing tables, the concept of merging and splitting cells is probably as familiar as an old shoe. But there is no merging or splitting in HTML. Instead, Dreamweaver hides some very complex table restructuring behind a lovely, familiar merging-and-splitting interface.
To merge two or more table cells, select the cells and either click the Split icon in the Property inspector, or go to Modify > Table > Merge Cells. What's happening to the HTML when you do this? Dreamweaver adds a colspan or rowspan attribute to the upper-leftmost cell selected, and removes all other cells, after moving their contents to the remaining cell.
To split a table cell, click to put the insertion point inside the cell and either click the Merge icon in the Property inspector, or go to Modify > Table > Split Cell. A dialog box will appear, asking you exactly how you want to split the cell. What's happening to the HTML here? Dreamweaver performs some fairly extensive restructuring of the table, adding rows or columns as necessary, and adding rowspan or colspan attributes where needed.
Tip
| | Splitting table cells to fix structural problems can often leave you with a table that just won't behave the way you want it to. A better practice is to create the table with the proper number of rows and columns to begin with, and use nested tables as needed to create rowspan and colspan cells. |
Formatting Tables
Borders, background colors, and other formatting properties can make tables look just how you want them even if you want the table to look like nothing at all. Before you go overboard with the fancy formatting, however, be aware that not all formatting properties are supported or interpreted the same way by all browsers. The following sections discuss some of the most common table formatting, and how Dreamweaver can help you apply it.
Borders, Cell Spacing, and Cell Padding
These three formatting options have to do with what happens between the cells, and how the table's contents are spaced. They're all properties of the table itself, and so are set from the table Property inspector (refer back to Figure 9.6).
Border width, set in pixels, determines the thickness of the outline around the table and between the cells. To create a borderless table, set the border width to 0. Border color can also be set, but only IE will use this attribute. All table borders in Netscape appear gray.
Tip
| | Many designers prefer a thinner table border than is possible with the border attribute. You can achieve this with a simple inline CSS declaration such as <TABLE style="border: 1px solid black;">. |
Cell padding is space added between cells. Cell spacing is empty gutter space around the inner edge of each cell, where no cell contents are allowed to go. Remember, leaving either of these two fields in the Property inspector blank is not the same as setting their values to 0. If the fields are left blank, and the attributes therefore not defined, most browsers will default to cell padding and cell spacing of 2 pixels. Remember also, when setting these, that their values will affect the overall table width.
Background Colors and Images
The entire table can have a background color; individual cells can also be assigned colors. Cell colors will override the table color. Note that, in Netscape, cell color does not include the cell padding area, though table color does. In IE, cell color and table color extend across the padding between cells.
The entire table, or individual cells, can also be assigned a background image. This image will tile, just like the background image for a page (see Figure 9.9).
Figure 9.9. A table background image tiling across multiple cells.
Note
| | If there's a chance that visitors will be using Netscape 4.x to view your page, be aware that this browser version (on any platform) will tile the image separately within each table cell rather than across the entire table. |
Cell Alignment
Each cell in a table can have its own align and valign properties, which determine how the content sits within that cell, horizontally, and vertically. If these attributes are not specified, most browsers will align <td> contents vertically centered and to the left, and <th> contents vertically and horizontally centered.
Using cell alignment is not the only way to horizontally center contents within a cell. If your content is a text element, or is contained within a text element, the alignment attribute can be applied either to the cell or to the text's formatting tag:
<td align="center">Hello, world</td> <td><p align="center">Hello, world</p></td>
There is no equivalent alternative for vertically aligning content, however. To float cell contents to the top of a cell, use the Property inspector to assign valign, like this:
<td valign="top">Hello, world</td>
Exercise 9.1 Creating a Table Calendar
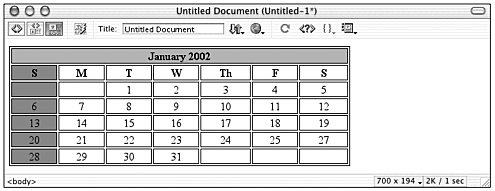
In this exercise, you'll create a monthly calendar, using a table to provide the row and column structure. Figure 9.10 shows the finished calendar layout you're aiming for.
Figure 9.10. A calendar created and formatted using an HTML table.
If you haven't done so yet, copy the files from the chapter_09 folder on the CD to your hard drive. Define a site called Chapter 9, with this folder as the local root folder.
-
Create a new HTML document, and save it in the chapter_09 folder as calendar.html.
-
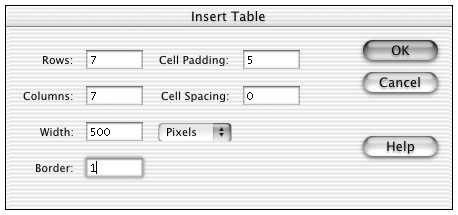
Before creating your table, you need to determine what its structure will be. By examining Figure 9.10, you see that you need seven rows and seven columns, with the top row consisting of one large, merged cell.
-
From the Insert bar, bring the Common tab to the front and click the Table object. When the Insert Table dialog box appears, fill it in to look like the one shown in Figure 9.11, and click OK.
Figure 9.11. The Insert Table dialog box ready to create a calendar table.
-
To create the top row, you'll need to merge all the cells in that row. Drag across the entire row to select it; then click the Merge Cells button in the Property inspector (refer back to Figure 9.5).
-
Enter the calendar data in your table. This will give you a good opportunity to practice moving from cell to cell (using Tab or the arrow keys).
-
For each cell, you want its contents centered vertically and horizontally within the cell. This is done with cell alignment, and can be done for all cells at once by selecting them all and then using the Property inspector. To select all the cells in the table, start with the cursor in the upper-left corner of the table, and drag down to the lower right. After you've done this, in the Property inspector set the Horizontal and Vertical fields to Center and Middle, respectively.
-
Format the text in the cells however you like. As in the previous step, you can format all the text in multiple cells at the same time, by selecting the cells and using the Property inspector or CSS panel.
-
To make your table's colors match that shown in Figure 9.10, you'll need to change the table's border color to black, and the background color for various cells to whatever coordinating colors you like. (Refer back to Figures 9.4 and 9.5 to find the border and cell coloring fields in the Property inspector.)
-
Preview your table in Internet Explorer, and in Netscape (if you have access to both browsers). The border will display differently in the two browsers, as shown in Figure 9.12.
Figure 9.12. The completed calendar.html displaying in two different browsers.
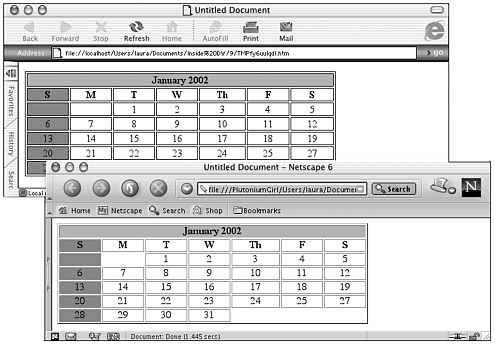
One disaster that might strike you is cells that don't display properly (see the Netscape display in Figure 9.12). This happens because browsers won't display empty cells; and although Dreamweaver starts out by inserting a non-breaking space in all empty cells, you might have inadvertently deleted these while tabbing around in your cells. If you have this problem, back in Dreamweaver enter a non-breaking space into the offending cells (Insert > Special Characters > Non-Breaking Space).
Tables and Page Layout: If You Can't Beat 'Em, Join 'Em
If browsers all implemented tables properly, knowing how to use the tags and attributes discussed so far would be enough. You would just place the tables as you pleased on your pages, setting width and height, colspan and rowspan, and feel assured that your designs would display correctly in the currently used browsers.
However, there's no reason for despair. You're going to learn a different approach to building pages with tables, one based on the way tables actually work. Tables do behave in predictable ways (a fact often not learned until after much trial and error). If these tendencies are understood, and the designer is willing to accommodate himself to them, smoothly working table pages are quite possible.
Some Do's and Don'ts of Real-World, Table-Based Page Design
These principles apply to all table-based designs, but are especially important when building "liquid" (as opposed to fixed-width) designs:
-
Don't drag table borders in the Dreamweaver Document window. When you do this, Dreamweaver inserts dimensions into each <td> tag. The problem with this is that table cell dimensions cannot be counted on to hold the dimension of the cell at the specified size when rendered in the browser.
-
Don't set the width and height attributes of table rows or cells to specify these dimensions. As explained in the preceding point, this does not work consistently and will most likely cause table problems.
-
Don't rely on splitting or merging table cells. Some browsers have a difficult time rendering table code containing these attributes, and with a little planning, the same effect can be produced in other ways.
-
Do set the width of the table itself, either in pixels or percentages, depending on your design goals (see the section "Fixed Versus Liquid, and How They Work," later in this chapter).
-
Do think of tables as "shrink wrap" as an elastic-like container that will be sized by its contents.
-
Do use rigid objects such as graphic images and nested tables when you need a table cell to shrink no further than a certain minimum size.
-
Do use stacked tables tables placed vertically one after another on the page when possible, as opposed to very large or nested tables. Nested tables take longer for browsers to render, and complex nested tables can cause problems. Nested tables can and should be used when necessary, but some restraint is advised.
-
Do use nested tables, but only when necessary.
-
Do use 1x1 pixel transparent GIFs, sized as necessary using the width and height attributes of the <img> tag, as shims to prop open table cells as necessary; but use as few as possible.
Creating Fixed-Width Layouts
Table-based pages can be built so that their layout remains at a fixed pixel width regardless of the user's monitor resolution and browser window size; or they can be built so that the width of the layout expands and contracts to take up a certain percentage of the browser window width. Each approach has its advantages and disadvantages.
Fixed Versus Liquid, and How They Work
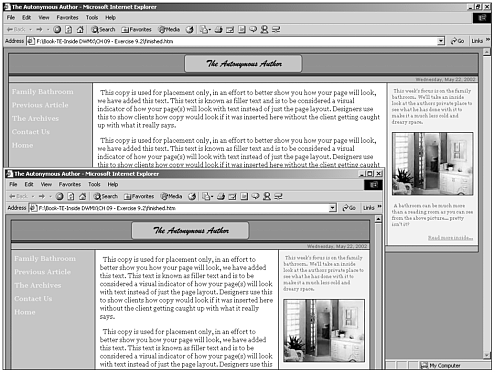
Layouts built using fixed-width tables are easier to construct, and it's easier for the designer to predict how the layout will appear to all of its visitors. But by choosing a fixed-width layout, you are essentially guessing how wide the visitor's window will be; if you guess wrong, your layout will either display with its right edge cut off, or with vast expanses of empty page surrounding it. Figure 9.13 shows examples of fixed-width layouts at work.
Figure 9.13. A fixed page layout seen at different browser window widths.
Layouts built using liquid tables (Also referred to as flexible tables, stretching tables or expanding and contracting tables), on the other hand, will adjust themselves to the browser window width, so they fit perfectly no matter what the size. But to achieve this effect, some part of the layout must be able to stretch and squash without ruining the design. Not all layouts are suited to this kind of treatment. Liquid layouts are also more difficult to construct. Figure 9.14 shows examples of Liquid layouts at work.
Figure 9.14. A liquid layout seen at different browser window widths.
Constructing Liquid Layouts
There is nothing magical about making a liquid table it's just a matter of knowing the right steps, applying those steps and doing a little planning up front prior to developing the liquid layout.
The whole table can be liquid, or only a single column, or several columns. You'll learn how to make a three-column table with the middle column being liquid in Exercise 9.2. One thing to note is that a row cannot be liquid in vertical height programmatically, that is, controlled by content and content alone.
The planning consists of using pad and pencil (yes, even in this day and age) and working through which segments of the table should be fixed and which should be liquid. After you have that decided and figured out, you'll need to use Dreamweaver to convert your sketch to a working liquid table.
There are several methods used to create a liquid design with tables, but there is really only one cross-platform and cross-browser method. We'll work through it in Exercise 9.2.
Exercise 9.2 Building a Liquid Page with Tables
In this exercise, you build a simple page that flows with the browser size starting at 740 pixels wide. The page consists of a header, a navigation bar, the content area (the liquid part), and a sidebar. Liquid pages can be much more complex or simpler than this, but after you use and become comfortable with the technique you can go about experimenting with your own pages.
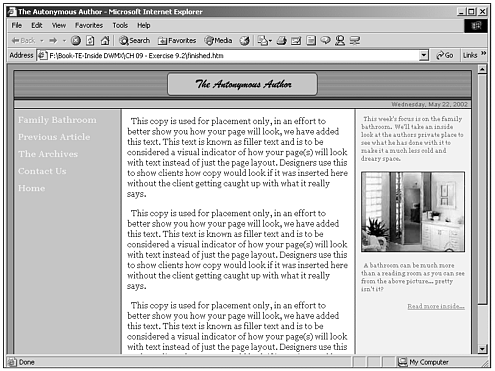
Figure 9.15 shows the finished exercise page, displayed in a browser window at about 800x600 pixels.
Figure 9.15. The finished liquid page.
-
If you haven't yet, copy the folder chapter_09 from the companion CD to your hard drive, and define a Dreamweaver site named chapter_09 with the folder chapter_09 as its root directory.
-
Open start.htm and immediately save it as index.htm. You're starting with this page because we have already done some basic groundwork for you by linking an external style sheet and setting the body margins.
-
Insert a table. Using the Insert Table dialog, give your table 1 row and 1 column, set the cell spacing, cell padding and border to 0 and set the width to 100% (and be sure to select percent from the drop down). Open the Property inspector (with the table still selected) and type in #000000 in the Bg Color field. (This is in preparation for giving the inner table structure a black border effect).
-
Position your cursor inside this new table and insert another table, this time using 5 rows, 3 columns, and cell padding of 5. Set cellpadding to 5 so that we can still select the proper cell later in the project. At the end of the project we will be changing this value to 0 so that the table collapses properly. Set cell spacing to 1, give it a 100% width and a border of 0.
-
Next, we want to merge some cells in the table rows to make a single cell in the rows for other content.
Select the top row by positioning your cursor in the top-left cell, click and hold the left mouse button, and drag across the top-right row, and then merge the 3 cells using the Modify > Table > Merge cells menu item. Repeat for row 2, 3 and 5.
-
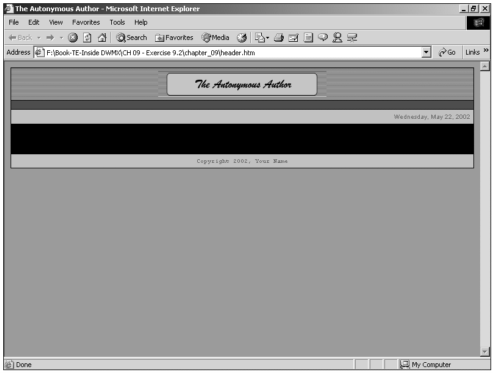
Position your cursor in row 1; using the Property inspector, use the Browse button beside the Bg field and navigate to hd_bg.gif in the image folder. Change the Horz field from Default to Center. Using Insert > Image, insert logo.gif in this cell. It should be center-aligned at this point, with the background showing in the entire table cell.
Tip

The TR and TD Property inspectors look identical, so as a safety precaution, use the tag selector to select the TD when your cursor is positioned inside the desired cell. This will ensure that property changes affect the TD and not the TR.
This also sets the cell background to match up with the provided logo and inserts the provided logo in the top most cell. The cell height is controlled by the content; in this case, the content is a specifically sized image.
-
Position your cursor in table row 2. In the Property inspector, change the Bg Color to #990000 and using the Insert > Image menu item, navigate to spacer.gif. Using the Image Property inspector, change its height to 4 and the width to 100 pixels.
-
Place your cursor in the third row, and using Modify > CSS Styles, select date. The date class will apply to the TD tag of the cell because it is currently empty. The cell should now be a powder blue color. Using the Insert bar Common tab, click the Date button to insert the date with the following dialog properties: Day format should be Thursday, leave the Date and Time Format at their defaults, and place a check in Update automatically on save. Click the OK button and a semi-dynamic date is inserted on the page.
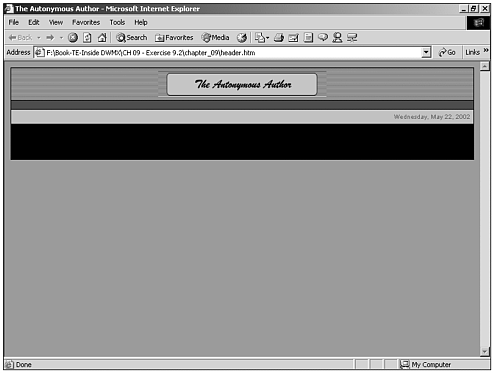
This completes the header section of the liquid table (see Figure 9.16). Next we will be dealing with the footer content.
Figure 9.16. Steps 1 through 8 completed.
-
Position your cursor in Row 5 (the last row), using Text > CSS Styles, select copy from the list. Your background should be the same powder blue as the date row and the cursor should be flashing in the center of this cell. Now type in Copyright 2002, Your Name (Replace Your Name with your actual name or company name if you like. You could also replace the word Copyright with the Copyright symbol located in the Insert Bar, Characters tab). Save the page and preview it in Netscape and IE.
That's all there is for the footer of this liquid table (see Figure 9.17). Next we will be dealing with the sidebar.
Figure 9.17. Step 9 completed.
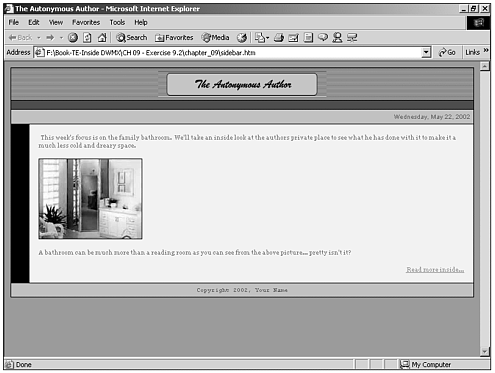
-
In row 4, position your cursor in the right most cell. Using Text > CSS Styles, select sidebar from the list. The cell should change to a pale orange color. Change the Vert field of the Property inspector from Default to Top.
-
Type the following in this cell: {spacebar}This week's focus is on the family bathroom. We'll take an inside look at the author's private place to see what he has done with it to make it a much less cold and dreary space. Select this text, using the Property inspector change the format to Paragraph. Press the right arrow key so that the paragraph is no longer selected and press the Enter key. Notice that the cell expansion is controlled by the content? We'll take care of that in a bit so don't worry about it right now.
-
Using the Insert > Image menu item, navigate to and select image.jpg, then click the OK button. Press the right arrow key again to deselect the image and press the Enter key.
-
Type in the following text at the current cursor position: {spacebar}A bathroom can be much more than a reading room as you can see from the above picture pretty isn't it? And press the Enter key.
-
Type the following text at the current cursor position: Read more inside .Use the Text > Align > Right menu item and using the Property inspector, type in javascript:; in the Link field. Save the page and preview it in Netscape and IE. This completes the sidebar content (see Figure 9.18). Click inside the row 4 left-most cell, and we will work on the navigation bar next.
Figure 9.18. Steps 10 through 14 completed
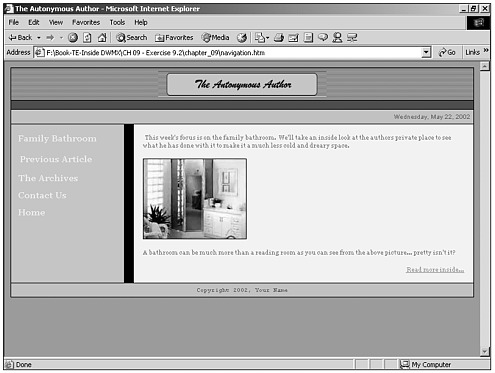
-
Using the Property inspector, change the Vert from Default to Top and change the Bg Color to #99CCCC. This sets our navigation bar background color and ensures that our menu system is always at the top of the cell. Now, select Insert > Table and in the Insert Table Dialog, specify 5 Rows, 1 Column, 0 for Cell spacing, Cell padding and Border. Change width to 75 Pixels. Previously we used percent, but for this table we want it to always be displayed at 175 pixels. Click OK to insert the table inside its container cell.
-
Place your cursor in the top most cell of this new table and insert a spacer image 100 pixels wide and 5 pixels high. There are two functions to this spacer image: The first is to provide a spacer from the top of the outer table cell, the second and most important is to force the table to 175 pixels wide. Why you might ask? Even though the table is specified at 175 pixels it theoretically should stay that way, but the browsers do not necessarily implement it correctly, and this is a safety feature to ensure that the table doesn't collapse at all, regardless of cell contents.
-
In each subsequent cell of this single column table, type in sequence: Family Bathroom, Previous Article, The Archives, Contact Us, and Home. In each row, starting with the first, change the Format to Paragraph, type in javascript:; in the link field and apply the Menu class to the <P> tag all using the Property inspector.
Tip
To use CSS in the Property inspector, click on the A icon beside the Format field of the Property inspector.
Warning
Order and applying is important. Set the Format to Paragraph, then Apply the menu class from the CSS dropdown in the Property Inspector, then type in javascript:; in the Link field. Failure to follow this order will result in the menu class being applied to the <TD> tag instead of the <P> tag, which in turn will cause rendering issues in the menu system.
After you have performed this step with each navigation bar item, the navigation system is completed and we will move on to the liquid section of this table (see Figure 9.19). Save the page and preview it in Netscape and IE.
Figure 9.19. Steps 15 through 17 completed.
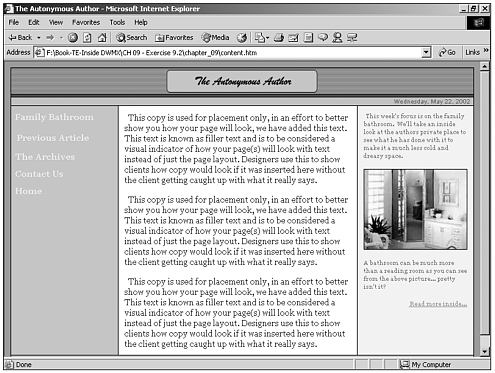
-
Position your cursor in Row 4, center column; it should be the only black background column remaining on the page. Using the Property inspector, change the Vert field to Top, the width to 100% (don't forget to type in the % symbol) and change the Class to Content. Now, also change the Format field to Paragraph. Why this order here? We don't want the Content CSS Class being applied to each Paragraph tag but rather the cell as a whole; so we apply the css with no format selected, which applies the CSS Class to the TD instead.
The cell should have adopted a white background and the cursor should be positioned in the top-left corner of the cell.
-
Using your favorite Filler Text extension (there are several on the Macromedia Exchange for Dreamweaver) add some content to this cell. If you don't have a Filler Text extension, you can use the following text: This copy is used for placement only. In an effort to better show you how your page will look, we have added this text. This text is known as filler text and is to be considered a visual indicator of how your page(s) will look with text instead of just the page layout. Designers use this to show clients how copy would look if it were inserted here without the client getting caught up with what it really says. Press the Enter key, copy the text you've just typed, and paste it to add it again (repeating this twice to get three paragraphs in the cell).
Save the page and preview it in Netscape and IE. Resize the browser window to cause page changes widthwise in your browser, and notice that the middle cell (known as content) resizes itself to allow for scaling in the browser. Notice how small the cell gets when the browser is down to about 640x480 ugh what do we do about that? Remember what we did with the navigation table when we inserted that spacer image ahh ha! You got it, we do that here too in the next step.
-
We have to decide what minimum browser resolution we want to support without having horizontal scrollbars. For the purpose of this exercise, we are going to choose 800x600. The typical viewable area of our desired resolution is about 740 pixels wide. So now we need pencil and paper again or a calculator.
740 pixels wide minimum
-175 pixels that we set the navigation nar
-170 pixels for the sidebar image
=395 pixels left for the content cell
Making allowances for cell spacing and cell padding, and some padding and margins allowed for in the external CSS file. We'll be using 320 as the spacer image width.
-
Now that we have our size requirement, where do we apply it? In the content cell (the white one at Row 4, center column), position your cursor at the very beginning of the first paragraph. Insert a spacer image, setting the width to 320 and the height to 1. Press the right arrow key, and add a line break (Shift+Enter) after the image.
-
Save the page and preview it in Netscape and IE. The browsers should go slightly below 800x600 size with no horizontal scrollbar and expand up to any resolution with only the center column changing it's width in the browser.
-
There is one thing left to do. Remember that in step 4, we changed the cell padding to 5. Now we want to change it back to 0 so that the image in the header looks proper. So position your cursor in the liquid cell (Row 4, middle cell) and using the tag selector, select the closest Table tag. After you select this, the Property inspector should populate with the current values. Change cell padding from 5 to 0. Save the page and preview it in Netscape and IE (see Figure 9.20).
Figure 9.20. Steps 18 through 23 completed.
Question: What if you don't want an image in the sidebar? How do you hold that cell open to the desired width?
Answer: You would basically repeat the procedure for step 21, except instead of performing it in the middle cell, you would do it for the right most cell on Row 4; and the image width would be whatever you desired, but make sure that you compensate in the center cell for your minimum width requirements.
Sliced-Image Tables
The "shrink wrap" nature of tables is perfect for putting together sliced images. A table without cell padding or cell spacing, and without width or height attributes, will naturally close in around images placed within its cells. The image slices are held together tightly by this "elastic" tendency of HTML tables, so that the visual effect in the browser is such that the image appears completely seamless.
An image is sliced for one or more of these purposes:
-
To allow the image to load in pieces, instead of forcing the visitor to wait while the complete image loads
-
To allow the separate slices to be used as links
-
To allow the separate slices to be used for rollovers or disjoint rollovers
-
So that portions of a large image can include nongraphic text (a "text slice" in Fireworks terms)
Macromedia Fireworks includes a variety of tools for making image slices and for exporting the slices as a table that can be opened and edited with Dreamweaver. Figure 9.21 shows a Fireworks-built sliced image table in Dreamweaver.
Figure 9.21. A sliced-image table created in Fireworks and being edited in Dreamweaver.
Note
| | For more on working with Fireworks and Dreamweaver together, see Appendix A. |
Summary
HTML tables have provided web designers with a workable, cross-browser way to lay out page elements for years. Although positioning with CSS is the W3C recommendation and the direction of things to come, as of this writing, tables are still one of the most reliable page layout techniques.
In this chapter, you looked at the HTML code that makes up tables, learned how to insert and format a table with the Dreamweaver Table Property inspector, went over some do's and don'ts of table layout, learned to build a flexible page with tables, and looked at the usefulness of tables in building sliced-image pages.
| CONTENTS |
EAN: 2147483647
Pages: 49