Chapter 25. Templates and Libraries
| CONTENTS |
| |
|
- Dreamweaver Site-Wide Content Tools
- Working with Templates
- Working with Library Items
- Interview: Becky Tench
- Strategies for Working with Templates and Library Items
- Summary
Almost every web site has some repeated content. Whether it is a header with the company logo and tagline, a navigation bar, a footer with more essential information, or other features, it's very common to use the exact same content on more than one page.
Repeated content is important to usability. When the pages of a web site have as very similar appearance, the user feels secure about his location; he knows he's still somewhere on the Acme Widgets Company site because the Acme Widgets logo is still in the upper-left corner. He also is comforted greatly by the fact that the same navigation he used to browse from the Home page to the Products page also is present on the Products page.
Web designers, therefore, are frequently called on to create a number of pages that look very much alike in certain ways. Designers also find themselves in the position of inserting similar content on many different pages, even if it doesn't necessarily make up part of the page's basic structure. A real estate site with many pages of listings, for instance, might have a Take a 360-degree tour of this home! link that is formatted nicely in a bright-yellow box. Dreamweaver templates and library items are the ideal tool for this need. Although quite different in function, templates and library items can both be thought of as site-wide content tools: features that enable you to create, propagate, and update certain content over numerous web pages with ease.
This chapter covers what a Dreamweaver template is, what a Dreamweaver library item is, how templates and library items work, how to create templates and library items, how to build pages based on a template, how to insert content in a page using a library item, how to update a page by updating its template or library items, how to attach and detach templates, and how to work with templates and libraries involving JavaScript behaviors.
Dreamweaver MX provides some exciting new tools that make templates even more powerful and flexible than in previous versions.
Templates and library items can seem confusing at first, but with a little familiarity and practice, you'll find that they operate in a very logical way and are actually very easy to use. In fact, it's the theory behind them that takes a little time to understand; using them is usually fast and easy, and can save huge amounts of time.
Dreamweaver Site-Wide Content Tools
Dreamweaver offers two different types of tools for managing site-wide content: templates and library items (sometimes also called libraries). A basic understanding of how these two features work makes it much easier to decide which to use in a particular situation and how to avoid problems.
What Are Templates and Library Items?
Templates and library items have some similarities and some distinguishing features. This section defines them and then moves on to discussing how they function within Dreamweaver.
A Dreamweaver template fits within the ordinary definition of the word template in that it is a page that serves as a pattern for others like itself. Even those who don't use Dreamweaver templates might create a template page and just resave it with a new name for each page of that type needed. However, Dreamweaver templates take the concept further, adding a measure of power and ease: The pages made from a template can be updated automatically, all at once, just by updating the template itself.
Therefore, a Dreamweaver template is an HTML page, but a special type of HTML page. Special code inserted by Dreamweaver makes it possible for the template and its child pages (the HTML pages made from the parent template) to be connected in such a way that an update to the template updates all child pages.
Dreamweaver library items are similar to templates. The main distinction between the two is in the fact that Dreamweaver templates are complete HTML pages, whereas library items are special sections of code. A second important difference is the capability of templates to have editable regions and noneditable regions, whereas the entire library item is editable.
As just described, library items consist of sections of code. However, they differ in several important ways from Dreamweaver Snippets. First, library items are available only to one particular site as defined in Dreamweaver (although they can be transferred from one to another), whereas Snippets are universally available. Library items, after inserted in a page, can be instantly updated when the parent library item is updated. Snippets are just code.
How Site-Wide Content Works
When you save a template or a library item, Dreamweaver does three things:
-
It inserts code into the template page or the library item in the form of HTML comments. As you probably know, HTML comments are code that is not displayed by any web browser, but serves some other purpose.
-
It saves a template as a file with the extension .dwt and a library item as a file (not a page, but a file nonetheless) with the extension .lbi.
-
Dreamweaver saves the template or library item into a specific folder underneath your site root folder. Templates are saved in a folder named Templates, and library items in a folder named Library; Dreamweaver creates the folders. It is crucial to the operation of both of these features that the files are left in the folders where Dreamweaver places them, and that the folder names not be changed.
These special characteristics given by Dreamweaver to the files allow the program to keep track of the template or library item and of all the pages that are made from it, and to update the pages made from the template or library item when the original is updated.
Templates, Library Items, and the Web Server
When you edit a template or library item, and Dreamweaver updates a number of HTML documents automatically, everything takes place on your local hard drive. The actual HTML in the child pages has been changed. The resulting changed pages need to be uploaded to the server for the changes to be reflected on the remote site. However, templates and library items themselves never need to be uploaded to the server. All of their work takes place locally.
Working with Templates
If you plan to have many similar pages on a web site, and you want to maintain a consistent look and feel from page to page, templates can prove extremely useful. When you create a template, you specify which page elements will be editable; all other page elements are noneditable, or locked.
After a template has been created, child pages can be made from it. In the child pages, the editable regions can be altered in any way you choose, whereas the noneditable regions are unchangeable.
When a change is needed to the noneditable areas of the pages based on a template, the change can be made just once, to the template itself; you can then instruct Dreamweaver to propagate the change to the child pages. The editable regions, however, always remain independent, just like normal HTML documents.
Note
| | Throughout this chapter, the term template file or just template refers to the original DWT document. Template-based page or child page refers to documents made from, and attached to, a template file. Taking care to be aware of which type of document is being discussed will make understanding templates a lot easier. |
The Templates Category of the Assets Panel
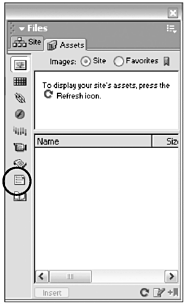
Templates don't have their own panel, but are managed through the Templates category of the Assets panel (part of the Files panel group), as shown in Figure 25.1. To open it, choose Window > Assets from the main menu, and then, on the left, click the Templates icon to open that category of the Assets panel.
Figure 25.1. The Templates category of the Assets panel.
Creating Templates
The first step in building a template-based web site is to create a template upon which to base multiple pages. You can create a Dreamweaver template from a new blank page or from an existing HTML document.
To create a new, blank template, follow these steps:
-
Choose Window > Templates to open the Assets panel and display the Templates category.
-
Click the New Template button at the bottom of the Assets panel. A new template, untitled, is added to the list of templates in the panel.
-
With the template still selected, enter a name for the template. Template names should follow the same restrictions as other filenames used on the web: No spaces, no special characters, and all lowercase is recommended.
-
Double-click the new template name to open the blank file. Proceed to build your page and to create editable regions, as described later in the section "Setting Editable Regions."
To save an existing document as a template, follow these steps:
-
Open the document.
-
Choose File > Save as Template.
-
In the Save as Template dialog box, select the site and enter a name for the template in the Save As box. This name will be used as the template's filename, so observe the normal restrictions for filenames. Dreamweaver will add the .dwt file extension in the Templates folder.
-
A template file contains no editable regions until you create them. Set some regions as editable by following the instructions in the section "Setting Editable Regions."
To edit a template file, follow these steps:
-
Choose Window > Assets. The Assets panel will appear, open to the Templates category, with all the available templates listed. The top pane will display a preview of the template that is selected.
-
Double-click the name of the template to open it in the Document window. Edit the template as desired. You can edit noneditable regions keep in mind that they are noneditable in child pages, not in the original template and your changes will be propagated to all the child pages based on the template. You can edit editable regions of a template, but there's no good reason to, because the content of editable regions of a template file don't propagate to the child pages.
-
Save the edited template by choosing File > Save.
When you attempt to save and close a template file that doesn't contain editable regions, you will be warned that your template contains no editable regions. You can save and close a template without including any editable regions, but it is virtually useless, because pages based on it will all be identical and cannot be edited. It is best to create editable regions at this point.
Note
| | Dreamweaver templates must be left in the Templates folder where Dreamweaver puts them, and the Templates folder must be left within your local site root directory. If the Templates directory or template files are moved, they will not function properly. |
Setting Editable Regions
When a page is made from a template, certain parts of it cannot be edited, and certain parts can. When you create the template itself, you make these determinations. Until you specify that one or more areas of the page will be editable, all regions are locked (noneditable).
Although you are editing the template file itself, you can make changes to both editable and locked regions, but the changes you make to editable regions will affect only the template file. Generally, there is no reason to place any content at all in the editable regions of a template.
In a page based on the template, you can make changes only to the editable regions.
To specify a part of a template page as an editable region, follow these steps:
-
Open the template file by double-clicking its name in the Templates category of the Assets panel.
-
Select the text or content you want to make an editable region.
Tip

One of the easiest ways to select the elements you want to make into editable regions is to use the tag selector at the bottom of the Document window. The tag selector will display different tags based on where the insertion point is in the Document window; to find the tag you want, place the insertion point within or near the element in the Document window, and then try selecting tags in the tag selector until you see by the highlighting in the Document window that you've found the correct one.
-
Choose Insert > Template Objects > Editable Region.
-
In the New Editable Region dialog box, enter a unique name for the region (see Figure 25.2). Avoid spaces and special characters in template names; the underscore character and hyphen are acceptable. Click OK.
Figure 25.2. The New Editable Region dialog box.

In the Document window in Design view, the editable region is enclosed in a highlighted rectangular outline in the template, with a tab at the upper left displaying the region's name. The color used for highlighting might be changed in your Dreamweaver preferences (see "Setting Template Preferences" later in this chapter).
In a page made from a template, the editable region also will be outlined and highlighted and show the upper-left name tab. But unlike template files, pages made from templates also have some added visual cues in the Document window in Design view. The entire page is surrounded by a different-colored outline, with a tab at the upper right giving the name of the template on which the document is based. Figures 25.3 and 25.4 show a template file and a page made from a template in the Document window.
Figure 25.3. A template and a template child page, with highlighting.
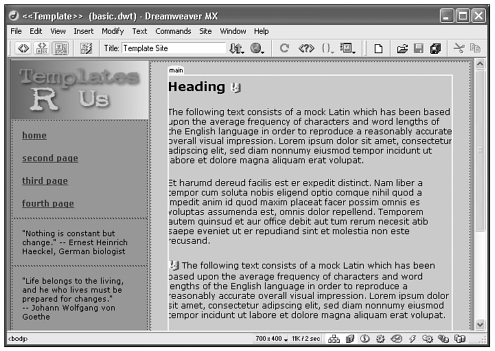
Figure 25.4. Highlighting in template pages and in documents made from templates.
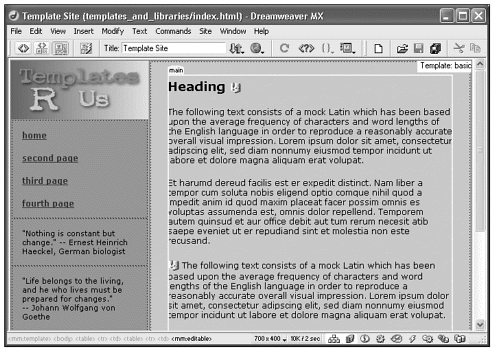
Table 25.1 gives some guidelines as to which HTML elements can and which cannot be made an editable region.
| Element | Whether Can Be Made Editable Region |
|---|---|
| An entire table | Can be made an editable region. |
| A single table cell | Can be made an editable region. |
| Contents of a cell | Can be made an editable region, but this is exactly the same as making the containing table cell an editable region. |
| Multiple table cells | Cannot be made an editable region. |
| A single layer | Can be made an editable region; its position will be editable. |
| A layer's contents | Can be made an editable region; the layer's position cannot be changed, but its contents can. |
| A document's title | By default an editable region. |
| The <head> region | Locked by default. However, there is a workaround for this; see "How CSS Affects Template-Based Pages" later in this chapter. |
| An empty editable region | Can be created by inserting and naming a new editable region at the insertion point, with nothing selected. |
Removing Editable Regions
To remove an editable region in other words, to convert the region back to a locked regions select it and choose Modify > Templates > Remove Template Markup. An editable region can be selected by clicking its tag in the tag selector at the bottom of the Document window.
Note
| | A region can be converted from editable to noneditable only in the template file itself. In a page made from a template, an editable region can't be made locked. |
How Links Work in Templates
Always use the folder icon to browse for the desired link, or the Point-to-File icon, when you add links to a template file. When you browse or point to a file to specify a link, Dreamweaver is able to handle the coding so that even document-relative links work properly in the pages made from a template, regardless of their location in the folder structure. An exception to this rule is in the case of external links, where a complete path can be typed into the link field.
Template files are saved in a folder named Templates, which Dreamweaver creates directly under your site root directory. When you allow Dreamweaver to write the code for the links you place in a template file, it knows to make the links with the path relative to the file in the Templates folder. When you make child pages from the template, and save those files to a location within your local site, Dreamweaver knows to adjust the link so that its path is relative to the child page.
To summarize, don't type links into templates, or the links in the pages made from the template might not be correct, especially if you're using document-relative links. For more on document-relative, site-root-relative, and absolute paths, see Chapter 6, "Links and Navigation."
Tip
| | To find an editable region and select it, choose Modify > Templates and choose the name of the region from the list at the bottom of that submenu. |
Other Types of Template Regions
In addition to editable regions, Dreamweaver MX allows the creation of three other types of template regions.
Editable Tag Attributes in Templates
This feature makes it possible to make certain attributes of a tag editable, without making the tag itself editable. For example, a page design might include a box that needs to have background colors that differ from page to page, although the text content within needs to remain unchanged. The background color attribute of the table can be made editable; in the template-based page, that background color can be changed, although the table itself is not editable.
An element can have multiple editable tag attributes. To make an attribute editable, it needs to be present in the tag. A default value can be set for each editable attribute.
To define an editable tag attribute, first select the object with the attribute. Then choose Modify > Templates > Make Attribute Editable. This opens the Editable Tag Attributes dialog box (see Figure 25.5).
Figure 25.5. The Editable Tag Attributes dialog box.
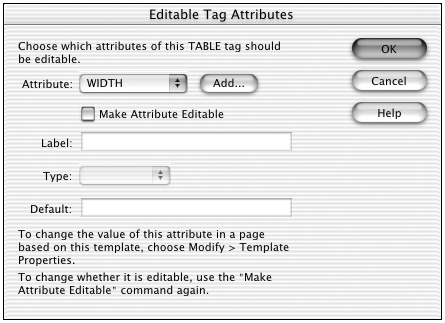
The Attribute drop-down list will display attributes that already are defined for the selected object. Check to see if the attribute you wish to make editable appears there. If so, click it to select it. If your desired attribute is not in evidence in the drop-down list, click the Add button, and then enter the name of the attribute. Then, click OK. Check the Make Attribute Editable checkbox. Then, fill in the remaining three fields. In the Label field, type a unique name to help you later identify the attribute; it is a good idea to include an indication of both the tag and the attribute in the label (for example, CellBgColor). In Type, specify whether the attribute value is a text string (such as in ALIGN="center"), a URL, a color, true/false, or a number. Finally, for Default, specify the value you want the attribute to have by default, until and unless it is edited in the template's child page.
While the dialog box is open, you can set other attributes of the same tag as editable, following the previous steps and clicking OK when you're finished.
On a child page made from a template containing editable tag attributes, these attributes are edited using the menu command Modify > Template Properties. This opens the Template Properties dialog box (see Figure 25.6).
Figure 25.6. The Template Properties dialog box.
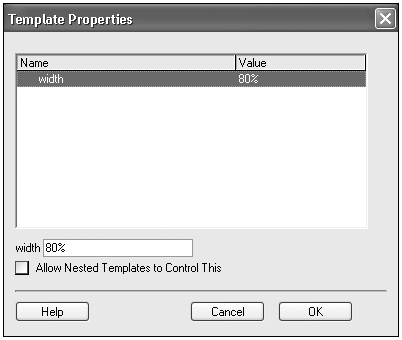
The editable tag attributes present in the document should be listed at the top by name. To change an attribute, select it, fill in the new value in the field below, and click OK.
Note
| | To avoid confusion, note that two separate menu items are associated with templates. Most commands used for creating and modifying templates are found by choosing Modify > Templates. Others are found under Modify > Template Properties. |
A tag with an attribute marked as editable can be relocked if desired; this change is made in the template document, after which the template's child pages must be updated. To do this, with the template document open, choose Modify > Templates > Make Attribute Editable. Select the attribute from the drop-down menu, deselect the Make Attribute Editable check box, and click OK. When you save the template, you will be prompted to update pages based on the template. To do so, click Update, and then in the resulting dialog box, click OK.
Optional Content Regions in Templates
When an optional content region is placed in a template, its child pages display that region or don't display it based on conditions set by the template author. Specific values can be set for a template parameter, or a conditional statement can be defined.
To insert an optional content region, follow these steps:
-
Select the element you want to set as an optional content region.
-
On the Insert bar, choose the Templates category and click the Optional Region button.
-
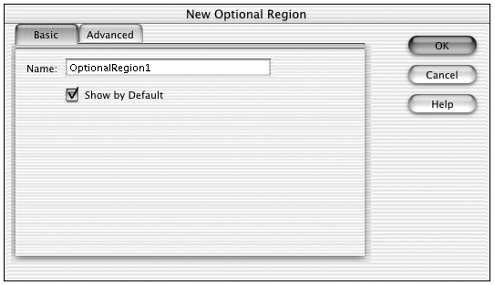
The New Optional Region dialog box opens (see Figure 25.7); enter the desired settings. Use the Basic tab to name a new optional content region and to set whether the optional content displays by default. On the Advanced tab, you can link the region you are creating to an already existing optional content region, or to create a template expression.
Figure 25.7. The New Optional Region dialog box.
-
Click OK.
Template parameters and conditional expressions can be created in the Advanced tab of the New Optional Region dialog box, or directly in Code view. Those parameters that you create using the dialog box can be accessed and edited in the template-based document by using the Template Properties dialog box; choose Modify > Template Properties. Parameters and expressions entered in Code view must be edited in the template-based document's code.
Repeating Content in Templates
By making a page element (such as a table row) a repeating content region, you enable that element to be repeated in the child pages, while still maintaining a locked containing element, such as the table holding the rows.
Typically, repeating content is used with tables, but other elements can be defined as repeating content regions as well.
A repeating content region is not automatically an editable region unless specifically defined as such; you must also create an editable region for the element. In nearly all cases, repeating content needs to be contained within an editable region.
Note
| | A repeating content region is a Dreamweaver template function and is not the equivalent of a repeat region produced by server-side code. The two are used together. |
To make an element in a template a repeating content region, follow these steps:
-
Select the desired element.
-
Do one of the following:
-
Choose Insert > Template Objects > Repeating Region.
-
Right-click (Windows) or Control-click (Macintosh) the selected content, and from the context menu, choose New Repeating Content.
-
-
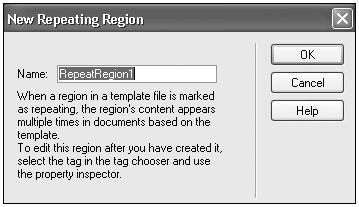
In the Templates category of the Insert bar, click Insert Repeating Content. The Repeating Content dialog box opens (see Figure 25.8).
Figure 25.8. The Repeating Content dialog box.
-
Give the new repeating region a unique name, avoiding single or double quotation marks (' "), angle brackets (< >), and ampersands (&). Click OK. The repeating region is entered into the document.
To add, delete, or change the order of a repeating content region, place the insertion point within the region and choose Modify > Templates > Repeating Entries. Select from the options in the menu to insert a new repeating entry, delete an entry, or move the selected entry to another position in relation to the other entries.
Nested Templates
| | Perhaps the most exciting new template feature in Dreamweaver MX is the capability to create nested templates. With this tool, it is possible to build a site with several levels of templates, so that different site subsections have a design common to just the subsection, but all pages share an overall design. |
Nested templates operate according to the inheritance principle, in the sense that a template nested within a parent template will inherit all of its parent's locked regions, but only the portion of its parent's editable regions specified. Typically, each level of nesting restricts more and more page areas, with the most deeply nested templates having the most limited amount of editable area.
This feature is perfect for the typical hierarchical site structure in which all pages share certain elements and subsections share a subset of page elements. Templates can be nested to as many levels as necessary.
To create a nested template, follow these steps:
-
In the Templates category of the Assets panel, select the template file you want to use as the base, or first-level, template. Right-click its name and choose New from Template. This creates a document based on the template.
-
Choose File > Save as Template, and name your new second-level template.
-
Within an editable region (or regions) of the new template, select an element (or elements) to become editable regions in the second-level template, and make it an editable region. (To learn how to do this, see "Setting Editable Regions" earlier in this chapter.)
-
Save the new second-level template.
Pages produced from the first-level template will have a certain set of editable regions. Pages produced from the second-level template will have only the editable regions specified when it was saved.
A nested template, after it has been given editable regions distinct from its parent, no longer has the editable regions its parent has, unless they are specifically made editable. On the other hand, a nested template will have all the locked regions its parent has. Changes to the locked regions of a parent template will be inherited by its nested templates, and by all pages created from the parent and the nested template. Nested templates will not inherit changes to the editable regions of a parent template, or by any pages made from either template; this is the normal behavior of any Dreamweaver template.
Creating Pages Based on Templates
You can create a page based on a particular template in two ways: using a template as the starting point for a brand-new document or applying a template to an existing document. Either way, the result is a page based on a template.
Creating a new page from a template is the simpler process of the two. Applying a template to an existing page requires that the existing page's content be matched with editable regions in the template, which can be tricky.
Creating a New Page from a Template
To build a new document based on a template, do one of the following:
-
In the Assets panel, choose the Templates category. Highlight the name of the desired template, right-click, and choose New from Template.
-
From the main menu, choose File > New. In the New Document dialog box, choose the Templates tab. From the left Category pane, choose the name of the Dreamweaver site containing the desired template. From the middle pane, choose and double-click the name of the template.
The new template-based page is created; save it with a unique document name with the appropriate file extension (.htm,.html, and so on).
You may then make any changes you like to the editable regions of the child page. The noneditable regions cannot be edited unless you detach the page from the template; see the section "Detaching Pages from Templates" for instructions.
Applying a Template to an Existing Page
When you apply a template to an existing page, the page becomes a copy of the template file, with the existing page's content placed within a single editable region that you specify.
Behaviors and other scripts in the existing document's <head> will remain after you apply a template to it. Other <head> items, however, such as <meta> tags, are discarded.
To apply a template to a document that has already been created, first open the document. Then, with the Templates category of the Assets panel displayed, select the name of the template and click Apply.
Applying a Template to an Existing Template-Based Page
A template also can be applied to an existing template-based page. When you do this, Dreamweaver turns the document into a copy of the new template and places the content from the existing document's editable regions into corresponding editable regions in the new template wherever possible. Dreamweaver does this by matching the names of the editable regions in the document to the names of the editable regions in the new template. Where there isn't a match, Dreamweaver asks you where you want to place the orphaned content.
Exercise 25.1 Creating a Template and Template-Based Pages
In this exercise, you build a Dreamweaver template and then create pages based on it. Before you start, copy the chapter_25 folder on the CD to your hard drive. Define a site called Chapter 25, with this folder as the local root folder.
-
From the chapter_25 folder, open the file starter.html. Assume for this example that this is a page you've just finished designing for your new Templates R Us web site. You like the look of it, and you want all the pages in the site to have the same page structure, left-hand navigation, and logo; you just want the large right-hand section to be different on each page. Choose File > Save as Template. The Save as Template dialog box will open (see Figure 25.9). Be sure that the correct site is showing in the field at the top, and in the bottommost field type the name basic for the template. Click Save.
Figure 25.9. The Save as Template dialog box.
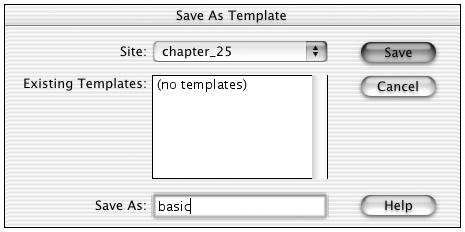
The page starter.html will be replaced in the Document window by the template you've just created, basic.dwt.
-
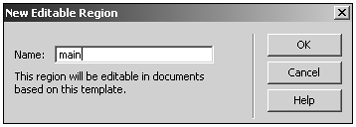
Now create an editable region. The only part of the document you plan to change from page to page is the right-hand content area, which consists of a two-row, two-cell table. The top cell, which now contains several paragraphs of filler text, is the element you want to make into an editable region. Click anywhere in the filler text on the page, and in the tag selector at the bottom left of the Document window, click the <td> tag that appears furthest to the right. If you've selected the right one, you'll see the rectangle around the filler text highlighted with a bold dotted line. Choose Insert > Template Objects > Editable Region, which opens the New Editable Region dialog box (see Figure 25.10).
Figure 25.10. The New Editable Region dialog box.
-
In the New Editable Region dialog box, type a name for the editable region, main, and click OK.
-
Now choose File > Save. You now have a Dreamweaver template, ready for action. Next you'll make three new pages based on this template.
-
In the Templates category of the Assets panel, select basic.dwt. Right-click (Ctrl-click on the Mac) it and choose New from Template. (This command can be chosen regardless of which page is open in the Document window; the template need not be open.)
-
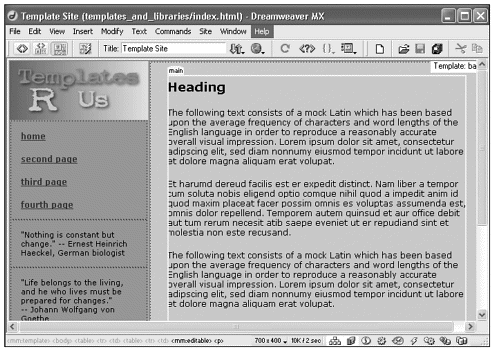
A new page opens, looking exactly like the template page. Dreamweaver gives it a name, such as Untitled-3, until you name it. Choose File > Save, which opens the familiar Save As dialog box. Give the page the name index.html, and save it in the chapter_25 directory. This will be your site's home page. If you have View > Visual Aids > Invisible Elements selected, the page will look like Figure 25.11.
Figure 25.11. The template-based document with Invisible Elements selected.
-
Try clicking anywhere in the left-hand column of the page; Dreamweaver won't let you edit anything there, because it is a locked region. But the right-hand content area behaves normally. Change the heading to Welcome to Templates R Us (or something else that makes it clear that this is the home page). Edit some of the text in such a way that you can identify it as having changed. Save the document.
-
Repeat steps 5, 6, and 7. This time, give the document the filename second.html and give it a heading that includes the word second (Here Is My Second Page, or something equally clever.) Save.
-
Repeat steps 5, 6, and 7 again. This time, give the page the filename third.html and change the heading to something witty with the word third in it. Save. Repeat steps 5, 6, and 7 again, naming the file fourth.html and giving it a heading identifying it in some way as fourth.
You now have a template and four pages attached to the template. (The file starter.html was just a prototype; it won't be part of the actual site.) In Exercise 25.2, you will edit the template and update the pages automatically.
Editing and Updating Templates and Their Child Pages
After pages have been made from a template, you can go back and edit the template in such a way that the changes you make are also made to all the pages attached to that template. This is the strength of templates, and the whole reason for using them.
Keep in mind that, although you can edit both editable and noneditable regions of a template file, only the changes to the noneditable regions will be made to the child pages.
To edit or update (these terms are used interchangeably here) a template, open the template file by double-clicking its name in the Assets panel or its filename in the Templates folder in the Site panel. Make whatever edits you choose to the editable regions of the template. When you're done, choose File > Save. This will open the Update Template Files dialog box (see Figure 25.12).
Figure 25.12. The Update Template Files dialog box.
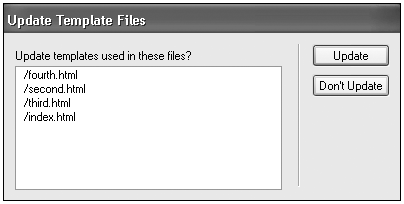
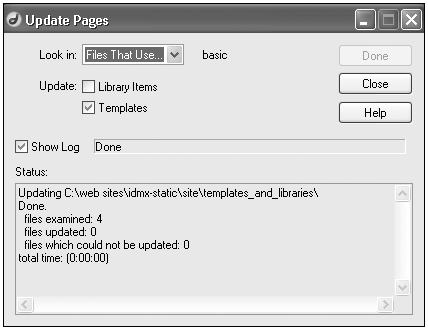
The dialog box lists the pages attached to the template and gives you the options Update or Don't Update. Choosing Update makes the changes you have made to the template file to all of the template file's child pages, and displays the Update Pages dialog box. There you can examine a log showing which pages have been updated (see Figure 25.13).
Figure 25.13. The Update Pages dialog box.
Clicking Close completes the process.
Exercise 25.2 Updating Multiple Pages by Updating a Template
In this exercise, you edit the template and update the pages automatically. This exercise builds on Exercise 25.1. If you haven't done so yet, copy the chapter_25 folder on the CD to your hard drive. Define a site called Chapter 25, with this folder as the local root folder.
-
Open the template basic.dwt you built in Exercise 25.1 by double-clicking its name in the Template pane of the Assets panel, or by double-clicking its filename in the Site panel. (Remember, it will be in the Templates folder.)
-
Now that you have several other pages in your little site, you'll want the navigation links on the left to work. Thanks to your template, you need to make the links only once. Select the text home, and, in the Property inspector, click the browse folder icon. Remember, always browse to links (or use the Point-to-File icon) when working with a template so that Dreamweaver can insert the correct link in the child pages. Browse to the file index.html and choose it.
-
Choose each of the navigation text labels in the left column in turn (second page, third page, fourth page) and browse to and choose the corresponding page in your site.
-
Choose File > Save. The Update Template Files dialog box will open.
-
Underneath the question "Update Templates Used in These Files?" is a list of the pages that will be updated. Click Update. Dreamweaver will do your work for you, and the Update Pages dialog box will open, showing you exactly which files have been examined and which have been updated. Closing this window finishes the update process.
-
Open index.html. Its left navigation links should reflect the changes you just made to the template. Preview index.html in your browser so that you can use the links to page through the site, and see that all of your pages now have the new navigation links.
In Exercise 25.3, you'll add a library item to the site.
Using Dreamweaver 4 Templates with Dreamweaver MX
Dreamweaver MX uses a template syntax that differs from that of Dreamweaver 4. But working with templates made with Dreamweaver 4 in Dreamweaver MX presents no problem.
You can even retain the ability of a Dreamweaver 4 template to be usable in both versions of Dreamweaver. A template created in Dreamweaver 4 can be opened and edited with Dreamweaver MX and the template syntax will not be automatically changed, unless new template regions are added from within Dreamweaver MX. After new template regions are added with Dreamweaver MX, however, the template will no longer be useable in Dreamweaver 4.
Detaching Pages from Templates
A page can be detached from its template. When detached, any portion of the page can be edited freely. However, it will no longer be updated when the template is updated.
After the page has been detached, the template has no more connection with it; it is on its own. Its template-specific comments are removed from the code, and it has no more noneditable areas; it becomes an ordinary HTML, containing all the content from its previous noneditable and editable regions.
Detaching a page from a template is usually not a good idea, because all the advantages of using a template are lost. A better system is to plan the site so that it isn't necessary to detach pages from the template. The judicious use of editable and noneditable regions in the original template can help greatly with this, as can using nested templates and including library items in templates.
The Source Code in Templates and Template Files
If you examine the source code used in templates and the pages that use them, you'll see the Dreamweaver-specific comments that Dreamweaver uses to make them work.
Pages made from templates begin with a comment like this one:
<!-- #InstanceBegin template="/Templates/my_template.dwt" codeOutsideHTMLIsLocked="false" -->
This comment allows Dreamweaver to recognize that the page is attached to the template my_template.dwt, which it will look for in the Templates folder in the site root directory.
In pages made from templates, and in the templates themselves, editable regions are marked with comments that identify their editable status as well as the name given to the region. In the following code example, a table cell has been made an editable region:
<td> <!-- #InstanceBeginEditable name="EditRegion1" --> <p> Here's some text in my editable region. </p> <!-- #InstanceEndEditable -->
Note
| | Every template-made document has an editable region for the page title, named doctitle. |
Setting Template Preferences
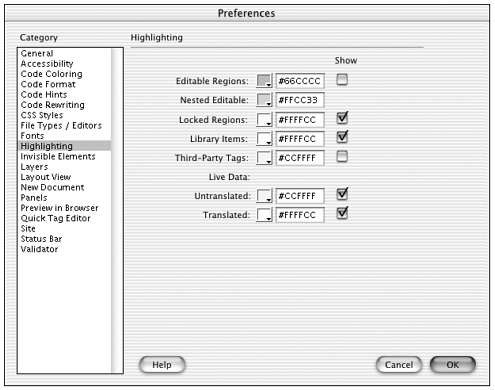
In your Dreamweaver preferences, you can specify color preferences for the highlighting that marks editable and locked regions of a template.
To view highlight colors in the Document window, be sure to choose View > Visual Aids > Invisible Elements.
To change highlight colors, follow these steps:
-
Choose Edit > Preferences. Select the Highlighting category (see Figure 25.14).
Figure 25.14. The Highlighting category of the Preferences dialog box.
-
The first two boxes affect template highlighting. Click in the Editable Regions color box and select a color using the color picker, or enter a hexadecimal number in the text box. Click the Locked Regions color box, and choose the color you want to be used for highlighting locked regions.
-
Check the Show option, assuming that you want the enable the display of these colors in the Document window.
Tip
| | When you save a template, Dreamweaver automatically checks the template syntax. If the syntax is badly formed, an error message dialog box appears, describing the error and referring to the specific line in the code where the error exists. You can use the Check Template Syntax command to check the template syntax at other times as well. If you made edits to the template parameters in Code view, it is a good idea to use this command to check that the code follows correct syntax. To run the Check Template Syntax command, choose Modify > Templates > Check Template Syntax. |
Working with Library Items
Library items can be a real time-saver; it is well worth your while to get to know them. Whereas templates are complete HTML pages, library items are chunks of code; although both enable you to update many pages instantly, library items are used in a very different way than templates.
What Is a Library Item?
A library item is a section of code that you plan to not only reuse, but also update. Users often confuse library items, assets, snippets, and server-side includes; Table 25.2 compares and contrasts them.
| Item | Description |
|---|---|
| Library items | Sections of code; when the original library item file, which resides in a folder in your local site, is updated, Dreamweaver automatically updates all pages containing it. The pages must then be uploaded to the server. Site-specific, although they can be copied to other sites. |
| Snippets | Sections of code independent of any particular Dreamweaver site, always available. They can feature opening and closing code, and so can "wrap" a selection. When a snippet is added to a page, the page must be uploaded to be viewable from the remote server. The major difference between Snippets and Library items is that a change to a Snippet does not affect the pages into which it has been inserted in any way, whereas a change to a Library item updates every instance of that Library item on every page where it has been inserted. |
| SSIs | Sections of code in a file that resides on the server. A tag in an HTML document calls the SSI, which is then "included" in the page at the point where the tag is. The SSI file can be edited and uploaded; whether it is included in one page or 1,000 pages, it will appear in all of them immediately without the pages being re-uploaded. |
| Assets | Single elements used in a particular site, including images, colors, URLs, Flash movies, Shockwave movies, MPEG and QuickTime movies, scripts, templates, and library items. They can be dropped easily into any page of the site with which they are associated. |
Library items should be used when the element will need to be inserted in multiple pages and later updated.
A good use for a library item is the footer that many designers include on a web page. The footer might include the company's contact information and a copyright notice; when the email address needs to be changed, or the year of copyright updated, it's easy to update many pages automatically.
Dreamweaver keeps track of library items in much the same way it does with templates, by inserting special comments into the page. The library item itself is made into a file with the extension.lbi and stored in a folder that Dreamweaver creates under the site root, named Library. Again, as with templates, each Dreamweaver site has its own Library folder and library items. They aren't accessible to other sites, but they can be copied from one site to another using the Assets panel's Copy to Site command. When an element such as an image is used within a Library item, and the Library item is copied to another site, the image needs to be copied to the new site as well.
Creating Library Items
To create a library item, follow these steps:
-
Select the part or parts of the document you want to save as a library item; use the tag selector to be sure you have the exact elements you want included.
-
Do one of the following:
-
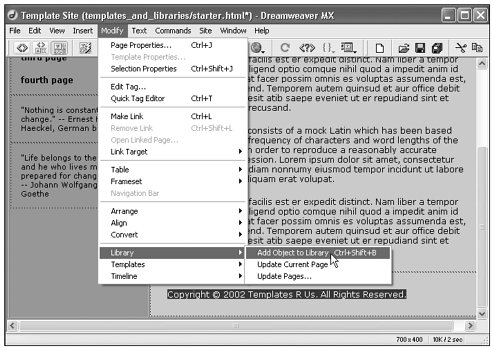
Choose Modify > Library > Add Object to Library (see Figure 25.15).
Figure 25.15. Creating a library item.
-
Click the New Library Item button at the bottom of the Library category of the Assets panel.
-
Drag the selection onto the Library category of the Assets panel.
-
-
Type a name for the new library item.
Using Library Items
When it's time to add a Library item to your document, the first step is to place the insertion point at the spot in the document where you would like the Library item to go. Then, open the Assets panel, and display the Library category. Select the name of the item you wish to insert, and click the Insert button.
Library items have some limitations and idiosyncrasies, including the following:
-
When a library item refers to linked elements, such as images, the library item stores only a reference to the item; for the library item to work, the linked item must continue to reside at the location in the file hierarchy where it was when the library item was created. If the linked item needs to be moved, the Dreamweaver Site panel should be used. Dreamweaver will then update the link within the Library item to reflect the new location.
-
Library items can contain behaviors, but special requirements apply when a behavior is edited within a library item.
-
Library items can be made from a section of a page that is linked to a Cascading Style Sheet, but the style sheet link is not copied along with the library item. If the same style sheet is applied to the pages into which the library item is inserted, however, the CSS will affect the code in the library item just as if it were not a library item.
Tip
| | By default, library items in the Document window are highlighted yellow. To see highlighting, choose View > Visual Aids > Invisible Elements. To change the color Dreamweaver uses to highlight library items, choose Edit > Preferences and select the Highlighting category. Click the library item's color box and use the color picker to choose a color (or type in a hexadecimal). Select Show, assuming that you want the highlight color to display in the Document window. |
Exercise 25.3 Creating and Using a Library Item
This exercise builds on Exercises 25.1 and 25.2. In this exercise, you create a library item made up of some text that will be used as a page footer and add it to the template file. If you haven't done so yet, copy the chapter_25 folder on the CD to your hard drive. Define a site called Chapter 25, with this folder as the local root folder.
-
Open the original file starter.html from Exercises 25.1 and 25.2. Although this library item could be created in the template itself, library items are often created on ordinary non-template pages, and the process is clearer using an ordinary page. First create a place for your page footer. Below the cell that holds the filler text is a second table row containing a single cell; place the cursor inside that table cell.
-
In that cell, type the following:
Copyright 2002 Templates R Us. All Rights Reserved.
To insert the symbol, choose Insert > Special Characters > Copyright.
-
Select the text you just typed, and in the Property inspector, from the Format drop-down menu, choose Paragraph. With the text still selected, choose Modify > Library > Add Object to Library. The Assets panel will open with the Library category displayed; an icon representing your new library item will be listed, named Untitled. Type a name, footer, for your library item and click anywhere outside of the library item Name field.
-
Now open the template file basic.dwt. Again, place the cursor in the table row/cell below the one that holds the filler text.
-
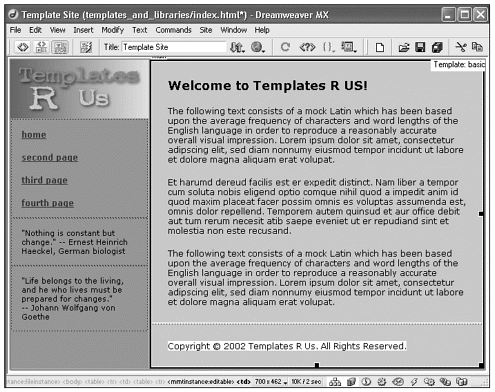
Open the Assets panel to the Library category, and drag and drop the library item footer to the cursor location in the lower row/cell. Click once anywhere in the page to refresh it. The library item will appear; if you have View > Visual Aids > Invisible Elements selected, it will be highlighted in yellow.
-
Save the template file. Dreamweaver will take you through the Update Template Files and Update Pages dialog boxes; click Update and Close, respectively. The three pages attached to this template will be updated.
-
Now open index.html. The footer should appear in it as well. Note that it is in a noneditable area. The footer cannot be accidentally removed from the template; but if it needs to be edited, it can be, as you'll see in Exercise 25.4. Figure 25.16 shows how index.html should look.
Figure 25.16. The exercise document index.html after Exercise 25.3.
-
Preview index.html in your browser and try the other links on the site; the footer should display on all four pages.
Editing and Updating Library Items
Library items can be opened individually and their code edited and resaved. In the Libraries category of the Assets panel, double-click the name of the library item; it will open in a Document window with a gray background (see Figure 25.17). It is not an HTML page, but consists only of the page elements you chose when you created it. It can be edited in much the same way as a normal Dreamweaver document.
Figure 25.17. A library item open for editing.

When you save your changes, the Update Library Items dialog box appears (see Figure 25.18), showing you which pages contain the library item and giving you the options Update or Don't Update. If you choose Update, the Update Pages dialog box appears (see Figure 25.19), and the changes are made; the dialog box can be closed.
Figure 25.18. The Update Library Items dialog box.
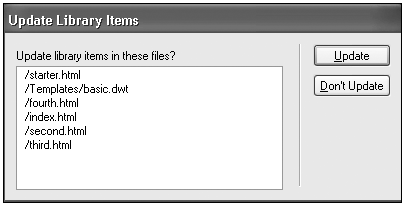
Figure 25.19. The Update Pages dialog box.
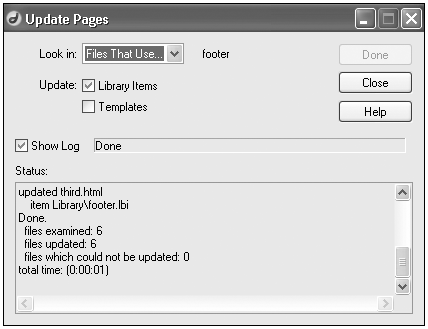
If you choose Don't Update, no documents will be changed until you use Modify > Library > Update Current Page or Update Pages.
Note
| | Some Dreamweaver features the CSS panel, Timelines panel, and Behaviors panel are grayed-out and unavailable when you are editing a library item; this is because library items are limited to <body> elements. Timeline and CSS code is part of the <head>, and behaviors insert code into the <head> as well as into the <body>. See "Using CSS with Templates and Library Items" later in this chapter for more on this. The Page Properties dialog box is also unavailable, because these tags are inserted into the <head> and library items don't include a <head>. |
Exercise 25.4 Updating a Library Item
This exercise builds on the previous three exercises. In this exercise, you edit the library item you added in Exercise 25.3 and update all four pages of the site. If you haven't done so yet, copy the chapter_25 folder on the CD to your hard drive. Define a site called Chapter 25, with this folder as the local root folder.
-
Open the Assets panel to the Library category and double-click the footer library item. It will open in a Document window (refer back to Figure 25.17).
-
You've decided that the footer really should be centered in its table cell, and bolded and italicized, while you're at it. Select the text, and in the Property inspector click the Center Text button on the upper right. Then click the Bold button, and then click the Italic button.
-
Choose File > Save. You'll be taken through the Update Library Items and Update Pages dialog boxes; click Update and Done, respectively. Close the Document window that displays the library item.
-
Open index.html. (If any of the four site pages or the template file were open when you edited the library item, you'll need to save them now. If they are closed, they are automatically edited and saved.) The new footer should display. Preview the page in your browser and page through the links; all four pages should display the updated footer.
Here ends this chapter's exercises. Use these files as a starting point for some experimentation with templates and library items.
Making Library Items Editable in a Document
A library item in a document is not editable. You can break the link between the library item in the document and its original, and the library item in the document will be editable; but after this has been done, it can no longer be updated automatically when the original is updated.
To make a library item editable, just select it in the Document window and click Detach from Original in the Property inspector. The selected instance of the library item is no longer highlighted, and can now be edited.
Deleting Library Items
To delete the original of a library item, select its name in the Assets panel and then click the tiny garbage can icon at the bottom right. You also can right-click the item's name and choose Delete.
The Source Code in Library Items
When you insert a library item into a document, Dreamweaver inserts special comments that allow the program to keep track of the instance of the library item and update it when the time comes. A library item wrapped in its Dreamweaver comments looks something like this:
<!-- #BeginLibraryItem "/Library/my_library_item.lbi" -->This is my library item.<!-- #EndLibraryItem -->
Interview: Becky Tench
Business Name: <bt> design
URL: www.beckytench.com
How did you get started in web design? What has your learning process been like? What kind of work are you currently doing?
I began designing web sites as a hobby when I was a freshman in college. I "taught" others how to do their own sites through a very basic knowledge of HTML and <gasp>Netscape Composer!</gasp>. When I discovered I could major in it, well, let's just say I didn't think twice. I took classes and workshops, but I really learned what I know through getting instruction/information from online tutorials and the Dreamweaver newsgroup and then applying that to real-world clients. Right now I am a web designer for the training/e-learning company, Productivity Point.
What hardware and software do you use in your work?
I struggled over the decision of whether to go Mac or PC for quite a while. But, ultimately money constraints and familiarity won out and I went PC. I am a mix of Macromedia and Adobe products, being more comfortable with Photoshop/Illustrator for graphics design and adamant about using Dreamweaver for my web development. I also use Visual SourceSafe for Check In/Out and version control, and that integrates nicely with Dreamweaver.
How do you use templates and/or library items in your web development work?
My web designs depend greatly on templates and includes. I think that the fewer sources/versions of information you can have, the better!
Basically, I start out with templates. I only make what absolutely has to be editable, editable. Then I make the uneditable regions includes. This way I am able to edit the template if need be, but that should be a very rare occurrence. I don't like checking out hundreds of files for one change, and uploading them up to the server, and so on. It's a waste of time!
The uneditable regions are made into includes so that I can edit one file, upload it, and the change is made!
Consider this example of when your site has a footer and it's on every single page of the site. If you make the footer an uneditable part of your template but insert it as an include in that template, you can then update that one file, upload it, and your footer is changed on every page. You don't need to update the template, you don't need to check out any extra files, or upload anything unnecessarily. It's a nice mix and enables you to have flexibility in your site without a lot of hours of repetitive work or waiting while files are checked out and uploaded.
What are the most important things for the new designer to know when using templates and library items?
Think ahead and be smart about things. Don't be generous about making things editable; you will just waste your time. If in doubt, make it uneditable and go back to correct it if necessary. Learn about the value of includes so that you can avoid unnecessary updating time and make sure you use root relative or absolute links in your includes!
What trends on the web and in the web designer's work do you see as important?
Browser compatibility and standards are important to me. It takes 30 minutes to make something work in Internet Explorer, but hours to make it work across browsers/ platforms.
Dynamic sites (database-driven) are very important and I think something that we'll all have to delve into sooner than later, if you haven't already. They add so much to a site and don't bog you down with the mindless and repetitive updating.
CSS and its expanding capabilities and consistency cross browser interests me a lot. I think that a mix of style sheets and CSS positioning web sites could really change the way the web/browsers work.
What advice would you give to someone just starting out in web design?
Designing web sites is not rocket science, but it can't be done without effort and hard work. You have to love it in order to be happy doing it full time because it can really be a frustrating thing sometimes. However, if you want to, you can learn something new every single day. It's creative and technical and constantly changing. If it's something you want to do, then go out there, be proactive, and learn. Take tutorials, read the Macromedia Dreamweaver newsgroup often, and don't be afraid to mess up or scream loudly if necessary.
Strategies for Working with Templates and Library Items
This section covers some techniques and tips to make templates and library items really work for you.
Using CSS with Templates and Library Items
Cascading Style Sheets can work very well with Dreamweaver sites that use templates and library items, after you understand a few basic principles.
Placing CSS Code in the Template File Itself
Style sheets can be linked to a template file, and every child page will have that style sheet linked to it. This is a good technique; every page will already be linked to the same style sheet, and yet the style sheet can be changed and still affect the page.
However, adding document-wide styles to a template file requires that the code be modified, as explained later in this section. (For more about CSS itself, see Chapter 13, "Using Cascading Style Sheets.")
Inline CSS styles can be placed in the noneditable regions of a template file, and the code will be propagated to the template's child pages, just like any other code.
To add document-wide styles to a template file, the code must be altered, as follows:
-
Open the template file and view the source code.
The <head> section will contain the following code:
<!--#BeginEditable "doctitle"--> <title>Untitled Document</title> <!--#EndEditable-->
This code allows the title of each document based on a template to be editable.
-
To add new document-wide style tags, enter the following code so that it follows right after the closing title tag, </title>:
<style></style>
This section of code should now look like this:
<!--#BeginEditable "doctitle"--> <title>Untitled Document</title> <style></style> <!--#EndEditable-->
If the template file already contains document-level CSS styles, you will need to move the entire <style></style> code block so that it resides just after the </title> tag.
After an editable <style> tag has been placed in the template file, document-level CSS styles can be added to individual template-based pages.
Placing CSS Code in the Library Item File Itself
As with template files, CSS code actually placed within a library item will be copied along with the library item, and will be inserted into a new page when the library item is inserted. In the case of library items, there is never a <head> region, and so only inline styles could be involved. However, linked style sheets and document-level CSS styles might affect the display of library items, just as they affect the display of any other HTML code; remember, as far as the browser is concerned, the code in a library item is just code and nothing more. The fact that it is a library item matters only to Dreamweaver and to you.
Saving Page Content as a Library Item When a Linked CSS Has Been Applied to the Page
When you select some page content and save it as a library item, and the page contains linked or document-wide CSS styles, Dreamweaver will warn you that the CSS styles are not being copied along with the library item code. In this situation, the simplest recourse is to be sure that the pages into which the library item will be inserted have the same linked style sheets or document-wide styles applied to them. In this way, the library item will appear on each new page exactly the way it did on the original page.
Linking a Style Sheet to a Page Based on a Template
Despite the document's <head> being a locked region other than the <title>, as you have seen, Dreamweaver does allow a style sheet to be linked to a page based on a template, in the usual way.
How CSS Affects Template-Based Pages
When a template-based page has a linked style sheet, or has document-level style declarations, these styles will affect the display of the page just as if it were not a template page. In other words, the browser doesn't know that the page is based on a Dreamweaver template. It sees the Dreamweaver comments and ignores them, and interprets and displays the HTML tags just as it always would.
Therefore, regardless of whether the code is within a locked region or an editable region, CSS styles, which under any other circumstances would affect the display of the page, will still affect it.
When a linked style sheet is edited, a new style sheet is added, or a document-level style declaration is changed, the regions that would normally be affected will display the changes. If either a locked region or an editable region includes the following code
<h3>This is a heading.</h3>
And the linked style sheet contains a redefinition of the <h3> tag, such as
h3 { font-size: 16px; } And the style declaration is altered, changing <h3> headings to a size of 20px, the heading within the locked regions in the template-based pages will reflect this change when viewed with a browser.
How CSS Affects Library Items on the Page
As with template-based pages, a browser has no interest in the fact that certain code on a page is a Dreamweaver library item. The comments that define the library item, which are so crucial to Dreamweaver, are ignored by the browser. Therefore, when a linked style sheet or a documentwide style would normally affect the code that makes up a library item, it will behave exactly the same as if it were not a library item.
Using Templates and Library Items Together
Templates and library items can be used together to good advantage. Combining them provides flexibility that would not otherwise be possible.
Here are some options for combining the two:
-
When creating a template file (or when editing one), a library item can be added to a locked region. This opens up possibilities for editing content within a locked region in pages based on the template; despite the region being locked, an update to the library item changes the locked region.
-
A library item can be created and inserted into the editable region of template-based pages. This can enable you to include updateable, repeating content in template-based pages that can be manipulated independently of the template.
Using Behaviors and CSS in Templates
Thanks to a special editable region within the <head> region of Dreamweaver MX templates and template-based documents, behaviors can now be added to both. However, behaviors cannot be applied to a portion of the document that is locked, although locked regions can change as a result of applying behaviors.
You also can add CSS style sheets to both templates and template-based documents. A library item can include a behavior, but it requires some special handling. When you create a library item out of page content that includes a Dreamweaver behavior, Dreamweaver copies the element and its event handler (the attribute that specifies which event triggers the action such as onClick or onLoad and which action to call when the event occurs) to the LBI file. Dreamweaver doesn't copy the associated JavaScript functions themselves into the library item, but when the library item is inserted into a document, Dreamweaver automatically inserts the needed JavaScript functions into the <head> of the document.
Because library items don't have a <head>, the Behaviors panel is unavailable when editing a library item. To edit a behavior that is part of a library item, a special workaround is needed. The library item is inserted into a document, detached from the original library item, edited, and saved. The old library item is then replaced with the new library item by deleting the old item and saving the new item with the exact same name.
Summary
This chapter covered two Dreamweaver features, templates and library items, similar in their use as a tool for creating and editing content that occurs across an entire site, or at least across many pages. You learned how Dreamweaver keeps track of template pages and pages containing library items, and how to use each of these features. This chapter also covered how to use CSS with templates and library items and how to use templates and library items in tandem. The discussion in this chapter also included a workaround for the problem of the locked <head> region in templates.
| CONTENTS |
EAN: 2147483647
Pages: 49