Chapter 12. Designing Frame-Based Pages
| CONTENTS |
| |
|
- Frame Basics
- Interview: Murray Summers
- Building Framesets in Dreamweaver
- Working with Frames
- Setting Attributes
- Linking and Targeting
- Working with <noframes>
- Summary
Frames the very mention of the word can cause ordinarily well-behaved web developers to lose their composure. Because they have both very useful applications and potentially significant disadvantages, frame-based sites have both strong proponents and vocal opponents. And this is not only in the world of web designers; users often have something to say about frame sites. It sometimes seems as if no one is neutral on the subject.
This chapter addresses the issues that make frames controversial as a web design tool and explains ways to avoid problems and pitfalls. Topics covered in this chapter also include when to use frames and when to avoid them, the HTML code behind frame sites, using Dreamweaver MX to build frame sites, setting frameset and frame attributes, linking and targeting in frame sites, and providing <noframe> content.
Frame Basics
When you view a frame-based page in the browser, what you're really seeing is several HTML documents at once, loaded into the individual frames of a frameset. Figure 12.1 shows a frame-based page as it appears in the browser along with a peek at its actual frameset structure.
Figure 12.1. A basic frame page.
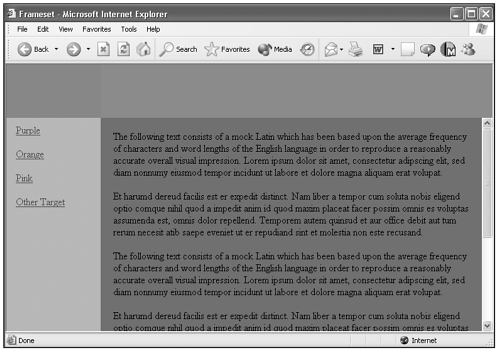
Frames provide the web developer with a page design tool very different from any other. With frames, rectangular areas of a page can be specified as distinct "windows" into which content can be loaded and reloaded, independent of the rest of the page.
A typical application for frames is a page in which a header along the top of the page, sporting the company logo, tagline, and contact information, remains static in one frame, a navigation bar which runs down the left side of the page remains static in another frame, and the remaining rectangular space is a frame into which various content can be loaded by clicking the navbar links.
Why Use Frames?
Before deciding to build a web site using frames, it's wise to think through the needs and goals of the site and its individual pages. Even though much of what can be accomplished with frames can also be done in other ways, frames have several distinct advantages to recommend them, and can be ideal for certain situations. So what are the pros of frame-based sites?
Unchanging Content
First, frames enable you to keep certain content onscreen while other content changes. On most web sites, it is desirable that certain elements be present on all (or many) pages. These elements usually fall into two categories:
-
Visuals, such as a company logo or other graphics important for consistency and branding.
-
Controls, such as navigation links or buttons.
In either case, nonframe sites just repeat this content on numerous pages, which can work well; after the first page has loaded, the repeating graphics are cached on the user's hard drive and will load quickly on the next page on which they appear, and text content usually doesn't create loading-time issues. However, placing the unchanging content in frames adds a special advantage: There is literally no loading time and none of the "page jump" that sometimes is seen even with well-designed nonframe sites. The unchanging content in a frame remains completely steady as the user clicks through changing content in another frame; it's an appealing effect.
Internally Scrolling Content
Frame pages also allow certain areas to be scrolled while others remain unmoved. Again this can be an appealing and even striking effect, particularly when frame borders are removed and the scrolling content disappears seamlessly behind the unchanging frame content above it.
An Unchanging Bottom Element
Frames are commonly used to "float" unchanging content at the top and left edges of the browser viewport, but there is another application of this capability that is even harder to produce in any other way: floating content at the bottom of the browser window. With frames, this can be accomplished so that the viewer sees the bottom-frame content at the very bottom of his browser window regardless of the way the window is sized. Creating an effect like this with tables, layers, or CSS positioning is tricky and inconsistently implemented in the browsers at best, but it's simple using frames.
Complex Nested Frame Layouts
Frames also open up possibilities for complex layouts that can stimulate the creative energies of the web designer to new heights. Because framesets can be nested within frames, the possibilities are limited only by the designer's willingness to keep track of the rapidly multiplying files, targets, and links.
Options for Printing and Saving
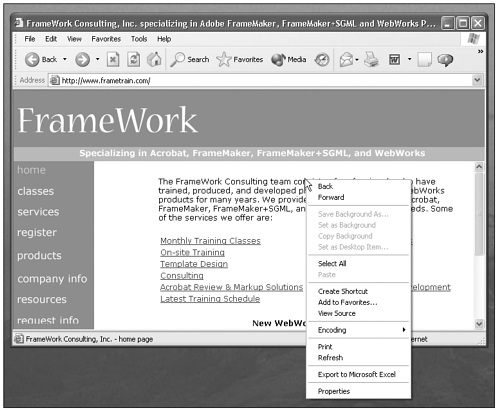
Portions of a frameset page can be printed and saved for offline viewing separately. In all major browsers, right-clicking in a particular frame will bring up a menu which will allow you to choose from a number of options, including Add to Favorites, View Source, and Print in recent versions of Internet Explorer, as shown in Figure 12.2.
Figure 12.2. Right-clicking within a frameset in Internet Explorer 6 displays a menu of options.
Hiding Internal Page References
Sometimes a web developer prefers that internal page references not be obvious to the user. With frames, the page can be set up so that the browser's address field always shows the frameset URL. The technique involves using a two-frame frameset with one frame at 100 percent and the other frame at 0 percent.
Simulating Scripting Effects
In the hands of sneaky designers, frames can be used to create a variety of effects that otherwise would require complex or impossible scripting. They're manipulated much more easily than layers often with no scripting required at all and can be used to pass information from page to page without server-side scripting or cookies. Instead of using complex and unreliable DHTML to dynamically load or control Plugin media, for instance, a frameset document can include navigation controls in one frame that load and unload pages in another frame, mimicking the effect of loading and unloading different movies or soundtracks. (See Chapter 19, "Plugins, ActiveX, and Java," for more on scripting and media elements. For an example of using frames to load and unload media, check out the frameset.html file in the chapter_19 folder of the CD.)
Why Not Use Frames?
As discussed already, frames are controversial, and there are some good reasons why many designers and many users dislike them. Instead of rejecting them outright, however, you should become educated as to the facts about the downside of frames. If you understand the both the pros and cons, you can make an informed choice as to whether a particular site might best use frames or avoid them.
Usability Problems
All web developers have to stop every now and then and remind themselves of their highest priority in planning a site: How easy it is for the visitor to use? There are exceptions in which the purpose is to dazzle the user with artistry and technical wizardry, but majority of web surfers just want to accomplish something while visiting your site get information, sign up for something, or purchase something, for example. They want to do it without a lot of effort or thought, and they should be able to. After all, if magazines required explanations to be used, how many people would curl up with one?
More Complex Authoring
Frameset pages actually consist of more than one HTML document, as you'll see later in this chapter when you look at the code used to create frame pages. Even a very simple frame page, consisting of a frameset document with two frames, each displaying as its source a separate HTML document, amounts to three files. As more frames are added, the complexity increases. To change the content of frames with links, the developer needs to keep track of which frame is which, the frame names, and the filenames of the documents to be loaded in them, and provide the proper link URLs and link targets. This requires some extra effort at file organization, and some careful coding.
Search Engine Issues
Frames can prevent some search engine spiders from indexing your site, and thus limit your site's capability to rank well in the search engines. However, you can minimize the negative aspects of frames with regard to search engine positioning by making sure you add <meta> tags, <title> information, and <noframes> content to your frames. (For more on maximizing your site for search engines, see Chapter 7, "Utilizing Head Content.")
Older Browser Issues
One frequently voiced objection to frame sites is that some browsers don't support frames. This is virtually a nonissue, however. Frames and framesets are supported by all browsers since Netscape 2.0 and Internet Explorer 3.0; the percentage of users of browsers prior to these is a fraction of a percent and shrinking daily, as the last remaining users of these very old browsers upgrade their browser or retire the old computers running them.
Design Challenges
Because of their divide-and-conquer nature, frames lend themselves to dividing and subdividing the available screen real estate, and some frames will require scrollbars to ensure that all viewers can see them. Therefore, screen real estate can be used up very quickly, with large proportions going to scrollbars, unless some restraint and finesse is exercised in the design of frame pages.
Interview: Murray Summers
Business Name: Great-Web-Sights, Inc.
URL: www.great-web-sights.com
How did you get started in Web design? What has your learning process been like? What kind of work are you currently doing?
I am a freelance web developer. My first serious attempt at building a site came as a result of a friend who had some Photoshop layout pages and wanted to "make them work on the web." I had built one site a year or so earlier (using HoTMetaL) and thought it would be fun to try again with something more challenging. The rest is history. I quickly moved from FrontPage to Dreamweaver and have been busy ever since. The most important learning tool for me during the past three years has been the Macromedia NNTP forums, and plenty of experimentation, of course!
What hardware and software do you use in your work?
I am working in DW4/UD4/FW4 exclusively. In addition, I find Homesite5 and TopStyle Pro to be indispensable tools. I am ambidextrous in the sense that I have both a Mac and a PC in my workspace, although I prefer to use the PC as my development environment. My development PC is a Dell Dimension 933 with W2Kpro and 256MB RAM. I have Photoshop on the Mac and I use it from time to time for compatibility reasons (I collaborate with several Mac people), but I am finding that Fireworks is becoming my principal graphics editor more and more.
Why do you use framesets and frames? What are they most useful for in your design work? What creative ways have you used them?
I use frames when I need them for a specific purpose. Some examples of those specific purposes include the following:
-
Centering content in any browser configuration without resorting to complex JavaScript solutions to deal with layers and other page content
-
Holding content that always floats at the bottom of the browser viewport
-
"Cloaking" internal page references so that the browser's address field always shows the frameset URL (by using a two-frame frameset with one frame at 100 percent and the other frame at 0 percent)
-
Keeping a complex navigational scheme onscreen throughout the site while content changes
-
Keeping company "branding" with logos onscreen (as above)
What is most crucial for a designer to know regarding the use of frames? Are there any misconceptions about frames you would like to correct?
The misconception I'd like to clear up is that frames are "evil." I have seen this often expressed on the Dreamweaver forum, and it just tells me that the poster doesn't understand frames. They are quite useful. In fact, you are probably not aware how many framed pages you visit because many people understand how to use them "transparently."
The most important thing to know about frames is what their limitations are. I believe that these limitations can be summarized by saying that framed pages can produce unexpected (and sometimes puzzling) behavior when they are bookmarked or printed, and when the browser's "back" option is used. Knowing these before being surprised can help the developer anticipate problems.
What trends on the web and in the web designer's work do you see as important?
I think that browser support for CSS positioning is the most important current trend for web development. Every web developer must understand the concept of using CSS for his pages to be successful over the long term.
What advice would you give to someone just starting out in web design?
I would counsel them to learn HTML well the sooner the better. Without a good understanding of the structure and utility of the underlying code, a web developer will never be able to debug their pages and accommodate different browsers.
HTML Coding for Frames
Using Dreamweaver, you can build frame sites without coming anywhere near the source code, if you like Dreamweaver's excellent visual page-creation tools make this possible. However, it is strongly recommended that you gain at least a basic familiarly with the underlying code for frames. There will inevitably come a time when you can't make some aspect of your page work the way you want, and being able to examine the HTML code and edit it can save you a lot of grief.
The tags and attributes described in this section are the ones that Dreamweaver will write for you as you use its point-and-click interface. If you make their acquaintance now, you'll feel that much more secure as you later use Dreamweaver to build your frames and framesets and set their attributes.
A web page divided into frames involves three new HTML tags:
-
<frameset> defines where the separate frames will appear on the page and how they will share the space, and specifies some of their characteristics.
-
<frame> defines how a single frame will look and what content it will display. Usually, a frame's content is another distinct HTML document.
-
<noframes> enables you to display some content for users whose browsers do not support frames.
The page that holds the <frameset> and <frame> elements and defines how the frames are arranged is often referred to as the frameset document. Pointing a browser at the frameset document will first load that, and then the HTML pages that the code specifies should populate each frame.
The code for a basic frameset document written by Dreamweaver MX looks like this. (All attributes have been left out to just show the way the <frameset>, <frame>, and <noframes> tags are used.)
<html> <head> <title>Untitled Document</title> </head> <frameset> <frame> <frame> </frameset> <noframes> <body> </body> </noframes> </html>
The following sections look at each of these three elements in turn.
<frameset>
The <frameset> element specifies how the browser window should be divided up into frames. It encloses the <frame> tags, and supports the attributes cols and rows.
cols defines the number and widths of columns that will be used to divide the frameset's parent element. The syntax is as follows:
<frameset cols="100, 530">
The columns are read by the browser from left to right. The comma-separated values can be any one of the following:
-
An absolute value in pixels, as in the preceding line of code
-
Relative widths, as the columns compare to one another; this is shown in this way: cols="1*, 3*, 2*". This would produce a frameset in which the column widths were in the ratio of 1:3:2.
-
A percentage of the width of the parent frameset, written like this: cols="20%, 80%"
Columns widths also can be given the value *, which means that the column will take up whatever width is not used up by the other columns.
Columns can be set to a combination of these values.
rows defines the number and heights of the rows that will be used to divide the frameset's parent element horizontally. The syntax is as follows:
<frameset cols="100, 530" rows="80%, 20%">
The values for rows can be drawn from the same options as the values for cols, and produce comparable results, although with horizontal rows of various heights rather than vertical columns.
By declaring values for both cols and rows in your frameset, such as in the following code, you can create a grid of frames.
<frameset cols="150, *" rows="10%, 80%, 10%">
By adding <frame> tags, you can specify the content that will be used as the source of each frame. The complete <frameset> tag pair might look like this:
<frameset cols="150, *" rows="10%, 80%, 10%"> <frame src="doc1.html"> <frame src="doc2.html"> <frame src="doc3.html"> <frame src="doc4.html"> <frame src="doc5.html"> <frame src="doc6.html"> </frameset>
The resulting page would look something like Figure 12.3.
Figure 12.3. A frameset with two columns and three rows.
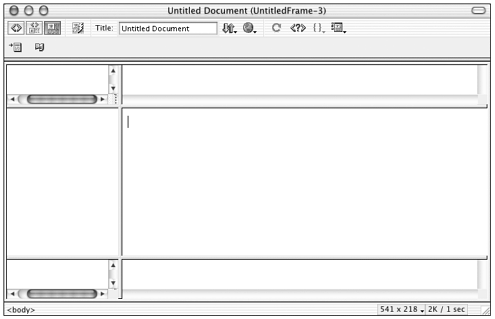
The frameset is populated by the source documents listed in the <frame> tags starting at the top left and moving left to right until a row is finished, and then proceeding to the next row down and moving through the frames left to right.
Although interesting layouts can be produced this way, at times you will definitely need to break out of the "checkerboard" grid pattern. To do this, you can use nested framesets.
Like tables, framesets can be nested within framesets. The nested frameset takes the place of a frame, and has its own cols and rows and other attributes, just like any other frameset. Here's an example:
<frameset rows="10%, 80%, 10%"> <frame src="doc1.html"> <frameset cols="200, 200, *> <frame src="doc2.html"> <frame src="doc3.html"> <frame src="doc4.html"> </frameset> <frame src="doc5.html"> </frameset>
This code would produce a page like Figure 12.4.
Figure 12.4. A frameset with a nested frameset.
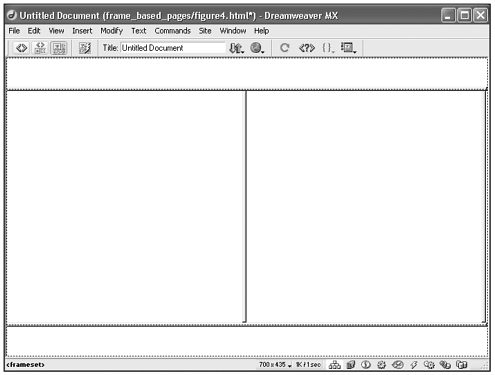
Framesets can be nested within each other to many levels, although the complexity of such arrangements can soon become impractical.
<frameset> accepts several other attributes, as shown in Table 12.1.
| Attribute Browser Support | What It Does | Syntax, Values |
|---|---|---|
| name | IE4+, NN4+ Enables you to give an identifying name to your frameset, allowing it to be referenced via script. name="value" | Values: One or more alphanumeric characters |
| framespacing | IE3+ Determines the space in pixels between frames in a frameset. framespacing="value" | Values: Any integer |
| frameborder | IE3+, NN3+ Specifies whether a 3D border displays between the frames. frameborder="value" | Values: 1 (borders shown) 0 (borders not shown) yes (same as 1) no (same as 0) |
| bordercolor | Specifies the main color of the 3D frame border. bordercolor="value" | Values: A color name or hexadecimal value |
| border | IE4+, NN3+ Like framespacing, determines a value for the width of a frameset border. border="value" | Values: Any integer |
<frame>
The <frame> element specifies how one of the rectangles in a frameset grid will look. It supports the attributes shown in Table 12.2.
| Attribute | What It Does | Syntax, Values |
|---|---|---|
| frameborder | Determines whether specific frame's borders are shown. Values: 1 (show borders) 0 (don't show borders) yes (same as 1) no (same as 0) | frameborder="value" |
| marginwidth | Specifies frame's left and right internal margins. | Values: Any integer |
| marginwidth="value" | Values: Any integer | |
| marginheight | Specifies frame's top and bottom internal margins. marginheight="value" | |
| noresize | Turns off users' ability to drag and resize frame borders. Just "noresize" | |
| scrolling | Determines whether a frame will contain scrollbars. scrolling="value" | Values: yes (frame must have scrollbars) no (frame must never have scrollbars) auto (frame must have scrollbars only when necessary) |
| src | Tells the browser which source file a frame will contain. src="value" | Values: Relative or bsolute URLs |
| name | An identifying name for the frame. name="value" | Values: one or more alphanumeric characters |
<noframes>
The <noframes> element enables you to supply content that will be viewed by users whose browsers do not support frames. It can be placed at the end of a frameset and contain an alternate message to those users.
Note
| | As discussed earlier, the percentage of users with browsers that don't support frames is tiny much less than 1 percent and shrinking rapidly. However, <noframes> content is important for non-graphical browsers. Also, search engines will index <noframes> content, which can be valuable for positioning in search engine results. |
Building Framesets in Dreamweaver
Dreamweaver offers several ways to do the initial building of frame pages. After you've designed your frameset by whatever method, frameset and frame attributes can be set or changed as necessary.
Regardless of which method you use to build a frame layout, you need to be sure to cover the following steps, not necessarily in this order:
-
Create the frameset and frames.
-
Save every file used in the frameset. Remember that each frame and frameset is an independent HTML document and must be saved. Using meaningful names for your documents will help avoid confusion.
-
Set the properties for each frameset and each frame, including a name for each frame.
-
Where links are included, be sure that they include targets so that the browser knows in which frame to load the content.
Creating a Frameset Manually
As you may already know, Dreamweaver has a number of visual aids that can either be turned on or off, depending on whether they're helpful to you in your design process. One of these is frame borders. Most people find it much easier to work with frames with this aid turned on. You can make frame borders visible by choosing View > Visual Aids > Frame Borders from the main menu.
Note that turning on frame borders has no effect on the actual border attributes that you set for your framesets or frames; regardless of these attributes, when the frame borders visual aid is turned on, you will see frame borders in Dreamweaver's Document window.
To create a frameset manually, select Modify > Frameset > Split Frame Left, Right, Up, or Down. This will insert a simple two-frame frameset.
To create more frames, drag one of the frame borders into the Document window to split the area horizontally or vertically. Dragging the borders from one of the corners divides the document into four frames.
To split an inner frame, use Alt-drag (Windows) or Option-drag (Macintosh).
To delete a frame, drag its border off the page or to the border of its parent frame.
Using Frame Objects to Create a Frameset
Dreamweaver includes a set of predefined framesets that enable you to create a frameset very quickly. To create a frameset in this way, follow these steps:
-
Start with an open, saved document. This document will become the source for one of the frames in the frameset you're building. Place the insertion point in the document.
-
From the Frames category of the Insert bar, select a predefined frameset. The Frames category provides a visual representation of each of the predefined framesets available (see Figure 12.5). Clicking the icon, or clicking and dragging it to the Document window, will insert the frameset. The frames icons each have a blue portion. This blue portion indicates into which frame the existing page will load.
Figure 12.5. The Frames tab of the Insert bar.

A predefined frameset also can be inserted by choosing Insert > Frames > Left, Right, Top, Bottom, Left and Top, Left Top, Top Left, or Split from the main menu. A nested frameset can be created by placing the insertion point within an existing frame and inserting another complete frameset from the Insert bar.
Note
| | Some of Dreamweaver's predefined Frame objects use nested frames to achieve their layout. |
Tip
| | A free third-party extension, More Framesets by Mark Erickson, is available at the Macromedia Exchange for Dreamweaver at www.macromedia.com/exchange/ dreamweaver/. |
Using the New Document Dialog Box to Create a Frameset
A third way to create a frameset is by using the Dreamweaver New Document dialog box. To use this method, follow these steps:
-
With the document open, choose File > New and select the General tab. From the Category list, select Framesets.
-
From the framesets list, choose a type of frameset. A preview and description will appear in the right-hand pane.
-
Click Create to insert the frameset.
Saving Frame and Frameset Files
When you use Dreamweaver to create frame pages, each new frame and frameset document is given a temporary file name, such as untitledframeset-1.htm. You must save the frameset document and its associated frame documents before you can preview the pages in a browser. Dreamweaver offers several save options to help you be sure that all necessary documents are saved; you can save a frameset document or a frame document individually, or you can save all open frame files and the frameset page.
When you select one of the save options from the File menu, the Save As dialog box opens ready to save a document with the temporary name it has been given. It's up to you, however, to provide filenames that have meaning for you; taking care with naming will make working with frames much less bewildering. If you find it difficult to tell which frame file is being saved, look at the frame selection lines in the Document window this identifies the current document (frame) being saved, as shown in Figure 12.6.
Figure 12.6. Saving framesets and frame documents.
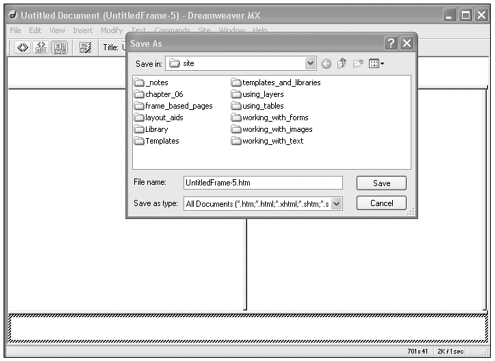
To save a frameset file, select the frameset in the Document window or in the Frames panel, and choose File > Save Frameset.
To save a document that is inside a frame, click in the frame in the Document window to select it, and then choose File > Save Frame or File > Save Frame As. Selecting frames and framesets is covered below in "Working with Selections in Framesets."
To save all files in a frameset in addition to the frameset itself, choose File > Save All.
Tip
| | You can tell if you've got the frameset selected, because the File menu now says Save Frameset, instead of Save Frame. Also, the tag selector will include the <frameset> and/or <frame> tags. |
Exercise 12.1 Building a Frameset
In this exercise, you build a simple frameset and frames from scratch. The documents you will use, with their solid-color backgrounds, are designed to clarify the way frames and framesets work.
Before you start, copy the chapter_12 folder on the CD to your hard drive. Define a site called Chapter 12, with this folder as the local root folder.
Note
| | As always, feel free to experiment on your own as you proceed through the exercise; this is often one of the best ways to learn. However, the subsequent exercises in this chapter build on this one, so when you're finished with experimenting, you might want to return the document to the design specified in this exercise. The History panel is an excellent tool for experimenting and backtracking; see Chapter 3, "Creating and Working with Documents," for more on the History panel. |
-
With the Site panel open and the site chapter_12 displayed, from the Site panel's menu, choose New > New File. When untitled.htm appears in the Site panel, name the file red.htm. Open the document and give it the page title Red.
-
Choose Modify > Page Properties and click the Background color square. Choose a nice shade of red and click OK.
-
Now you're going to tell Dreamweaver that you want to create a frameset with one frame displaying the document red.html. First choose View > Visual Aids > Frame Borders so that frame borders are visible in the Document window. Remember, this is only as visual aid for the design process and has no bearing on whether you give your frames borders that can be seen in the browser. Frame borders in the Document window are seen as thick gray 3D lines.
-
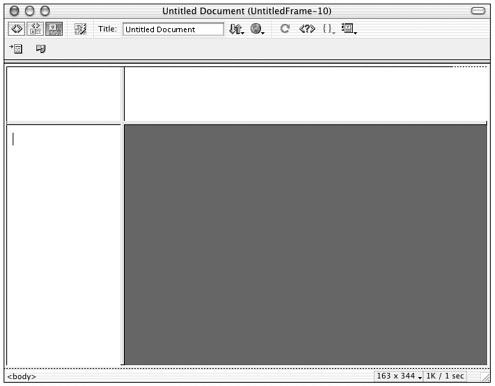
With the cursor, click and drag the top frame border a little way down into the page's body area. Similarly, click and drag the left border a little way to the right into the body area. Your document should look something like Figure 12.7.
Figure 12.7. The exercise document with a two-column, two-row frameset.
-
You now have a document defining a frameset and four frames, each frame having a separate HTML document as a source file. The documents all need to be saved. Go to File > Save All. This option cycles through each of the files you've created, enabling you to name them, or to retain the temporary name that Dreamweaver has given them catchy names such as Untitledframeset-01.htm. Rename the files as follows: frameset.htm, blue.htm, green.htm, gold.htm. The fourth frame is the document you started with, red.htm. Close the frameset.
-
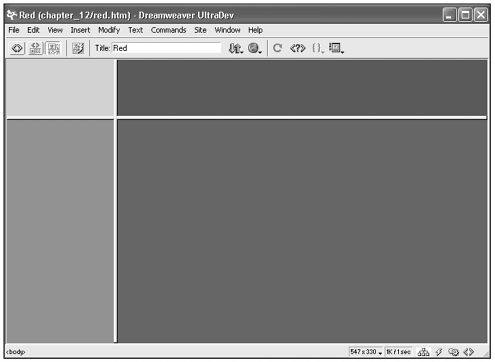
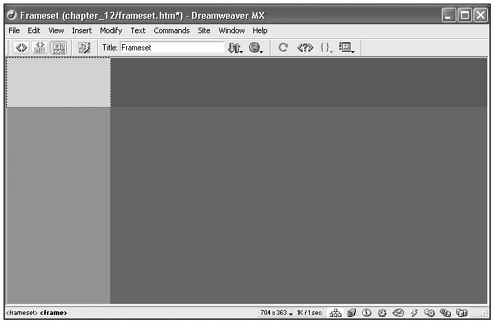
Now give each of the frame source documents a background color. Open the Dreamweaver Site panel and double-click the file blue.htm to open it. Choose Modify > Page Properties, click the Background color chip, and pick a nice blue; click OK. Give the page the title Blue by typing it into the Title field just about the Document window. Save and close the file. In the Site panel, double-click gold.htm and give it a gold-colored background and title Gold; save and close it. Open green.htm, give it a green background and title Green, save, and close. Open frameset.htm again; it should look something like Figure 12.8 in the Dreamweaver Document window, with each of the four frames a different color.
Figure 12.8. The exercise document after saving and coloring the framed source documents.
-
Spend some time familiarizing yourself with the way Dreamweaver displays a frameset and frame documents in its Document window. Notice that if you click in an individual frame, you'll see its filename in the Document window's top blue bar, and its title in the Title field. If you switch to Code view, you'll see the source code for the html file that loads into that frame only. Note, however, that clicking a frame in this way does not actually select that frame. To select a frame, Alt-click it (Windows) or Option+Shift-click (Macintosh), or choose it in the Frames panel. You'll see that it is selected by a dotted line around its perimeter, and by the fact that the Property inspector changes to the Frame Property inspector.
-
Clicking a frame border in the Document window will display the frameset's filename in the top blue bar and its title in the Title field. (You probably haven't titled the frameset document, but you can do that now; title it Frameset.) With the frameset document active in the Document window, switching to Code view will display the source code for the frameset document.
-
Choose File > Save All; this is a good habit to develop when working with frames, because it's easy to neglect saving one of the many files involved. You will also have to save files before previewing them in the browser. Preview the frameset document in a browser; it should look very much like it appeared in the Document window. In the exercises that follow in this chapter, you'll add some formatting and content to these documents.
Note
| | Why do you need to save frames before previewing, when you don't need to save regular nonframed documents? Browsers can only preview saved files. When you preview a regular document, Dreamweaver creates and saves a temporary file to launch in the browser so that you don't have to save your document. But frameset documents contain links to other documents (those that show in the frames). If those other documents haven't been saved, the browser won't be able to load them in the frameset and there won't be any value in previewing. |
Working with Frames
After your frame layout is created, you'll undoubtedly need to manipulate the frameset and frames in various ways in order to achieve the design you envision.
The Dreamweaver Frames Interface
The Dreamweaver interface allows easy manipulation of the placement, size, and attributes of frames and framesets, using the Frames Panel, the Property inspector, and the tag selector.
Using the Frames Panel
To open the Frames panel, either choose Window > Others > Frames, or press Shift+F2 (Windows) or Command+F10 (Macintosh); see Figure 12.9. The Frames panel is part of the Advanced Layout panel group. After you've chosen the panel the first time, if you're using the docked panel interface, the Advanced Layout group remains visible, able to be expanded or contracted as needed.
Figure 12.9. The Frames panel.
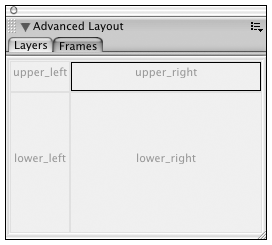
The Frames panel provides a visual representation of the currently active frameset and can make working with frames in the Document window much easier. Frames and framesets can be clicked in the Frames panel to select them in the Document window. The Frames panel also shows the hierarchy of the frameset structure in a way that might not be as easy to see in the Document window. In the Frames panel, each frameset is surrounded by a thick three-dimensional border; frames are surrounded by a thin gray line, and each frame is identified by a frame name.
Using the Property Inspectors
As with many other elements in Dreamweaver, a specific Property inspector appears when a frame is selected; another Property inspector appears when a frameset is selected, as shown in Figure 12.10. (If you don't see the Property inspector, choose Window > Property inspector, or Ctrl+F3/Opt+F3.)
Figure 12.10. The Frameset Property inspector and the Frames Property inspector.
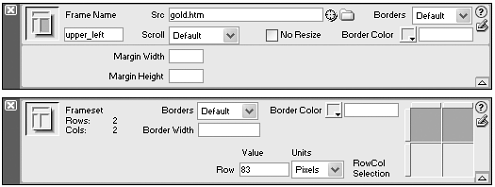
The Property inspectors for frames and for framesets enable you to view, set, and edit many of the attributes that HTML allows for frames and framesets. You'll learn about setting these attributes in detail in the section "Setting Frame Attributes" later in the chapter.
Using the Tag Selector
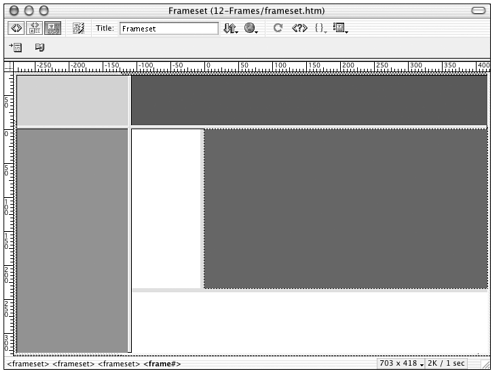
The tag selector, located along the bottom edge of the Document window, is an important visual aid and tool when working with frames. One of the trickiest aspects of working with frames in Dreamweaver is determining which file is currently active (one of the frames? the frameset?), and which tag is currently selected (<frame> or <frameset>). As Figure 12.11 shows, the tag selector is a lifesaver for working with the abundance of tags and documents.
Figure 12.11. The tag selector showing a selected frame in a frameset.
Note
| | See Chapter 2, "Setting Up the Dreamweaver Workspace," for more about the tag selector. |
Working with Selections in Framesets
To work with frames, you'll want to get comfortable with selecting frames and framesets, because this is necessary to edit their properties. You can select items from within the Document window itself, or you can use the Frames panel.
Selecting Frames
To select a frame in the Document window, Alt-click (Windows) or Option+Shift-click (Mac) inside the frame.
To select a frame using the Frames panel, click anywhere within the part of the diagram that represents the frame.
Selecting the Frameset
To select a frameset in the Document window, click any frame border. If View > Visual Aids > Frame Borders is turned off, you will not be able to click a frame border to select a frameset.
To select a frameset using the Frames panel, click the black border around the edge of the panel.
Determining the Current Selection
In the Document window, when a frame is selected, it has a dotted-line border. When a frameset is selected, all the frames that it contains have a dotted-line border (see Figure 12.12).
Figure 12.12. A frameset (top) and a frame selected in the Document window.
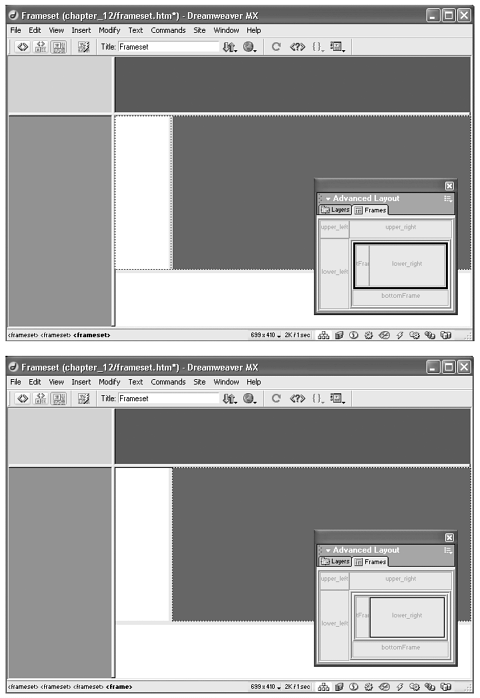
When you select a frame, you're working with the frameset itself, not with the document that the frame contains. To select the document, click in the Document window, and check the tag selector for the <body> tag.
Resizing Frames
Frames can be resized by just dragging their borders; this can be a good technique to use to "rough out" the basic size of your rows and columns. However, you'll probably want to use the Property inspector to be sure that columns and rows are allocated space according to your plan for the page layout. As discussed earlier in this chapter, both columns and rows can be given absolute, percentage, or relative sizes, and how you use these values will determine how the page looks at different window sizes. You'll learn about this in more depth in the upcoming section "Setting Attributes."
Setting Attributes
After you have created and saved your frameset and frames (and nested framesets and frames, possibly) you can set a number of their attributes (this term is used interchangeably with the Dreamweaver term properties here) using the Dreamweaver Property inspector. In this discussion of the HTML code involved with frame sites, earlier, in Tables 12.1 and 12.2, you read about the commonly used attributes for both framesets and frames; most of these can be set using the Property inspector. Any attributes not available through the Property inspector, of course, can be set by editing the source code directly, or by using the tag editor.
Frameset attributes and frame attributes work together using the cascade principle: Setting a frame property overrides any setting for that property in a frameset. If you set border attributes in a frame, for instance, and these attributes are different from the border attributes set for the frameset itself, the border attributes of the frame will take precedence.
Setting Frameset Attributes
When you manually create a frameset in Dreamweaver, no attributes are added to the code except for a src attribute for each <frame> element. All other common attributes can be added using the Property inspector.
When you use Dreamweaver predefined framesets, the following default property values are automatically applied: no borders, no scrollbars, and no resizing of frames in the browser. These properties can be easily changed, and others set, using the Property inspector.
To view frameset properties, be sure that the Property inspector is open, and, select the frameset, using the Document window or the Frames panel.
-
In the Document window, click a border between two frames. The frameset will be selected, which is indicated by a dotted line around all frames.
-
In the Frames panel, click the border that surrounds the frames.
Notice that a specialized Frameset Property inspector now displays, as shown in Figure 12.13, allowing you to view and edit the frameset's properties.
Figure 12.13. The Frameset Property inspector.

Frameset Borders
The Borders drop-down list enables you to make one of three choices:
-
Yes. Borders will display around the frames in this frameset in the browser.
-
No. Borders will not display around the frames in this frameset in the browser.
-
Default. The user's browser will determine whether borders will display.
Frameset Border Width
In the Border Width field, you can type a number to specify the width of the borders in the frameset.
To create a set of borderless frames that will work in all current major browsers, you need to explicitly set frameborder to "no" and border to "0".
Frameset Border Color
In the Border Color field, use the color picker to select a color for the border, or type the hexadecimal value.
Frameset Column Sizes and Row Sizes
In the Frameset Property inspector on the far right is a small visual representation of the frameset, the RowCol Selection box. Along the left and top sides of the box are tabs; clicking these tabs selects the corresponding row or column. With a row or column selected, you can use the Value and Units fields to set the size of each column. As discussed earlier in the section "HTML Coding for Frames," using the different unit types absolute (pixels), percentage, and relative will have different effects in the browser, and combining them will have yet more complex effects.
Frame borders can be dragged in the Document window to set approximate row and column sizes, and the Property inspector then used to make slight numeric corrections and to adjust the type of unit of measurement used. Table 12.3 explains the columns and row sizing units and their effects in the browser.
Note
| | One of the common mistakes made in coding frameset pages is not assigning absolute and relative sizes carefully, causing frames to display unpredictably in browsers. (If your frames are set to cols="100, 600", the page will only display correctly if visitors have their browser windows at exactly 700 pixels wide.) Dreamweaver generally does a very good job of making sure this doesn't happen but it's still a good idea to keep an eye on things yourself. Especially after you've been dragging frames to resize them, use the Frameset inspector to make sure you know how your frames will behave in the browser. |
| Unit | Effect |
|---|---|
| Pixels | Sets the size of the selected column or row at an absolute value; its size will not change regardless of the browser window size, and a column or row with this type of unit will be allocated its share of space before a column or row with a percentage or relative value. |
| Percent | Specifies that the current frame should make up the determined percentage of space available in its frameset. Columns or rows set with percent units are allocated space after those with units set in pixels, but before those set to Relative. |
| Relative | Determines that the column or row be allocated whatever space is left over after pixel-unit and percent-unit columns or rows have been allocated their space. |
Giving a Title and a Name to a Frameset Document
A frameset document is an HTML document, and it can be given a <title> in the same way as any other HTML document. In Dreamweaver this is done by selecting the frameset and going to Modify > Page Properties or using the Document toolbar to assign a title.
The name attribute of the <frameset> tag is completely different from the <title> tag of the frameset document. A name attribute is set when the frameset needs to be referenced by a script. The Property inspector doesn't allow this attribute to be set, but it can be added manually to the source code. With the frameset selected, press Ctrl+Tab to access Code view. Locate the <frameset> tag and add the name attribute with this syntax:
<frameset name="myframesetname">
The ID attribute is also used to reference a frameset from a script, and can be added using the tag editor.
Tip
| | To view the source code for a frameset document in Dreamweaver, be sure that View > Visual Aids > Frame Borders is selected, click any frame border in the Document window, and press Ctrl/Cmd+Tab to view the frameset document in Code view. When in Code view, you can edit attributes by typing, or by using Edit Tag or the Tag Chooser object. |
Setting Frame Attributes
To view frame properties, be sure that the Property inspector is open, and select the frame. The Frame property inspector will appear, as shown in Figure 12.14.
Figure 12.14. The Frame Property inspector.

Frame Names
Entering a one-word name in the Name Frame field of the Property inspector adds a name attribute to the <frame> tag.
Frame names are important; they are used as targets for hyperlinks, to instruct the browser as to where into what frame a document should be loaded. They also can be used by scripts to reference the frame. A frame name should not include any spaces or special characters; underscores are the only character allowed. Be careful not to use reserved words such as top or blank; it's safest to choose distinctive, unusual words. The name is what appears in the Frames panel. Dreamweaver frame objects are created automatically with names, but these names can be changed to whatever you choose.
Frame Source
The attribute src determines the source document for the frame (the document that will show in that frame). In the Src field, enter a filename and path, or click the folder icon to browse to and select a file. A file also can be opened in a frame by placing the cursor in the frame in the Document window and choosing File > Open in Frame.
Frame Scroll
The Scroll field enables you to determine whether scrollbars appear when there is not enough room to display the content of the current frame. You have three choices: Yes, No, or Auto. Yes will cause scrollbars to appear whether they're needed or not. No will prevent scrollbars from appearing whether they are needed or not. Auto will cause them to appear only when needed. Most browsers default to Auto. Frames without borders can't be resized regardless of how this property is set.
Frame Noresize
When checked, this option prevents users from dragging the frame borders when the site is accessed in a browser.
Frame Borders
This field enables you to set the border properties of the frame; whatever options you choose will appear for the current frame, overriding the frameset border properties. The options are Yes, No, and Default. If you don't choose an option, Dreamweaver defaults to No. If you choose Default, the browser's default display will apply, and most browsers default to Yes.
Note
| | If a frame is surrounded by frames whose borders are set to Yes, it will appear to have borders even if none are specified. If a frameset has borders specified, this will also give the frames it contains the appearance of having borders. |
Frame Border Colors
In the field Border Color, you can set a border color that will apply to all the borders adjacent to the current frame. This setting overrides the border color of the frameset.
Margin Width and Margin Height
Margin width sets the width of the frame's left and right margins (the space between the content and the frame border).
Margin height sets the height in pixels of the top and bottom margins (as with margin width, the space between the content and the frame borders).
Exercise 12.2 Setting Frameset and Frame Attributes
In this exercise, you'll add some attributes to your frameset and frames. This exercise builds on Exercise 12.1. If you haven't completed Exercise 12.1, a completed version of the exercise files is available on the CD in chapter_12/exercise_1_completed/. If you haven't done so yet, copy the chapter_12 folder on the CD to your hard drive. Define a site called Chapter 12, with this folder as the local root folder.
-
Open the file frameset.htm from the chapter_12 folder. First, you'll set some frameset properties. To set frameset properties, the frameset needs to be selected in the Document window; do this by clicking on any frame border. The frameset is selected when you see dotted lines surrounding all the frames, and when you see the Frameset Property inspector displayed.
-
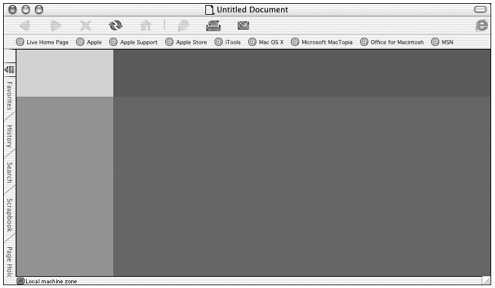
You are going to make a borderless frameset page, so from the Borders drop-down list, choose No. Choose File > Save All and preview the frameset document with a browser. Depending on which browser you're using, you might still see frame borders, despite setting the frameset border property to No. Browsers as recent as Internet Explorer 5.5, Internet Explorer 6.0, Netscape 4.7, and Netscape 6.2 will still display frame borders, given this code. The workaround for this is to be sure to set the Border Width property to 0 as well. Change this setting, then choose File > Save All again and preview the frameset document. In the browser, you should now see a borderless frame page, as in Figure 12.15. (In the Dreamweaver Document window, you'll still see frame borders, because you have the visual aid frame borders turned on. This is unrelated to the actual frame borders.)
Figure 12.15. The exercise document as borderless frameset.
-
Back in the Document window, select the frameset again. Now set the size of the columns and rows. On the right side of the Property inspector, in the little diagram of your frameset, click the tab at the top of the left column, and in the Column Value field just to the left, specify a width of 150, and a Column Units of pixels. Click the tab at the top of the right column and specify a Column Units of Relative. (Dreamweaver fills in a 1, but Relative has no actual numeric value.) This configuration will fix the left column at 150 pixels wide, but allow the right column to fill whatever space remains of the browser window viewport. Choose File > Save All. Only frameset.htm has been modified, but it's best to get into the habit of saving all documents when working with framesets.
-
Now, in the Property inspector, select the top row by clicking its tab along the left edge of the frameset diagram. Set its height to 20 percent by setting the Row Value to 20 and the Row Units to Percent. Click the bottom row's tab and set its height to 80 percent. This will create rows which both adjust to the available browser window size, each taking up its allotted percentage of vertical space. Save all frames again. The frameset should still look much as it did before, depending on how you originally sized the rows and columns when you dragged them into place, and depending on what size you keep your Dreamweaver Document window.
Note

The window size drop-down menu at the bottom of the Document window is useful for sizing your Dreamweaver window in such a way that it best represents the average browser window size you want to accommodate with your design. When working with frames, however, you have to take special care when using it. If a frame is selected and you resize the window, Dreamweaver will attempt to resize the frame itself to the size you specify. Instead, you want to select the frameset and resize the window; this will let Dreamweaver know that it is the frameset document that you want resized.
-
Now set some frame attributes, starting with the upper-left frame. If you just click in that frame, you'll see that the Property inspector doesn't change at all; this is because just clicking in the frame doesn't select it. To select it, you must Alt-click (Option+Shift-click the Mac) or click on the frame in the Frames panel. Select the upper-left frame (see Figure 12.16).
Figure 12.16. Selecting the upper-left frame.
-
If you were planning to reference this frame with a script, it would need a name, so give it one for practice. You will also need to name a frame in order to target it with a link. In the Name field, type top_left. Then check the Noresize box; suppose, for example, that you don't want the user to resize your frames. You also wouldn't want scrollbars in that frame, and won't need them, so set the Scroll field to No.
-
Moving on, select the upper-right frame. In this frame, you want no resizing, so check that box again. You also want to be sure you don't see any scrollbars, and you know that none will be called for, so you set scrollbars to No. Name this frame upper_right.
-
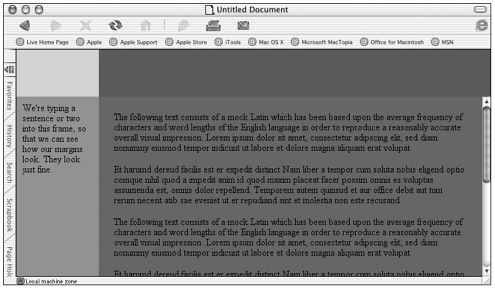
Now select the lower-left frame. Set the Noresize and Scroll options the same as the two upper-row frames. For this frame, you also need margins. Set Margin Height to 10 and Margin Width to 15. Now type a sentence or two into that frame so that you can see the margins you've created. Name this frame lower_left.
-
Finally, select the lower-right frame, the largest one. Again set Noresize, but this time you might need scrollbars. You're going to fill this frame with content, and because a lot of it will be text, depending on the user's browser window size, they might need scrollbars to see it all. If the scrollbars aren't necessary to a given user in a given configuration, however, you would much rather not look at them in your pretty design. So set Scroll to Auto, which will do exactly what you want in each situation.
-
Name this frame main_content_frame.
-
With the lower-right frame still selected, set some margins. Make both Margin Width and Margin Height 20. Now add some content to that frame's source document. If you haven't yet acquired an extension such as Filler Text Fever, Latin Text, or Corporate Mumbo Jumbo from the Macromedia Exchange for Dreamweaver (www.macromedia.com/exchange/dreamweaver/), you really should. Either use your filler text extension to pour a couple of paragraphs of text into that frame, or find some text to copy and paste there; the point is to fill the frame with content past the overflowing point. Depending on the shades of background color you used, the text color might not be easily readable, but don't worry about that for right now.
-
Save all frames, and preview your work in a browser; it should look something like Figure 12.17.
Figure 12.17. The Exercise 12.2 frameset document as it should look now.
-
Still previewing the document in the browser, try resizing the browser window. Note the way the columns and rows behave at different window sizes. Also note that the large main frame has scrollbars only when needed, and that you cannot drag and change the frame borders. You're done for now; in Exercise 12.3, you'll add some navigation links and new source documents to your little frame-based site.
Linking and Targeting
Creating links on a frame site distinctly differs from on nonframe sites. On a frame site, if a link is to be opened within one of the frames of the current frameset, the link needs to include a target, an attribute instructing the browser where to open the new document.
A link also can target other locations in which a document can be opened; these are explained in this section.
To create a link that targets a frame, follow these steps:
-
Select the text or object that is to serve as the link anchor.
-
Create a link. Next to the Link field in the Property inspector is the Target drop-down list. From that list, choose the location where you want the linked document to appear. Table 12.4 shows the choices that should appear.
| Target | Causes Linked Document to Open In |
|---|---|
| Frame name: If you've named your individual frames, their names should appear in the Target drop-down list. | The frame whose name is specified |
| _blank | A new browser window |
| _parent | The parent frameset of the link, occupying the whole browser window |
| _self | The current frame, replacing the content in that frame |
| _top | The outermost frameset of the current document, replacing all frames |
If no target is chosen, the link will open in the current frame.
Exercise 12.3 Adding Targeted Links to a Frameset
In this exercise, you'll make links in your frameset to display various documents in the main content frame. This exercise builds on Exercises 12.1 and 12.2. A completed set of Exercise 12.2 files is available on the CD in the folder chapter_12/exercise_2_ completed/; you can build on them for this exercise, if you like. If you haven't done so yet, copy the chapter_12 folder on the CD to your hard drive. Define a site called Chapter 12, with this folder as the local root folder.
-
For this exercise, you need more source documents than your current Red, Blue, Gold, and Green documents. In the Site panel, select the chapter_12 folder that contains frameset.htm and choose File > New File. Name the new file purple.htm and open it. Give it a purple background color, title it Purple in the Title field, and pour or type some filler text onto the page, at least a paragraph or two. Save the file and close it.
-
Create another new file, name it orange.htm, give it an orange background and the title of Orange in the Title field. Place some filler text on the page, and then save and close it. Create another file, name it pink.htm, give it a pink background and the title Pink in the Title field. Place some filler text on the page, and then save it and close it.
-
Now open the frameset document you built in Exercises 12.1 and 12.2, frameset.htm. Delete the couple of sentences you placed in the lower-left frame; you need that space for your navigation links. In that lower-left frame, type the word Purple. Press the Spacebar and type Orange. Press the Spacebar again and type Pink.
-
Select the word Purple. In the Property inspector, click the browse-for-file icon (the yellow file folder) and browse to the file you just created, purple.htm. Either double-click it or select it, and then click OK. With the text Purple still selected, in the Property inspector, specify a target in the Target drop-down list. You should see the four standard options, _blank, _parent, _self, and _top, and also the name of your lower-right frame, main_content_frame choose it.
-
Next select the text Orange, and follow the same steps outlined in step 4 to link it to the file orange.htm and tell the browser to open it in the lower-right frame. Save all frames.
-
Finally, select the text Pink, and repeat the same steps you did for Purple and Orange. Save all frames.
-
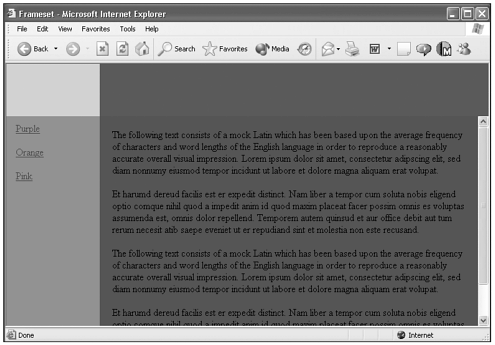
Preview in a browser. (Be sure that you have saved all frames by choosing File > Save All.) Click each of your links they should swap the source file for the frame named main_content_frame, the lower-right frame. The frameset page should look like Figure 12.18.
Figure 12.18. The exercise document with left-hand navigation links.
-
Add one more to your navigation link list by typing Other Target. Select it, link it to the purple.htm document, but this time, choose _blank for a target. Save all frames and preview; clicking that link should open the Purple page in a completely new browser window. Go back, select the link Other Target again, and change the target to _parent. Save all frames and preview; this time, the current window will be replaced with the Purple document, with no frameset involved.
-
Try the target _self; the new file will replace the current frame. Finally, try _top; in this configuration, it will have the same effect as _parent, filling the browser window.
Working with <noframes>
If the user who accesses your frameset document is using an extremely outdated browser a version of Netscape previous to Netscape 2.0, or a version of Internet Explorer previous to IE 3.0 he won't be able to view your framed content. The <noframes> element is provided for the purpose of displaying content for these users.
<noframes> also can be used to one's advantage in search engine positioning, and this tactic is worth considering when a frame site needs to be positioned competitively.
Ideally, you might want to include all of the content included in the frames portion of your web site in the <noframes> section in some form. You can link to a full set of nonframe HTML pages containing all of the site's content, if you choose.
The <noframes> tag pair contains a <body> tag pair; the source code structure looks something like this:
<noframes> <body> This is the no-frames content. </body> </noframes>
To define <noframes> content with Dreamweaver, follow these steps:
-
Choose Modify > Frameset > Edit NoFrames Content. This causes the Document window to be cleared; the words NoFrames Content appear at the top of the document body area.
-
In the Document window, type or insert any content you like, just as you would with any other HTML page.
-
To return to the normal view of the frameset document, uncheck Modify > Frameset > Edit NoFrames Content.
Tip
| | If you switch back and forth between Code and Design views, the position of the cursor within the document code will determine whether Design view shows you your standard or <noframes> content. If you're working in Code and Design view, selecting code in one section or another will automatically switch the display in the Design view portion of the window. |
Exercise 12.4 Adding <noframes> Content
This exercise builds on Exercises 12.1, 12.2, and 12.3. A set of completed Exercise 3 files is available on the CD in the folder chapter_12/exercise_3_completed/; these documents can be copied to your chapter_12 folder and used as the basis for Exercise 12.4.
If you haven't done so yet, copy the chapter_12 folder on the CD to your hard drive. Define a site called Chapter 12, with this folder as the local root folder.
-
Open the document frameset.htm, created in the preceding three exercises.
-
From the main menu, select Modify > Frameset > Edit NoFrames Content. The Document window should be replaced by a gray window with the words NoFrames Content at the top.
-
Type a message, such as Here is my <noframes> content. Add any formatting you like.
-
Uncheck Modify > Frameset > Edit NoFrames Content.
-
Save all frames. If you can upload your frame pages to a server on the Internet, perhaps to a temporary subdirectory of a site to which you have FTP access, you can use the Browser Emulator at www.dejavu.org/ to see how your noframes content looks to someone with a really ancient browser such as Netscape Navigator 1.0. Only the noframes content should show.
Summary
This chapter discussed the pros and cons of using frames, and familiarized you with the HTML code that makes up frameset documents and the file structure of frame sites.
With Dreamweaver opened, you discovered how its frame-building tools can make putting together a frameset simple. This chapter covered the different attributes that you can set for framesets and frames and showed you how to set many of them easily with the Dreamweaver Property inspector.
This chapter also addressed how to sort out some of the complexities of linking from a frameset to a frame and discussed some other link targeting options available. Finally, this chapter discussed adding content to a frameset document that will display when a user with a very old browser accesses the page.
The exercises in this chapter walked you through building a frameset and frames, setting their attributes, and adding targeted links and noframes content. However, you should experiment and play with frames within Dreamweaver to discover more of the inherent possibilities.
| CONTENTS |
EAN: 2147483647
Pages: 49