Personal Information Management
As if the Mozilla plug-ins for tasks such as e-mail management weren t enough, an application to manage e-mail, contacts, and related things is available in the form of Ximian s Evolution . The Evolution application is a groupware program, similar to Microsoft Outlook, that provides access to personal information such as e-mail, a calendar, contacts, and so on. Management of this type of information is often known as personal information management (PIM) . Programs such as Evolution (and Outlook) allow you to manage all of this personal information within a single application.
Setting Up Evolution
If you are starting Evolution for the first time, the setup wizard will guide you through completing the information to establish a connection with your mail server through your ISP. Figure 4-23 shows one of the early screens in the Evolution Setup Assistant, which starts up the first time you run the application.
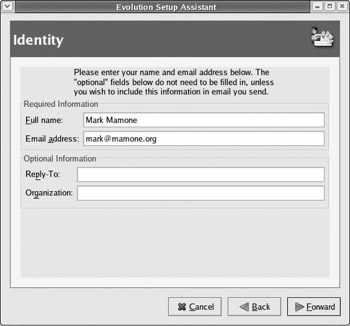
Figure 4-23
Alternatively, you can set up your mailbox properties once the application has started properly. To do this, select Tools>Settings (this is the starting point for changing most of the Evolution settings), and then select the Mail Accounts tab, which allows you to add new accounts and edit the properties of your existing accounts (see Figure 4-24).
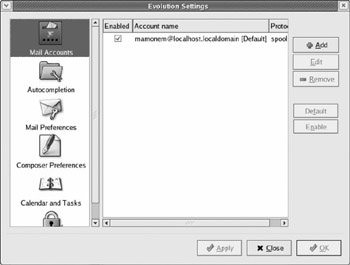
Figure 4-24
The wizard guides you through the process of entering the information that is provided by your ISP to gain access to your Internet account and e-mail subscription: your name, e-mail address, and the name of the server and username assigned by your ISP.
Using Evolution
Selecting this option will start the setup wizard, and when the wizard is complete you ll see the Summary screen by default. You can move to other areas of the application by selecting the icons on the left side of the window. For example, selecting the InBox icon displays the screen shown in Figure 4-25.
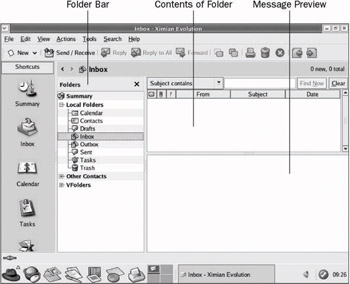
Figure 4-25
The layout of the window consists of the usual menu bar and a context-sensitive toolbar . The toolbar s icons reflect the application s current mode (Summary, Inbox, Calendar, Tasks, or Contacts). These modes are accessed via the shortcut toolbar that runs down the left side of the application.
-
The Inbox (shown in the preceding figure) provides access to your e-mail account, allowing you to send, receive, and manage your e-mail using features and folders.
-
The Calendar allows you to manage your schedule, adding forthcoming appointments between one or more people and attaching reminders so you don t forget.
-
The Tasks feature provides a simple task database, allowing you to record tasks and assign due dates. In addition, you can categorize your tasks for more flexibility when managing them.
-
The Contacts feature allows you to store your contacts in an address book, which may then be used when sending e- mails . However, it allows you to store far more information than simply an e-mail address such as mailing addresses, Web pages, a variety of telephone numbers , company information, and more.
Again, check out the online documentation; it is more than sufficient to take you through the details of individual tasks. We ll concentrate on the key features of the application, note some similarities with Microsoft Outlook, and cover some of the features for interoperability with other applications (particularly Microsoft Outlook).
The Inbox Feature
The Inbox screen provides an interface not only to your Inbox folder, but to all your local mail folders. When you first open the Inbox screen, you get to see the Inbox folder, with a list of messages shown in the top panel and the content of the currently selected message shown underneath in the preview panel. The toolbar contains shortcuts to the most popular features ”creating, replying to, and deleting messages; printing; navigation; and so on.
The folder bar is a particularly useful feature that s not shown by default. To make it appear, select View>Folder Bar.
As you can see, the folder bar makes it much easier to find your way around your local mail folders. In addition, you can use the folder bar to manage your folders (creating, deleting, moving, copying, renaming folders, and so on). For example, to create a new subfolder you simply select the parent folder in the folder bar and either select File>New>Folder or right-click and select Create New Folder.
Evolution also provides the usual search facilities, which are very similar to those in Microsoft s Outlook. You can apply search criteria against fields held in e-mails, such as the subject or body.
The Calendar Feature
The Calendar function provides you with a view that represents a certain time period. It can display a single day, a week (including or excluding weekends), or a month. You can change this setting via the View>Current View menu item. The example in Figure 4-26 shows the Working Week view.
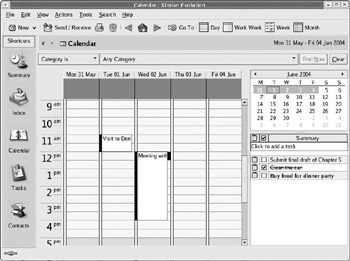
Figure 4-26
It is within these views that you can create Appointments that hold information such as Summary, Location, Start Date/Time, Classification, and so on. You can even add a Reminder to your appointment, and you can create recurring reminders over a period of days, weeks, months, or years . In the preceding figure, you can see that Mark had a couple of appointments, including a visit to the dentist and a meeting with the publisher.
The Tasks Feature
The Tasks screen is a simple but effective list of jobs. To enter a task, you can select New>Task or Click the New Task button to add a task text box. If you want, you can also assign a Due Date, and when the task is complete, you can mark it as finished.
Figure 4-27 shows an example of the Tasks screen with some tasks entered.
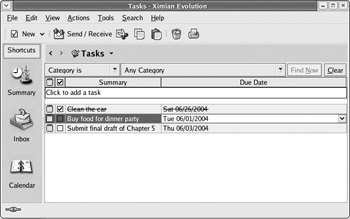
Figure 4-27
So, Mark cleaned the car last Friday, and marked the task as complete by clicking the checkbox next to that task. We re having a dinner party tomorrow (Tuesday), so mark will have to buy some food ”the application is showing that task in bold because food has to be bought today. The final task shows that Mark has until February 26 to submit this chapter to the Publisher.
| Note | Remember that these tasks can also be displayed on your Summary screen. |
The Contacts Feature
The Contacts screen acts as an address book. The screen presents a columnar list of contacts that exist within your address book. Figure 4-28 shows the contact screen with just a few contacts already entered.
You can see here that I have added a few contacts. I ve added entries for all the co-authors of this book, and for two companies (Wrox Press and Red Hat). I ve also added a distribution list, which I ve called Beg RHL9 Authors. This entry has a table icon to the right of it to indicate that it s a distribution list; it contains a list of the entries for the other authors.
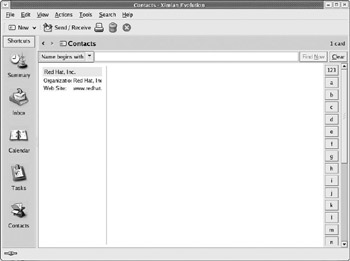
Figure 4-28
To add a contact, you can select New>Contact or the File>New>Contact menu option. When you do so, you get a dialog box in which to enter your information, as shown in Figure 4-29.
Creating distribution lists is equally simple ”you select New>Contact List button or the File>New>Contact List menu option to bring up the dialog box, supply a name, and then use your mouse to drag-and-drop contacts into the list.
To the right of the window you ll notice a list of shortcut buttons . Each button acts as a filter on the contacts. So if I selected the W button, only those contacts beginning with W would be shown (in this case, only Simon Whiting and Wrox Press).
Importing E-mail from Other Systems
If you are familiar with Microsoft Outlook (or Outlook Express), you will find Evolution very familiar and comfortable. In fact, you can use Evolution either to import data from a recognized format in the form of a data file or to connect to an e-mail account already held on Microsoft Exchange, such as one within your corporate environment or even at home.
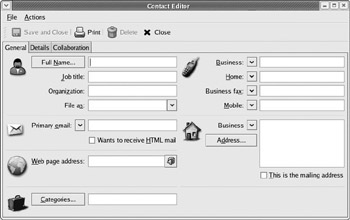
Figure 4-29
Importing from Outlook and Other Formats
The File>Import option from the menu starts the Evolution Importer Assistant. Step 1 of the assistant invites you to indicate whether you want to import from an older program or from a file. If you re importing from a file, Figure 4-30 shows you what Step 2 looks like.
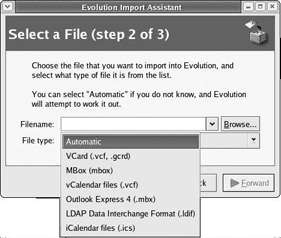
Figure 4-30
You can import from any of six formats listed in the drop-down list box shown in the screenshot. When you ve selected the data file you wish to convert, move to Step 3 using the Next button, and select the Import button to begin the import process.
| Note | You cannot use this technique when importing information from Microsoft Outlook or Outlook Express version 4 (or later). However, you can convert these files into the standard mbox format that is supported by the preceding method (you can perform this conversion using another mail application such as Mozilla Mail). Alternatively, you can use the Outport tool. For more information, see http://outport. sourceforge .net and http://support.ximian.com/cgi-bin/ximian.cfg/php/enduser/std_adp.php?p_faqid=59 . |
Connecting to a Microsoft Exchange Mail Server
Connecting your Evolution client to a Microsoft Exchange server is fairly simple, as long as you have purchased the Ximian Connector for Microsoft Exchange. You can find instructions for setting up accounts using this feature within the online documentation, or at the Ximian support desk (try http://support.ximian.com/cgi-bin/ximian.cfg/php/enduser/popup_adp.php?p_faqid=148 ).
You can find additional information about the features and the costs associated with the Ximian Connector at www.ximian.com/products/connector .
EAN: 2147483647
Pages: 170