The Project Window
| [ LiB ] |
The Project Window
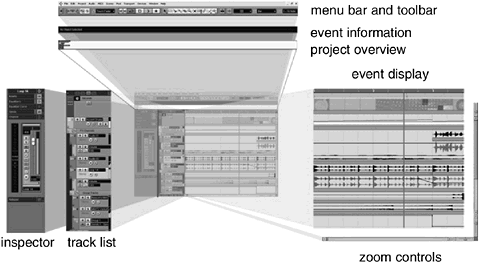
The project window (see Figure 2.1) is your main working area. In Cubase SX/SL, you can load different projects. When you make a project window active (bring it on top of others by clicking in it), all other project- related windows also update their content to display the settings of this active project window. The project window is divided into seven areas:
-
Toolbar. Accesses the most common tools and functions used in this window, as most toolbars do. It appears on the top of the project window, covering the width of the window.
-
Event information line. Displays information on selected events. You can use it to rename these selected events or edit the event's start, end, length, and so on.
-
Overview. Displays the whole project and frames the current portion of the project currently viewed . You can quickly zoom to a specific point or move your point of view by using this area.
-
Inspector. Gives you detailed information on a selected track. Each track has different information represented in this area, depending on the track's type.
-
Track list. Displays vertically stacked tracks available in your project. Each track also displays information related to its track type (audio, MIDI, marker, video, and so on).
-
Event display. Displays events in time as well as automation lanes associated with events on tracks.
-
Zoom. Enables you to view your project in different ways, focusing on a particular section, track, or event, or simply to get an overall view of your project.
Figure 2.1. The Cubase SX/SL project window. menu bar and toolbar event information project overview event display inspector track list zoom controls
Channels
The concept of channels is fairly important in modern digital audio production. Whenever events are recorded in a project, they go into a channel. So, in order to record anything, you need to create a track for it, which in turn , creates a channel that separates its settings from the track (channel) next door.
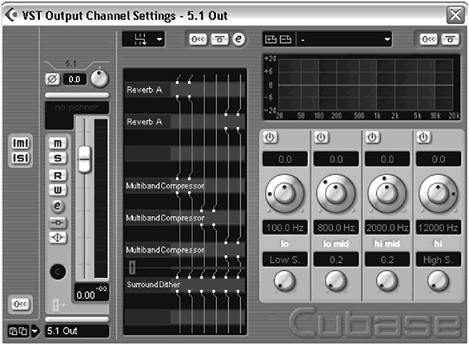
The VST Channel Settings panel offers the best look at all the parameters assigned to any types of channels inside a project. Since it's so important, you can access it by pressing the Edit button from the following places:
How To
To view the VST Channel panel:
-
Project window > Inspector area > Channel section.
-
Mixer Panel (F3) > individual channel.
-
Project window > Track List area > individual channel.
In Figure 2.2, the example shows an audio output channel in surround format and its associated effects routing in the surround output bus.
Figure 2.2. The VST Channel Settings panel.
Mixers
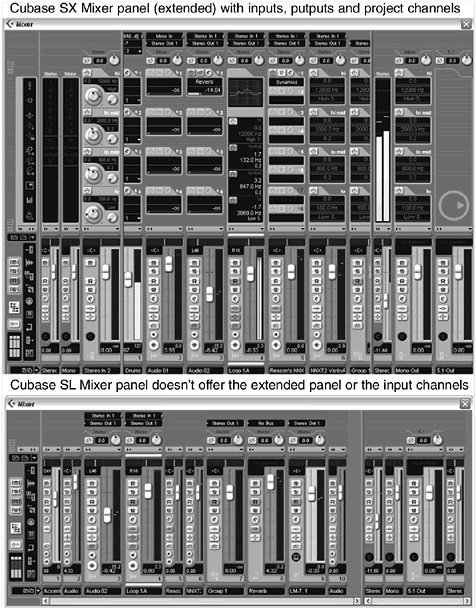
The Mixer panel (see Figure 2.3) is your virtual mixing console. It monitors inputs and outputs, adjusts levels, assigns effects or inserts , adjusts the equalization, changes the routing of a signal, records and plays back mixing automation, as well as finalizing your project's mix. Each channel in this mixer can be edited in a separate channel setting window for greater control over this channel; however, the Mixer panel allows you to see what you normally need to see when mixing your project. Cubase SL users can configure up to two different mixer panels while SX users will have up to three panels. This is convenient when you want to separate MIDI-related tracks from audio ones, for example. In other words, you can display all your channels under one mixer panel, or spread them out over several if you need to.
Figure 2.3. The Cubase SX Mixer panel (extended on top and similar to SL on the bottom) with inputs, ouputs, and project channels.
How To
To view the Mixer window:
-
Press the F3 key on your keyboard.
-
Or click the Track Mixer button in the Devices panel.
-
Or select Devices > Track Mixer from the menu bar.
Surround Pan
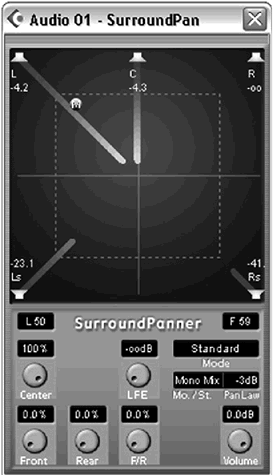
A feature only available on the SX version, the Surround Pan (see Figure 2.4) panel controls the positioning of a sound inside a surround audio channel configuration when you are working with surround sound.
Figure 2.4. The Surround Pan panel (Cubase SX only).
How To
To view the Surround Pan panel:
-
Double-click in the surround channel's pan area of the Mixer panel.
-
Click on the Show Surround Pan button in the extended portion of the Mixer panel (this extension is also only available in the SX version).
The Transport Panel
The Transport panel (shown in Figure 2.5) controls different aspects of your project, such as the position of your left and right locators, Punch-in and -out modes, Cycle modes, playback and recording functions, as well as tempo, click, and sync functions. Also, new to this version is the possibility of monitoring your system's performance as well as the main stereo output levels.
Figure 2.5. The Transport panel.
![]()
How To
To view the Transport panel:
-
Press the F2 key on your keyboard.
-
Or select Transport > Transport Panel from the menu bar.
Metronome Setup Dialog Box
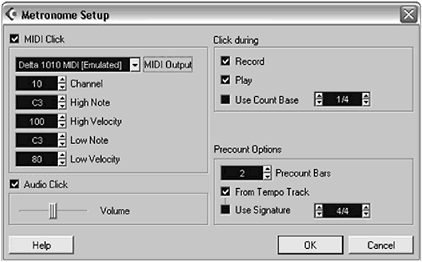
The Metronome Setup dialog box (see Figure 2.6) configures your metronome's click. A metronome click is useful mostly when recording events, but you can also use the metronome during playback to make sure the timing of your recorded performance is accurate.
Figure 2.6. The Metronome Setup dialog box.
How To
To view the Metronome Setup dialog box:
-
From the Transport panel, Ctrl(PC)/
 (Mac)-click the Click button.
 -
Or select Transport > Metronome Setup from the menu bar.
Synchronization Setup Dialog Box
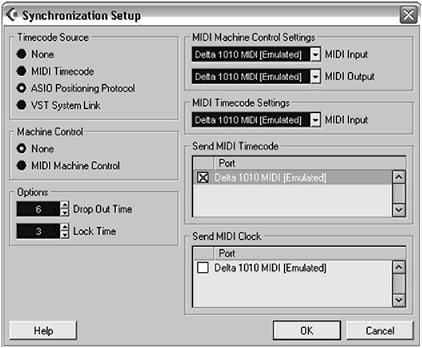
If you are working with video or need to synchronize Cubase with another MIDI device, you can use the Synchronization Setup dialog box (see Figure 2.7) to properly configure Cubase. This dialog box sets Cubase as the master or the slave and also enables you to echo synchronization information to various outputs and in different formats.
Figure 2.7. The Synchronization Setup dialog box.
How To
To view the Synchronization Setup dialog box:
-
From the Transport panel, Ctrl(PC)/
 (Mac)-click the Sync button.
 -
Or select Transport > Sync Setup from the menu bar.
The Devices Panel
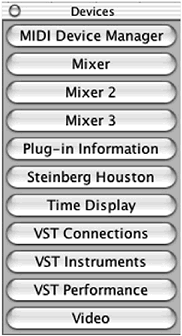
You can access many of the different windows and panels allowing you to configure devices in Cubase SX/SL through the Devices panel (see Figure 2.8). When this panel is visible, you can click on any button in the panel to access its content. The content of each panel is described in this section. This panel also displays any Rewire-compatible applications installed on your computer (Rewire will be discussed in Chapter 12). If you don't have any Rewire-compatible applications or USB/MIDI controller surface, such as the Steinberg Houston in this example, you won't see any in this panel.
Figure 2.8. The Devices panel.
How To
To view the Devices panel:
-
Select Devices > Show Panel from the menu bar.
Plug-in Information Panel
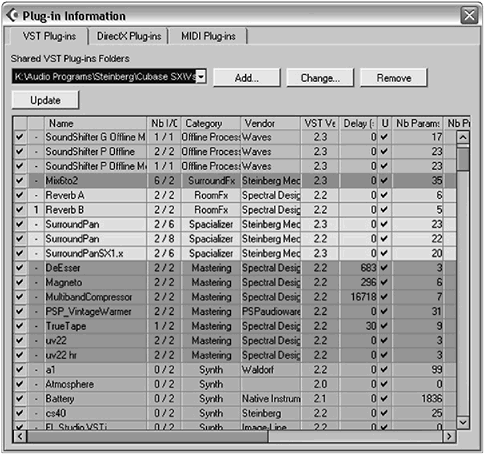
Cubase supports two (Mac version) or three (Windows version) types of plug-ins: VST, DirectX (only on the PC version), and MIDI plug-ins. You can use the Plug-in Information panel (see Figure 2.9) to manage which plug-ins appear in your menu when selecting plug-ins for destructive processing or as a nondestructive process, such as FX channels. This panel displays information about each plug-in installed on your system and also allows you to specify the folders containing your shared VST plug-ins.
Figure 2.9. The Plug-in Information panel.
How To
To view the Plug-in Information panel:
-
Click the Plug-in Information button in the Devices panel.
-
Or select Devices > Plug-in Information from the menu bar.
Time Display
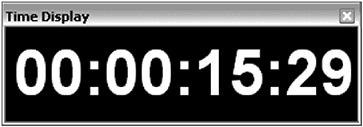
Cubase users working with video know that sometimes seeing the time displayed in different formats simultaneously onscreen is very helpful. New to this version is the time display panel (see Figure 2.10) which does exactly that. You can still see the time displayed in the transport bar and through the play line position, but this time display can be scaled to the size you need it to be so that when you're spotting a commercial, writing down SMPTE cues, you don't need to squint in front of the computer to see where the cue should go.
Figure 2.10. The Time Display panel.
VST Connections
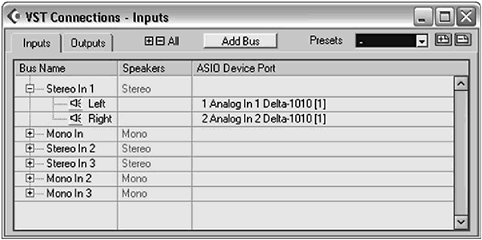
The VST Connections (see Figure 2.11) manages (creates, deletes, renames) audio buses that will be available within your project. It also allows you to associate ASIO-compatible sound card devices to these buses. The number of actual buses you create in a project is up to you, but the number of simultaneous audio ports is determined by your sound card's physical connections.
Figure 2.11. The VST Connections panelInputs tab.
How To
To view the VST Connections:
-
Press the F4 key on your keyboard.
-
Or click the VST Connections button in the Devices panel.
-
Or select Devices > VST Connections from the menu bar.
VST Instruments Panel
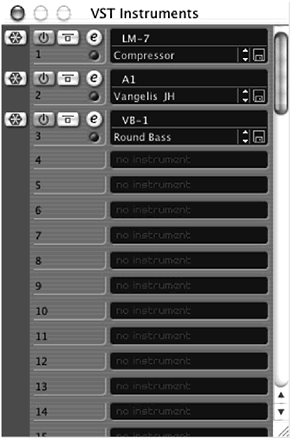
VST instruments or VSTi are VST-compatible software instruments that you can load inside Cubase SX/SL. To load, edit, and manage these virtual instruments, you can use the VST Instruments panel (see Figure 2.12). After an instrument is loaded into memory, you can send MIDI events to it by using a MIDI track to generate sounds. New to this version of Cubase is the possibility of freezing the MIDI events played through the VST instrument. This creates a temporary audio rendering of the MIDI events passing through the assigned VST instrument and unloads this instrument from memory, thus freeing up some computer resources. You'll find more about this in Chapter 5. Note that you can load up to 64 VST instruments in the SX version and up to 16 in the SL version.
Figure 2.12. The VST Instruments panel.
How To
To view the VST Instruments panel:
-
Press the F11 key on your keyboard.
-
Or click the VST Instruments button in the Devices panel.
-
Or select Devices > VST Instruments from the menu bar.
VST Performance Panel
Cubase SX/SL monitors the performance of both your CPU and your hard disk. This capability can be useful to measure when it's time to start creating audio tracks, which contain effects, or create submixes to reduce the load on your computer, especially when your performance indicator shows a high level of activity on a constant basis. If you hear your audio stuttering while playing back your project, take a look at the VST Performance panel (see Figure 2.13). This panel will show you if the CPU is overloaded (top bar); if it is, you should unload some of the real-time processes. On the other hand, if the hard disk is overloaded (lower bar), mix down some tracks. If that doesn't work, try increasing the buffer sizes in the ASIO control panel.
Figure 2.13. The VST Performance panel.

How To
To view the VST Performance panel:
-
Press the F12 key on your keyboard.
-
Or click the VST Performance button in the Devices panel.
-
Or select Devices > VST Performance from the menu bar.
Video Display Window
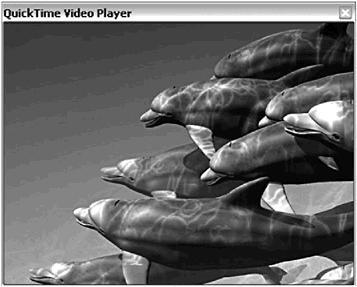
You can load video files into a Cubase project when working on multimedia projects or film projects. Cubase will support a number of formats: QuickTime, AVI, or MPEG on both Mac and PC versions, Windows Media Video on the PC version only and DV format on the Mac version only. Cubase SX (not SL) for PC will also support Windows Media Video Pro format. When you import a video file into a project, you will need to create a video track in order to place the video file on this track. That will allow you to view the video information while working on the audio.
How To
To view the Video Display window (see Figure 2.14 ):
-
Press the F8 key on your keyboard.
-
Or click the Video button in the Devices panel.
-
Or select Devices > Video from the menu bar.
Figure 2.14. The Video Display window.
| [ LiB ] |