Getting Help
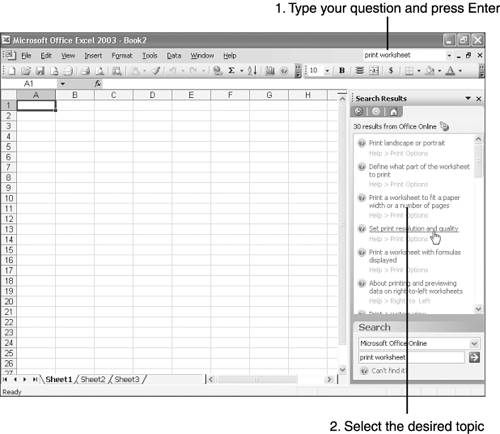
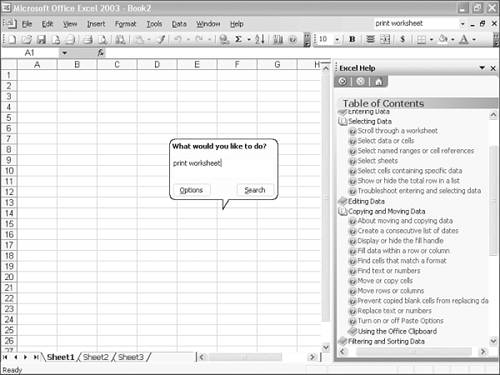
| In Excel 2003, help is just a click away. On the far right end of Excel's menu bar is the question box (the box that contains the text "Type a question for help"), where you can type a question or one or two key words to quickly track down the help you need. Whenever you need help, take the following steps to ask your question:
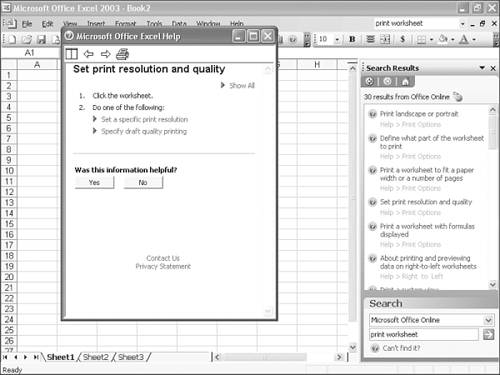
Navigating Excel's Help WindowYou can access Excel's help system at any time by asking a question, as explained in the preceding section, or by opening Excel's Help menu and clicking Microsoft Excel Help, or by pressing the F1 key on your keyboard. Whichever method you employ , Excel displays the Microsoft Excel Help or Search Results task pane that enables you to search for specific help topics. When you click a topic, the Help window appears, as you saw in Figure 2.12. Near the top of the Help window are several buttons that control the size and orientation of the Help window, enable you to print helpful information and instructions, and let you set preferences. The following list describes these buttons :
Note
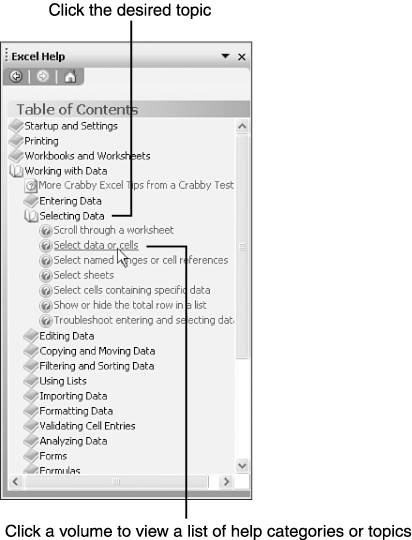
Browsing Excel's Help SystemExcel comes with comprehensive documentation that you can access from within Excel. This documentation acts as a built-in user 's manual. To access it, simply display the Microsoft Excel Help taskbar (by pressing F1 or choosing the Help , Microsoft Excel Help command), and then click the Table of Contents link, as shown in Figure 2.13. Figure 2.13. Click Table of Contents to access Excel's online documentation. The Microsoft Excel Help task pane displays a table of contents for using Excel, as shown in Figure 2.14. The table of contents consists of several volumes of help topics, each of which has a tiny book icon next to it. Click the desired volume to display a list of help categories or available topics. Continue clicking help categories until you find the desired topic, and then click the topic's name . The Help window appears, displaying information relating to the topic or instructions on how to perform the selected task. (When a volume or help category is expanded, you can condense or hide the expanded list by clicking the volume or help category again.) Figure 2.14. Excel Help's Table of Contents displays a complete list of topics. Tip
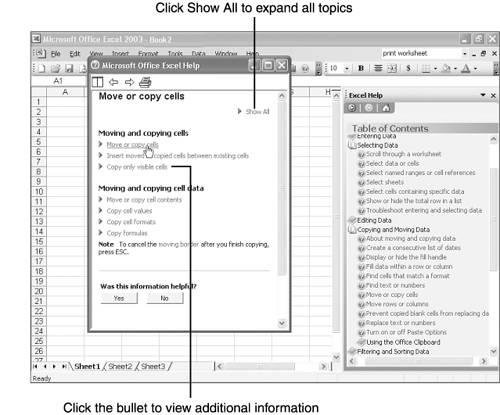
If you're lucky, the first Help screen you see provides the help you need. In most cases, however, you need to probe a little further. Many Help screens display a bulleted list of topics, with the bullets appearing as right-pointing arrow heads. You must click the bullet or the topic's name to expand the information below the bullet, as shown in Figure 2.15. Some Help screens contain links to other related topics, as well. These links typically appear as blue text; when you position the mouse pointer over a link, the pointer transforms into a pointing-hand icon, and the topic's name appears underlined . Click the topic to display its information. Figure 2.15. Many Help screens contain additional, hidden information. If you probe too deep into the help system and want to go back to a previous screen, click the Back button, near the top left of the Help window. Viewing ScreenTipsToolbar buttons and other objects can seem as cryptic as Egyptian hieroglyphics to a novice user. To help, Excel features screen tips that pop up whenever you rest the mouse pointer on an object. ScreenTips appear in their own tiny boxes and display the name of the selected object, as shown in Figure 2.16. Figure 2.16. Rest the mouse pointer on an object to view its ScreenTip. Obtaining Context-Sensitive HelpExcel's help system features an animated tutor, called Clippit, who can help answer your questions. In previous versions of Excel, Clippit was a central character, popping up whenever you needed help and sometimes when you didn't. In Excel 2003, Microsoft chose to make Clippit a little less intrusive . If you feel comforted by having Clippit on hand, you can activate this Office Assistant by performing the following steps:
As you work in Excel, Clippit occasionally asks whether you need help performing a task. Simply give your okay, and Clippit jumps in to lend a hand. You can also ask Clippit questions. Click Clippit, type your question, and press Enter . Clippit displays the Search Results taskbar, listing possible topics of interest, just as if you had typed your question in the question box. Click the desired topic. To make Clippit go away, right-click Clippit and choose Hide . To bring him back, open the Help menu and click Show the Office Assistant . Tip
Obtaining Help in Dialog BoxesDialog boxes can be packed with confusing options and preferences. Fortunately, help is just a click away. In the upper-right corner of most dialog boxes is a button with a question mark on it. To get help, click that question mark button. Excel opens the Help window, which displays a description of the various options available in the active dialog box. |


EAN: 2147483647
Pages: 189
- Chapter IV How Consumers Think About Interactive Aspects of Web Advertising
- Chapter VIII Personalization Systems and Their Deployment as Web Site Interface Design Decisions
- Chapter IX Extrinsic Plus Intrinsic Human Factors Influencing the Web Usage
- Chapter XIV Product Catalog and Shopping Cart Effective Design
- Chapter XVII Internet Markets and E-Loyalty