Recording for Video
Most of what has been discussed in this book about audio recording applies to music created for video; see, in particular, Chapter 3 for information on how to connect devices and Chapter 6 for information about microphones and recording, as well as Chapter 10 for general mixing strategies. There are some techniques that are specific to sound production for video, however. The single thorniest issue to deal with is synchronization.
Separately Recorded Film/Video and Audio
If audio and video are recorded on the same storage medium at the same time on the same device, you shouldn't have to worry about synchronization. For instance, if you recorded sound to your DV camera by connecting a microphone to its audio input while shooting video, that recorded sound should be synced to picture. (If it falls out of sync, you probably need to get a better camera.)
There are many cases when you'll need or want more than one recorder. You can't record sound onto film formats like 16mm and 35mm, so if you're using one of those formats you'll have to carry a second deck for audio. Video formats like DV and HDV can contain audio as well as video, but a dedicated audio recorder can provide higher-quality sound. Many video cameras are geared for video footage, not for pro audio inputs, and lack good quality XLR mic inputs. By bringing along a separate audio recorder, you can avoid the video camera's low-fidelity audio capture.
The use of separate recorders for picture and sound is called dual system recording . It requires that you put the two media files together again in the postproduction phase. Pro video editing software is capable of merging the two recordings so that they're synchronized, using time information recorded on the storage medium (timecode), or some other reference point.
There are three basic elements to the process of preparing synced video and audio via the dual system recording method:
-
Recording: The audio and video captured during production should ideally have some form of timecode stream or other common time reference, which is included in each of the recordings when they are made.
-
Capture: Transferring your audio and video content onto your hard drive system and into your editing program (Final Cut Pro, Avid, etc.) should preserve timecode information for editing purposes.
-
Synchronization: Once you've brought in video and audio using either timecode or another reference, you'll use your software to merge your clips based on that time reference so that they're perfected synced.
The first step is to make sure there's some kind of reference in the recordings that you can use to synchronize them.
Recordings and Time Reference
Technical details aside, it's pretty easy to understand the need for recording a time reference by which you can sync. Imagine you're at a track-and-field race between two runners. Instead of shouting "3, 2, 1, go!" or firing a starting pistol , each runner just runs the 100 yards at a different time, and no one has a stop watch.
| | Get all your devices on the same page: The most important task when recording is to set timecode to the same frame rate in all your devices and software. Otherwise , you'll have to deal with pulldown : the conversion between timecodes with different frame rates. Considering pulldown could be conversion between 29.97 fps and 25 fps, it can obviously cause some major problems, so it's best to avoid the issue entirely by matching all your media's frame rates when possible. |
Who was faster? There's no way to tell, because there's no common time reference. The start point (the moment they started running) and the end point (the moment they crossed the finish line) happened at different times, and there was no common measurement of time (no stopwatch). Any one of these three elements would solve this problem: if they crossed the finish line at the same time, whoever started running first lost. If they started at the same time, whoever crossed the finish line first won. If someone was watching a stopwatch, he or she would be able to easily measure the length of each run, even if the runners started and finished at different times. Notice that you don't necessarily need the stopwatch: you just need some common reference for a starting or ending point.
The same is true for video production. To synchronize your recordings, you need at least one of three elements: an in point (the starting line from the example), an out point (the finish line), or a common stream of timecode (the stopwatch).
Slates and clapperboards
Professional film and video crews begin shooting by adding a slate , a visual and auditory marker that designates the start of each take. Even if you've never seen a professional production, you probably know what this looks like: someone shouts, "Take 4!", holds a flat board in front of the camera, and then "claps" the hinged top of the board.
You can buy a slate, also called a clapboard, clapperboard, or "clapper," at a video supply store ( Figure 12.10 ). Simple models run as little as $10, so there's not much excuse for not using one. The old-style models were made of wood and had chalkboard fronts for labeling which scene was which. Modern models are fancier, with dry-erase whiteboards , and even digital timecode readouts on high-end slates. The design is significant because it actually creates two reference points at once: you can align the sound of the transient, the "clap sound," with the visual reference of the top of the hinged clapper coming in contact with the base. (With a digital LED readout, there's a third, numeric timecode reference; you can literally see the numbers of the timecode as the stream is received electronically by the slate.)
Figure 12.10. Slates range from simple to sophisticated, but they have one thing in common:"clapping" the hinged top provides both a visual and auditory cue for synchronizing sound and picture. Advanced "smart slates" like the Denecke Time Code slates can also generate, read, and display timecode. (Photo courtesy Pawel Wdowczak)

Even if you don't have a pro clapper, any sharp transient sound with a clear accompanying visual will do. You can even clap your hands in front of the camera. (Banging the actor on the head is not generally suggested, although in the underwater shooting of James Cameron's The Abyss , the crew banged the helmets of their actors to get a good sound.)
| | Slate and timecode equipment makers : Ambient Recording (www.ambientaudio.com) Denecke, Inc. (www.denecke.com) |
Using a slate at the beginning of a take gives you your in point, but to be safe, you should also add a slate to the end of your take; in other words, clap your clapboard at the beginning and ending of everything you shoot. This serves two functions. First, if something goes wrong with your start slate, you have a backup slate from which you can sync video and audio. Second, if a problem with one of your recording devices is causing timing to drift , you'll be able to identify and more easily fix the problem.
Even if you're generating timecode for automatic synchronization, adding slates to the beginning and end of a take is a good idea. The additional reference points can be used if your timecode fails, and can help troubleshoot timecode issues. To save yourself headaches , then, even if you're not involved in shooting, make sure whoever is in charge at least adds slates, even if they're doing nothing fancier than clapping their hands.
Slates are also typically added in video and audio editing; in this case the "slate" is a screen added to the front end of the footage, not the physical object shown in Figure 12.10. This screen also includes the auditory cue of the 2-beep, which is the editing equivalent of the "clap" sound added to footage by the physical slate.
Timecode signal
With pro recording equipment that can synchronize to and record an external timecode signal, you can perform more sophisticated, automatic synchronization. When you record a common timecode signal onto multiple devices, everything you record should be coded with the same time information regardless of which device recorded it. That way, your editing software will be able to automatically merge footage from any device. For instance, 3 minutes, 2 seconds, 4 frames will mean the same thing on your two DV cameras and your audio recorder, because each recorded not only audio and/or video but also a signal printed to the tape at that moment identifying time at which the recording took place.
|
Most recording devices write some kind of timecode as they record: if you look at the display of a DAT or DV recorder, for instance, you'll see timecode displayed on the counter. Not all counters show timecode; the way you can tell this display represents the timecode written to the tape is by moving the tape to another machine and viewing its counter.
The trick for synchronization is that this can't just be any timecode; you need to make sure every device that's recording has exactly the same timecode. This timecode source is usually provided as a SMPTE timecode signal.
You won't normally hear the SMPTE signal, but a device capable of reading the timecode will be able to extract it from an otherwise inaudible track, so that everything recorded on that device contains the timecode reference. (On tape, this is an extra physical track; in digital video and audio files, it's encoded digitally into the file.) When you capture the clip to a pro video application, the timecode is included in your video project, so the software can automatically synchronize clips. (Most often, but not always, this source is encoded as SMPTE timecode; see the sidebar, "SMPTE and Other Timecode Formats.")
|
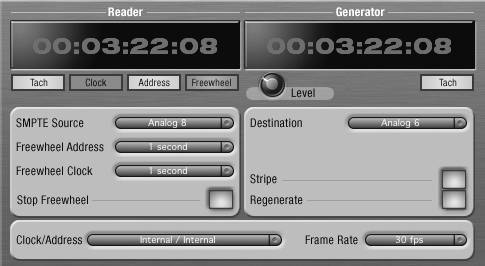
To generate timecode during the recording process, you need a timecode source or generator. This can be a computer with peripheral hardware capable of generating timecode signal, or a recording deviceanything with a timecode out. (To use a computer, you'll need either an audio interface that includes SMPTE timecode inputs and output jacks , like the MOTU 828 mkII and Traveler, or a dedicated synchronizer hardware unit; see the sidebar, "Digital Recorders and Formats.") Second, you need a way of receiving and recording the signal; each device needs to be compatible with the timecode signal. These devices usually receive this signal via a timecode-in jack, a dedicated audio connection. You'll need to check your audio recorder's specs to see if it can send and/or receive timecode information; many cannot, particularly if you're using inexpensive semipro equipment. (In that case, you'll need to sync via a clapperboard or other reference instead.)
| | Leaving a sufficient lead-in and lead-out: Even digital equipment needs a margin of error for accurate timecode. Any mechanical glitch on a DV tape or other delay can cause a tiny timeout dropout. So to get a fully synchronized tape, leave a few seconds before the critical part of your recording to ensure complete timecode recording (10 counts is a safe reference typically used by pros). Don't hit Stop once you're done recording; leave a sufficient lead-out. If you're using tape, you'll also want to rewind slightly over the lead-out prior to restarting recording so there isn't a timecode break between subsequent takes. |
Once you have both a generator and a device or devices to receive timecode, you'll have several options for what kind of timecode to use, but you'll most frequently encounter one of three popular types:
-
Free run: Like two spies in a James Bond movie synchronizing watches before a mission, equipment using free run sync sets a synchronized point and then starts running, disregarding any incoming timecode. The camera, the audio recorder, the computer, and all other devices simply start their clocks and run as long as they're on. The timecode can be encoded as either time of day or an arbitrary specified start point.
-
Record run: Instead of running continuously, record run devices record timecode only when they're on. The problem is that stopping recording or switching off a device will throw timecode out of sync.
-
Jam-sync: Jam-sync synchronizes your device (such as a camera) to an external synchronization source. For instance, cameras set to jam-sync might receive a SMPTE timecode signal from a computer or audio recorder, overriding their internal timecode with that external signal, as recorded to their audio track.
| | Shooting on HD: New HD (High Definition) video formats pose new challenges for synchronization; slate manufacturer Denecke has a good overview of these issues entitled "24P Info : Time Code and the High Definition Camera" (http://denecke.com/24pinfo.htm). |
The advantage of free run and jam-sync over record run is that they'll work even if devices are stopped or started at different times, or even powered down, because they're all using the same timecode.
Recording Formats
Recording formats can be complex, so here's some general advice: when in doubt, opt for 48 kHz, 16-bit audio, and make sure there's some kind of time reference embedded in the recording: an in point, an out point, a timecode stream, or some combination of the three.
| | Popular pro audio recorder vendors : Fostex (www.fostexinternational.com) Marantz (www.d-mpro.com) Nagra (www.nagraaudio.com) Sony (http://bssc.sel.sony.com/BroadcastandBusiness) Zaxcom (www.zaxcom.com) |
Generally speaking, digital video footage is shot at its highest-quality setting at 48 kHz, 16-bit. (DV cameras can be set to other settings, but the highest-quality setting is preferable.) Stereo sound for DV will usually be delivered at this quality.
Surround (theatre-style, multichannel mixing) and other audiovisual formats open up other possibilities, but are dependent on delivery method; see Chapter 10 for an extended discussion of surround mixing. Here again, recording at 48 kHz is preferred, because DTS surround sound (Digital Theater Systems) and Linear PCM (LPCM) both encode each audio channel at 48 kHz. (See the sidebar, "Digital Recorders and Formats.")
High-end recorders geared for video work often encode audio in the Broadcast Wave Format (BWF). BWF is a format based on the Microsoft WAV file format that adds additional timecode information to the file, making it easier to sync with video. The format was approved by the European Broadcast Union and is used as a standard internationally. BWFs can be read by most DAWs and high-end video editors on both Windows and Mac, so all you have to do is drag them off your hard drive recorder onto your computer, usually via USB. (Note that if you have a semipro digital audio recorder that uses plain- vanilla WAV or AIFF, you'll lack this timecode information and will need to sync it manually.)
|
Postproduction: Capture and Synchronization
Once all your audio and video has been recorded, the final step is to bring it into the editing environment for postproduction. Even working with digital media, some additional steps are necessary to bring your media together. You'll need to make sure your media is captured properly to the computer so that you retain timecode information. The best way to do this is by importing it into a video editing project using your video editing software's capture utility. (If you're not doing the video editing, you can have an editor do the capture for you and send you a file with the video for timing reference.)
Capturing video and audio
So you have your DV video on tape, you have your computer, and you have your video editing software: everything's digital, so you're done, right? Not exactly: since DV (and HD digital video cameras) all shoot to tape, you'll have to capture your media to your hard drive in real time. The tape will play back at normal speed, and the computer will record video signal, most often through a FireWire connection to a camera or tape deck. You need to make sure the capture software is capable of recording timecode information along with the video and/or audio content, so that when the software records that information to your hard drive, the timecode is maintained .
There are three elements to this capture process: a device playing your source content, a computer, and video editing software. The source is called a Video Tape Recorder (VTR); it's typically either a DV camera or a dedicated DV playback deck. With DV, the computer is connected to the VTR via a simple FireWire cable. You click Record in your video software, and the software records whatever is on your tape to a file on the hard drive.
Device Control is a protocol that's used to remotely control the deck or camera (for start, stop, and other transport operations), enabling you to capture video and audio from a device and write edited video and audio back to the device. Device Control is essential for synchronization, because it also transfers timecode from your recording device to your computer. Using a DV camera or deck, Device Control is usually plug-and-play, even with cheap consumer-grade cameras. Connect the camera via FireWire, and when you click Record in your video editing application, the camera will start playing and will transmit timecode information to your software. (If you're working with a professional audio recorder, you might also use a serial RS-232 or RS-422 connector, which can be connected to the computer via an adapter or a pro-level video/audio capture card.)
To keep everything in sync, you need a tool that's up to the job. Entry-level tools like Apple iMovie, Adobe Premiere LE, and Microsoft Windows Movie Maker can all record video from a DV camera and other sources, but they generally don't support timecode capture and synchronization. Even the full version of Adobe Premiere requires a third-party plug-in for Device Control support. Fortunately, Sony Vegas, Apple Final Cut Express and Final Cut Pro, and Avid's product line all support Device Control and synchronization. You can also use specialized capture, logging, and batch processing tools like Squarebox's CatDV (www.squarebox.co.uk).
Using the capture feature in one of these applications, you'll record video and audio to a hard drive file and import it (along with any meta-information ) into your video project. Capture tools perform other useful tasks in addition to retaining timecode information. They log recorded information, so you can keep track of what footage came from which camera or recorder on which date and what it containsnot much of a consideration for your home movie, perhaps, but a big deal for industrial-strength, full-length projects. (Specifically, logging records a reel number , among other information like comments. Although the word "reel" used to designate a physical spool of film, it now identifies clips of video that came from the same video tape.) Digital video editing software can also organize content based on related media (like audio and video from a multicamera, multirecorder shoot), subject matter, or any other system you want to use.
Importing audio is usually even easier. To add audio with embedded timecode in Broadcast Wave files, you might connect your BWF digital recorder via USB, drag the files to your hard drive, and then import them to a DAW or audio editor with BWF compatibility, or directly into your video software.
With other formats like ordinary WAV files, you can also drag-and-drop, although you won't retain timecode information since it's not included in the file; the file always begins at 0:00:00. Audio and video captured without timecode can either be imported as is or dubbed onto a DV deck to add timecode information. Either way, you'll need to sync it manually.
Synchronization
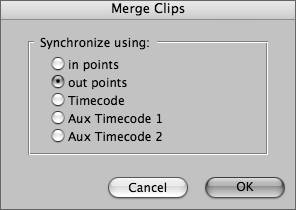
If you've shot video and audio in a dual system recording setup (via separate decks), your final step will be to synchronize the two media. To reconnect the video with its associated audio, you'll use the "merge" function in your video editing software ( Figure 12.14 ). If all your clips have the same timecode, you'll be able to merge them automatically. If not, here are the methods by which you can manually sync them:
-
Match a slate: If your footage has a slate at its beginning or end, you can sync with that. If the slate is at the beginning, you'll mark the in points; if it's at the end, you'll mark the out points. Let's use the in point as an example. To find the slate in the sound, scrub over the audio until the playback cursor is right over top of the "clap" sound, and mark that spot as an in point. To find it in the video, move in slow motion to the exact frame where the top hinge of the slate makes contact with the bottom of the slate. Mark that spot as the video's in point. Then merge the clips using the in points. (This method will also work if you use a person clapping his or her hands as a "poor man's slate.")
-
Synchronize a 2-beep: Using the 2-beep, you can either visually overlay the clips by looking at the waveforms or scrub over the audio to the right location and place a marker on each. Then set your audio editing software so that segments will snap to markers when dragged.
-
Synchronize identical timecode: Your video application should be able to select a timecode source from a group of clips to merge them according to identical timecode. You should still check the 2-beep and/or in and out slates to double-check that they've synced successfully.
-
If there's no reference at all, synchronize manually: This is the trickiest case. In this situation, you'll need to manually overlay audio and video using your video editor's nudge feature. First, get the two elements in the same ballpark: look for any reference at all, like a clear transient, start, or end part that you can identify visually or aurally, checking the waveform display in the timeline view or any other landmark contained in both audio and video. Next , align that element as well as you can so you're at least in nudge range. Then nudge by seconds, then by frames, for a frame-accurate sync. (Many applications even let you edit at the subframe level, if needed.)
Figure 12.14. Merge clips using one of your time references to align video and audio. In Final Cut Pro, for instance, select audio and video clips and choose Modify > Merge Clips.
| | Do you really need timecode sync? The short answer is no. The reality is, many shootsnot just independent films , but commercial ones as wellrecord video and audio without true timecode sync. The reason is that many recorders lack this feature, and, on a nontechnical note, audio and video people often don't pay much attention to each other on a shoot. Using a slate (even if it's someone clapping their hands at the beginning and end of a take mimicking a slate) is the next best thing. In the absence of a clap, you can use the manual method of nudging your audio until it lines up with video. It's more work, but once you've aligned the two, assuming neither recording drifted in timing over the take, you're done. |
Dialog
Matching music to video involves marrying the dual sciences of video and music. Matching spoken word to video usually just comes down to a lot of takes and raw human skill. It's often impossible to get clean dialog recordings on location because of ambient noise or technical problems. Adding dialog to video after it's been shot is called Automated Dialog Replacement (ADR). (Alternatively, ADR is sometimes said to be an acronym for Additional Dialog Recording, which would be more accurate, since there's nothing particularly automated about it.) The challenge of ADR, like dubbing, is to make the words line up with the pacing of the footage, especially if there are onscreen lips the viewer will be able to see. If the timing of the dialog is off, your video will look like a cheap English dub of a Hong Kong action flick.
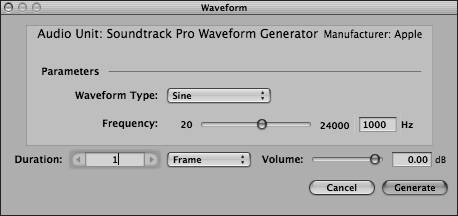
You can perform ADR very easily with any audio software that supports video playback during looped audio recording with multiple takes ( Figure 12.15 ). The computer software duplicates what filmmakers have done for decades: you'll keep looping the video while your actor or actors perform the lines. Once you're satisfied that you have enough takes, you can choose whichever take works best with the picture. The advantages of looping are twofold: first, your actors have plenty of shots at getting it right, and second, after a few loops they'll start to memorize the pacing.
Figure 12.15. Having trouble getting your narration or dialog right the first time? Try looping recording so you can do multiple takes, rapid-fire, until you get it right. Soundtrack Pro, for example, will record multiple takes automatically with cycling turned on and will keep rolling the video file as you record.

Since you'll typically be recording directly to a precaptured digital video file, you can then export the video clip with the new dialog audio mixed in, and the two will be synchronized.
|