48. Save a Custom-Designed Transition  BEFORE YOU BEGIN BEFORE YOU BEGIN
44 About Transitions 45 Fade In or Out of a Video Clip
 SEE ALSO SEE ALSO
64 Copy Attributes from One Clip to Another 65 Create and Save a Preset
Any of the transitions that allow you to customize its motion (that is, where you can specify Scale and Position values), opacity, or Image Control can be saved for later use. Because there is no preset transition that fades in and out on a clip, you will save that customized transition effect for reuse later. If you worked through 45 Fade In or Out of a Video Clip, you can create it once, save it, and use it over and over. 48. Save a Custom-Designed Transition 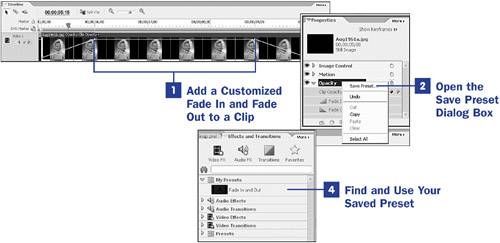 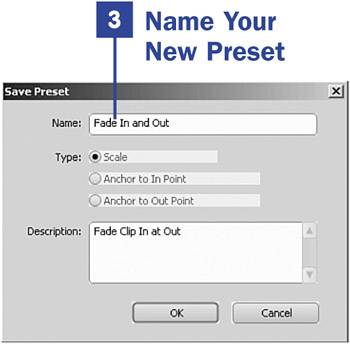
1. | Add a Customized Fade In and Fade Out to a Clip
Make sure you have one clip that's 5 seconds long or 150 frames (NTSC), with no effects or transitions applied, on the Timeline. Follow the instructions in 45 Fade In or Out of a Video Clip. Apply the Fade In effect to the beginning of the clip and the Fade Out effect to the end of the clip. As you can see by the keyframe markers on the Timeline, the default duration of each effect is 30 frames or 1 second. The first second of the clip shows the Opacity line going up (the Fade In effect) and the last second of the clip going down (the Fade Out effect). You can change the duration of these effects by moving the keyframe markers until you get the effect for which you are looking.
 NOTE NOTE
After this transition is saved, whenever you apply it to a 5-second clip, the transition will fade the clip in for 1 second, show 3 seconds of the clip, and end with a 1-second fade out. | 2. | Open the Save Preset Dialog Box
To save your new, customized transition, click the clip to which you've applied the Fade In and Fade Out effects. This action highlights the clip and opens it in the Properties panel. In this case, you have created a transition that affects the Opacity of a clip; therefore, the settings and keyframes are under the Opacity property in the Properties panel. Right-click the Opacity heading and choose Save Preset from the context menu. The Save Preset dialog box opens.
TIP Saving a customized effect is discussed in detail in 65 Create and Save a Preset. | 3. | Name Your New Preset
In this dialog box, name the customized transition and select the Type of preset it is. For this example, leave the Type option set at the default setting Scale, and type a description to remind you of what the preset does. Click OK to save the custom transition or click Cancel if you decide not to save it now.
When creating a preset, you have three options: Scale, Anchor to In Point, and Anchor to Out Point:
The Scale option scales the keyframes markers proportionally to the length of the clip to which it will be applied. Applying this preset also deletes any existing keyframes on the applied clip. The Anchor to In Point option places the first keyframe marker the same distance from the first frame in the applied clip as it was from the original clip's first frame. This option does not do any scaling. The Anchor to Out Point option places the last keyframe marker at the same distance from the last frame in the applied clip as it was from the original clip's last frame. This option does not do any scaling.
TIP Use preset names that will easily remind you, at a glance, what that saved preset does. | 4. | Find and Use Your Saved Preset
The new transition is added to the My Presets category in the Effects and Transitions panel. You can now drag and drop your customized transition onto any clip on the Timeline.
|
|