40. Slow/Speed/Reverse Audio/Video  BEFORE YOU BEGIN BEFORE YOU BEGIN
29 About the Timeline and Video Tracks
 SEE ALSO SEE ALSO
50 Freeze a Frame
If you've ever thought about doing some slow-motion instant replays, speeding up a clip to look like a silent movie, or playing your clip in reverse, the Time Stretch tool is for you. You can use the Time Stretch feature two ways: The first is a button on the Timeline that enables you to speed up or slow down a clip by simply dragging. The second option is found in the clip context menu and allows you to fine tune the speed, duration, reverse speed, and audio pitch of the selected clip. Using the Time Stretch tool, you can have multiple copies of a clip on the Timeline, play the first copy at normal speed, then show the slow-motion instant replay, then show the clip again in reverse, and finally play it in fast motionall in the same movie. 1. | Select the Time Stretch Tool
Make sure you have a video clip on the Timeline. At the top-left side of the Timeline is the Time Stretch button. Click this button and move the mouse pointer over the edge of your video clip. Notice that the pointer changes to the Time Stretch icon.
| 2. | Drag the Outer Edge of a Clip
Click the outer edge (either the left or the right edge) of the video clip and drag the edge. Drag to the right to produce a slow-speed effect; drag to the left to produce a fast-speed effect. What you are actually doing is shortening or lengthening the duration of the clip. Slowing the clip down requires Premiere Elements to repeat frames, speeding it up requires Premiere Elements to remove frames.
| 3. | Or Set Time Stretch Options
If you want finer control over the speed of your video clip, you can get it using the Time Stretch dialog box. Undo the drag-and-drop changes you made to the video in steps 1 and 2, and then right-click the clip to open the clip context menu. Select the Time Stretch option to open the Time Stretch dialog box.
40. Slow/Speed/Reverse Audio/Video 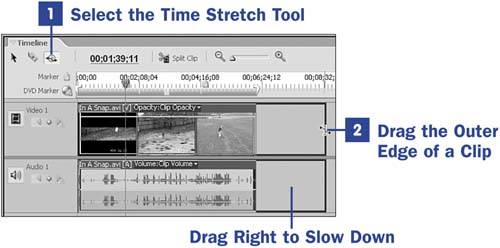 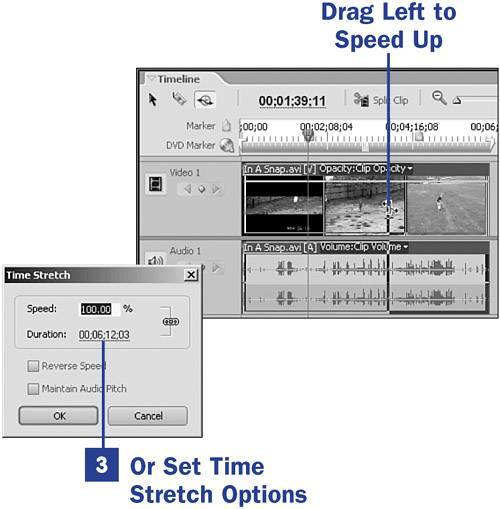
Here you have a bit more control over what happens to your clip. You can set the precise percent of increase or decrease in speed (a value less than 100% slows down the clip, a value over 100% speeds up the clip), change the speed by setting the duration of the clip (a shorter duration than the original speeds up the clip, a longer duration slows down the clip), choose to play the clip in reverse, and maintain the audio pitch (keeping the pitch of the audio portion of the clip unchanged).
 TIP TIP
The Duration setting in the Time Stretch dialog box comes in very handy for music tracks. If your music is a little too short or a little too long, you can set the duration of the audio clip to match the duration of the video on the Timeline. A small difference in the duration audio clip is not noticed when you're watching the movie. This happens in television quite often, to fit a 32-minute program into 30 minutes or a 2-hour movie into 1 hour and 55 minutes. That is what makes room for all of those commercials. After you have made the necessary modifications, click OK. These settings are applied to your clip.
|
TIP You can apply the Time Stretch feature to clips not yet on the Timeline; just right-click the clip in the Media panel and choose Time Stretch from the context menu.
|