3. Nest Your Panels to Save Desktop Space  BEFORE YOU BEGIN BEFORE YOU BEGIN
1 Start a New Project 2 Customize Your Workspaces
As you have seen, there are many panels, windows, dialog boxes, and workspaces. With all of that going on in one screen, it can be hard to keep track of where everything is. For this reason, Premiere Elements helps you create the perfect working environment, just for you. The panels can be moved anywhere on the screen. The panels can be nested in with other panels and can also be free floating. In this task, you see how easy it is to customize you own workspace according to your workflow needs.  NOTE NOTE
After moving or nesting panels, the workspace remains that way until you either make another change or restore the workspace to its default. The panel arrangement remains as you left it even after closing and re-opening the program or opening another project.
1. | Drag a Panel
Simply click the tab at the top of the panel and hold down the left mouse button to drag and drop the panel wherever you want it to be. As you drag the panel, notice that three-dimensional boxes appear to show you what space is available for your panel and what it would look like if it were dropped at that location. You can drop the panel in a whole new panel, or drop it in a panel that already contains other panels (this is where the space savings comes in). You can nest all the panels in one panel if you likethe possibilities are pretty much endless. It just depends on what is best for the way you work and what panels you tend to need most often, as well as what panels you don't use. Even the Timeline can be nested with other panels. Try moving a few panels to get a good idea of how the process works. Don't worry if things get a little messed up; at the end of this task, we will show you how to restore your workspace.
3. Nest Your Panels to Save Desktop Space 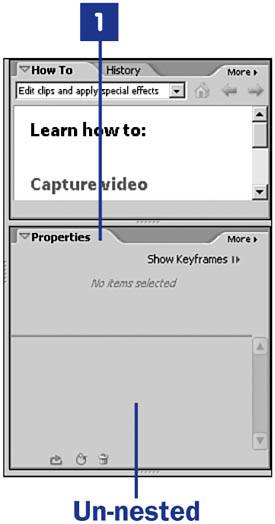
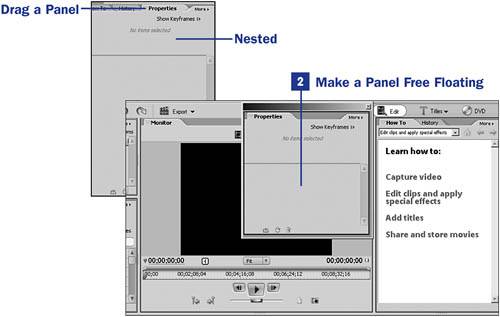 
| 2. | Make a Panel Free Floating
If you want to have a particular panel floating rather than in another panel, Premiere Elements allows you to do that also. Drag the panel, as described in step 1, to the top of your screen (the taskbar area) and drop it there. That's all there is to it. Now you have a free-floating panel you can move anywhere on the screen. Just be careful where you drop it, or you will nest it within another panel.
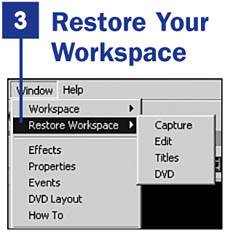
| 3. | Restore Your Workspace
The ability to restore your workspace will come in handy on more than one occasion, I'm afraid. As you start moving things around, panels begin to hide themselves or end up in places other than where you want them. In that case, you can always restore the workspace to its default appearance. Choose Window, Restore Workspace and then click the workspace you want to restore (Capture, Edit, Titles, or DVD).
NOTE After you restore a workspace, it remains that way until you again make changes. Changes made to the workspace are not kept in the History panel, and there is no way to restore to a custom workspace; you can only restore a workspace to its default configuration. In its seemingly unlimited ways to customize the application to your needs, Premiere Elements has gone all out with these types of features. Features that allow you to be in control of your own workspace and workflow are very important in the world of video editing, something that Adobe knows a lot about.
|
|