Customizing the Look of Your Bridge
|
| Back in Photoshop CS, you had little control over the look of the File Browser, but with the Adobe Bridge, you've got a number of options for personalizing the look and feel. But not only that, you also have more control over what information will be displayed. Here's how to set up your Bridge your way: Setting Your BackgroundYou have three basic choices for the background color that will appear behind your thumbnails: black, white, or some shade of gray. To set your background color, go under the Bridge menu (on a Mac) or the Edit menu (on a PC) and choose Preferences. When the Preferences dialog appears, with General selected (in the list on the left side of the dialog), you'll see the Background slider under the Thumbnails section. Just drag the slider where you want it (I chose a medium gray), and then click OK. 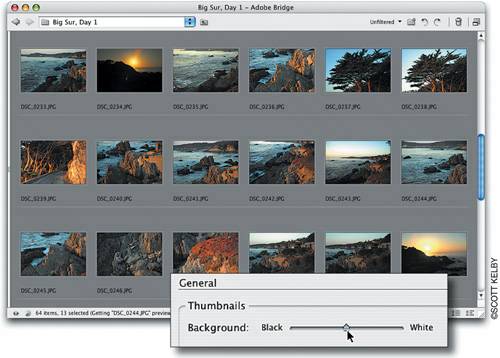 Which Info Do You Want?By default, the name of each file is displayed below the thumbnail, but you can add up to three additional lines of information (which are gathered from the EXIF data embedded in the file by your camera, plus the metadata added by Photoshop and the Bridge itself). First, press Command-K (PC: Control-K) to open the Preferences, and under the Thumbnails section in the General category, turn on the checkbox beside each of the three lines of info you want to add. Then, from the pop-up menus, choose which type of information you want to appear on each line. 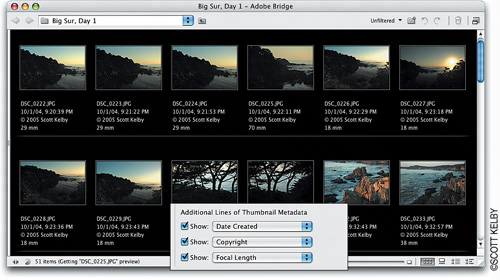 Tip So you can add up to three lines of extra information below your thumbnails, but what if you want to see just the thumbnails, and temporarily hide all that extra information? Just press Command-T (PC: Control-T) and only the thumbnails will be displayed. This is a handy shortcut, because all those extra lines of info take up space, and when you're displaying three extra lines, plus the file's name and perhaps even a rating, fewer thumbnails fit in the same amount of space. 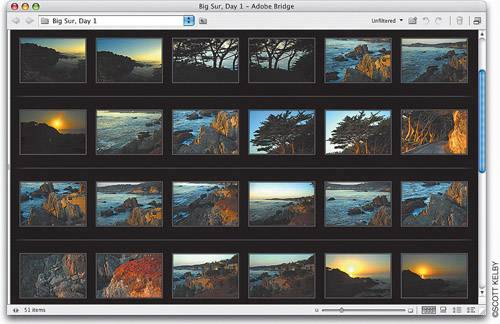 Adding More PanelsAlthough the Bridge is designed to have three palette panels visible on the left-hand side, you can actually have more (or fewer). To add an additional panel to the Bridge, you first have to go up to the View menu and choose the palettes you want visible. Then, click directly on the palette's tab and drag slowly upward (or downward, if your palette is at the top of the Panel area) until a thin bar highlights between the two currently visible palettes. When you release your mouse button, a new panel section will appear. This way you can have all five palettes visible all the time (if that's your "thing"). 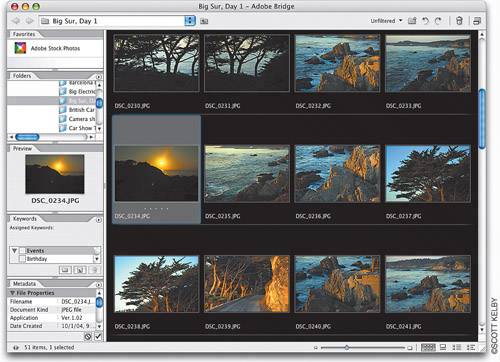 |
|
EAN: N/A
Pages: 187