Advanced Skin Softening
|
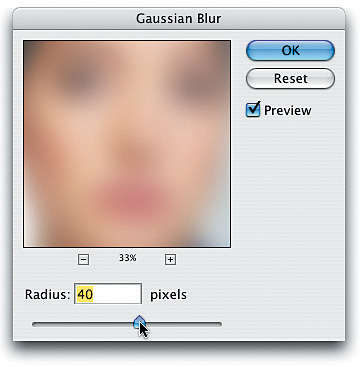
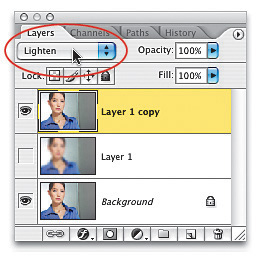
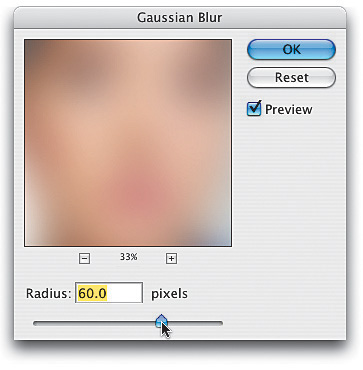
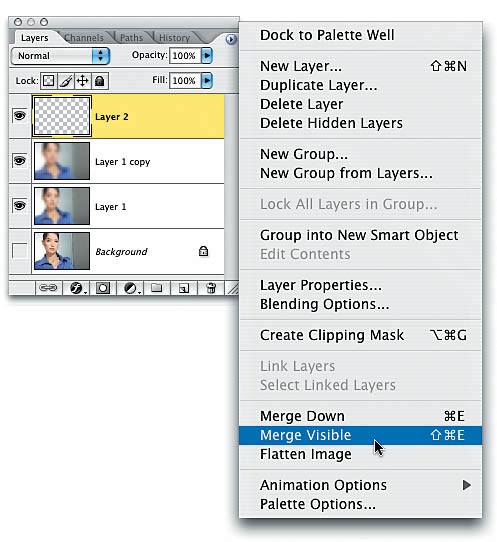
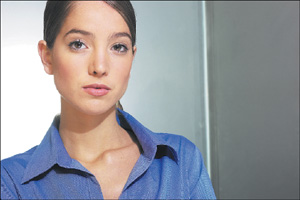
This technique, which I picked up from Kevin Ames, does an amazing job of simulating a Hasselblad Softar No. 2 filter in that it softens the skin tones, but at the same time introduces a little bit of soft flare and lowers the contrast of the imageperfect for fashion photography. Step OneOpen the photo you want to soften. Press Command-J (PC: Control-J) twice to create two duplicates of your Background layer in the Layers palette. Hide the top copy (Layer 1 copy) by clicking on the Eye icon next to it in the Layers palette, and then click on the middle layer (Layer 1) to make it active and change its layer blend mode from Normal to Darken. 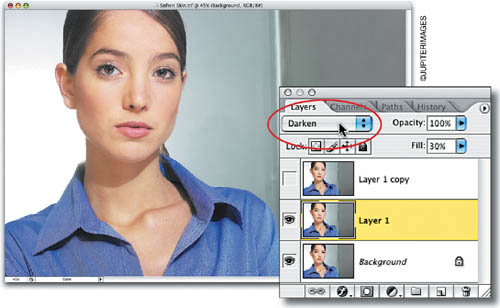 Step TwoGo under the Filter menu, under Blur, and choose Gaussian Blur. Apply a 40-pixel blur to the photo. Step ThreeIn the Layers palette, hide the middle layer (Layer 1) from view by clicking on its Eye icon, and then click on the top layer (Layer 1 copy) and click in the empty box on the left to make it visible again (the Eye icon will reappear). Change the layer blend mode of this top layer to Lighten. Step FourNow, go back to the Filter's Blur sub-menu and apply a 60-pixel Gaussian Blur to this top layer. Step FiveAfter you've applied the blur, click on the middle layer (Layer 1), click on the empty box to reveal its Eye icon, and then lower its Opacity to 40% in the Layers palette. Step SixHide the Background layer from view by clicking on its Eye icon, and then create a new layer by clicking on the Create a New Layer icon at the bottom of the Layers palette. Click-and-drag this layer to the top of your layer stack. Then, press-and-hold the Option (PC: Alt) key and choose Merge Visible from the Layers palette's flyout menu. This creates a flattened version of your document in your new layer. Step SevenIn the Layers palette, make the Background layer visible again by clicking on the empty box on the left, but hide the two duplicate layers in the middle (Layer 1 and Layer 1 copy) by clicking on their Eye icons. Make sure the top layer in the stack (Layer 2) is still the active layer, and then lower its Opacity to 40%. Lowering the Opacity of that layer creates the overall softening effect (which is fine if you want an overall effect), but in most cases, you won't want to soften the detail areas (eyes, lips, etc.).  Step EightClick on the Add Layer Mask icon at the bottom of the Layers palette to add a layer mask to your blurred layer. Press the letter X until your Foreground color is black, and then press B to get the Brush tool. In the Options Bar, click on the thumbnail after the word "Brush" and choose a medium, soft-edged brush from the Brush Picker. Now, paint over the areas that should have full detail (lips, eyes, eyebrows, eyelashes, hair, ears, clothingpretty much everything but the skin). Note: Press the Left Bracket key to make your brush size smaller or press the Right Bracket to make it larger.  Before After |


|
EAN: N/A
Pages: 187