Transforming a Frown into a Smile
| This is a pretty slick technique for taking a photo where the subject was frowning and tweaking it just a bit to add a pleasant smilewhich can often save a photo that otherwise would've been ignored. Step One©ISTOCKPHOTO/JAIMIE D. TRAVIS 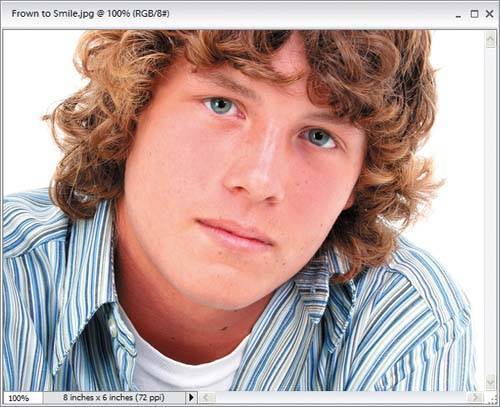 Open the photo that you want to retouch. Step Two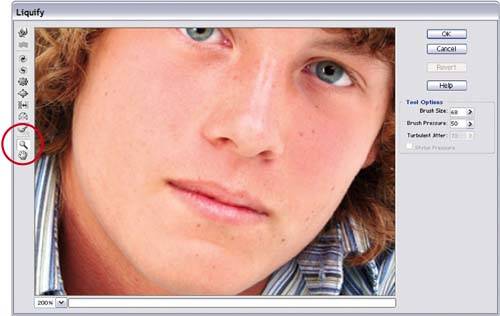 Go under the Filter menu, under Distort, and choose Liquify. When the Liquify dialog appears, choose the Zoom tool (it looks like a magnifying glass) from the Liquify Toolbox (found along the left edge of the dialog). Click it once or twice within the preview window to zoom in closer on your subject's face. Then, choose the Warp tool (it's the top tool in the Liquify Toolbox). Step Three In the Tool Options on the right side of the dialog, choose a brush size that's roughly the size of the person's cheek. Place the brush at the base of a cheek and click-and-"tug" slightly up. This tugging of the cheek makes the corner of the mouth turn up, creating a smile. Step Four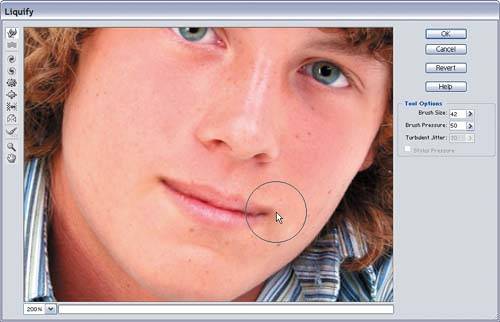 Repeat the "tug" on the opposite side of the mouth, using the already tugged side as a visual guide as to how far to tug. Be careful not to tug too far, or you'll turn your subject into the Joker from Batman Returns. Click OK in Liquify to apply the change, and the retouch is applied to your photo. Before
After
|


EAN: 2147483647
Pages: 201